Buckling your toddler into a car seat can feel overwhelming, especially on busy mornings when you’re rushing out the door and your little one is squirming or protesting. If you’ve ever second-guessed the straps or worried about whether it’s secure enough, you’re not alone—many parents struggle with this to ensure their child’s safety on the road. The good news is that following a simple, proper technique for how to buckle toddler in car seat can make it quick and foolproof, reducing the risk of injury in an accident by up to 71% according to the National Highway Traffic Safety Administration (NHTSA).
In this comprehensive guide, we’ll go beyond the basics to cover everything you need to know, from selecting the right car seat for your toddler’s age and size to step-by-step buckling instructions tailored for forward- and rear-facing seats. You’ll also find troubleshooting tips for common issues like loose straps or fussy kids, plus pro advice to make the process smoother. By the end, you’ll feel confident securing your toddler every time, keeping rides safe and stress-free.
Understanding Toddler Car Seat Basics
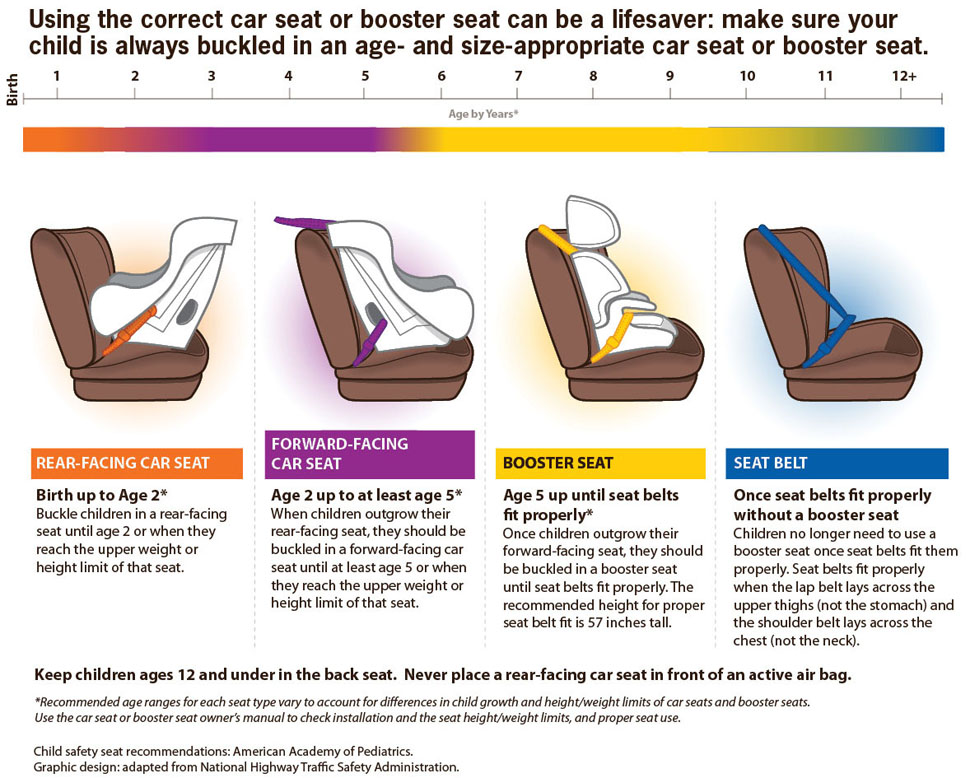
Before diving into the buckling process, it’s essential to ensure you’re using the correct car seat type for your toddler’s age, weight, and height. Toddlers (typically 1-3 years old) should remain rear-facing as long as possible—ideally until they reach the seat’s maximum rear-facing weight or height limit—for optimal protection of their head, neck, and spine. Once they outgrow that, switch to forward-facing with a harness.
Key Guidelines from the American Academy of Pediatrics (AAP):
– Rear-facing: Until at least age 2, or the seat’s limits (often 30-50 pounds).
– Forward-facing: Until the child reaches 40-65 pounds or 49 inches tall.
– Always check your specific car seat manual, as models vary (e.g., Graco, Britax, or Chicco brands).
If your car seat is damaged, expired (most last 6-10 years), or improperly installed, it won’t protect effectively. The NHTSA estimates that 46% of car seats are used incorrectly, so start by verifying installation using the LATCH system or seat belt—consider a free inspection at a local fire station or certified technician.
What You’ll Need to Buckle Your Toddler Safely

Buckling a toddler doesn’t require fancy tools, but having the right setup ensures efficiency and safety. Focus on the car seat itself and a few essentials to keep things organized.
| Item | Quantity | Specifications |
|---|---|---|
| Approved Car Seat | 1 | Rear- or forward-facing convertible seat rated for toddlers (e.g., Graco Extend2Fit for rear-facing up to 50 lbs); check for NHTSA certification label. |
| Vehicle Seat Belt or LATCH Connectors | As needed | Use the car’s lower anchors or seat belt; avoid using both simultaneously. |
| Clean Blanket or Towel | 1 | For leveling the car seat if your vehicle seat is sloped; optional for comfort. |
| Snacks or Toys | 1-2 | Distractions for a cooperative toddler during buckling. |
| Harness Pads or Clips | If included | Manufacturer-provided to prevent pinching; not substitutes for proper fit. |
Pro Tip: Invest in a car seat with easy-adjust harnesses, like the Diono Radian, for quicker buckling. Always register your car seat with the manufacturer for recall alerts.
Preparation and Safety Considerations
Proper preparation turns buckling from a hassle into a routine. Start by parking in a safe, well-lit area—never attempt this while driving or in traffic. Ensure the car is off and the emergency brake is engaged to prevent any movement.
Safety First: Key Precautions
- Check for Recalls: Use the NHTSA’s website (nhtsa.gov/recalls) to search by car seat model before each use.
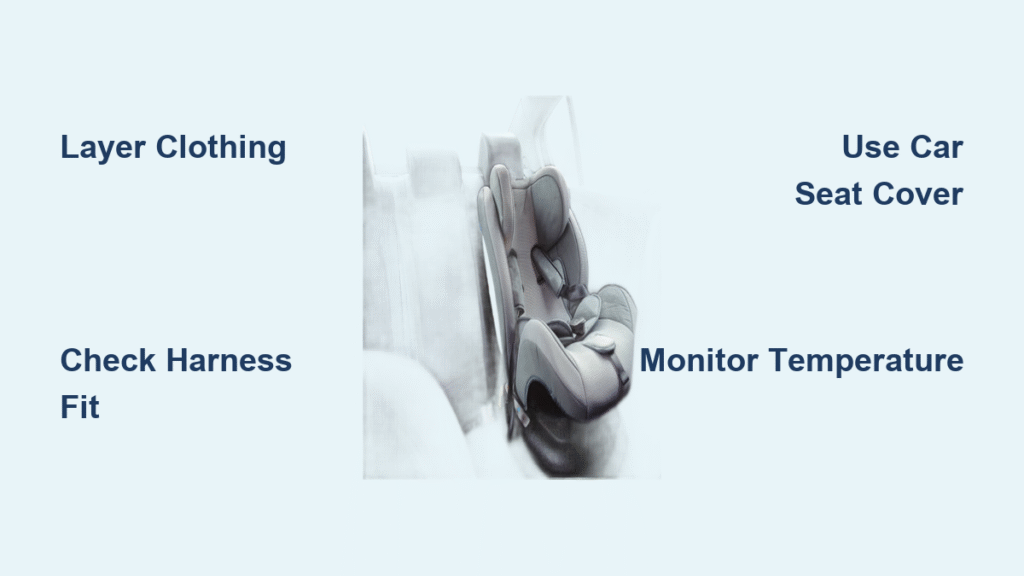
- Temperature Check: Avoid extreme heat or cold; car interiors can reach 140°F in minutes, risking burns or hypothermia. Use sunshades or preheat the car.
- Toddler Readiness: Dress your child in thin layers—no bulky coats or snowsuits, as they can compress the harness and reduce effectiveness. Remove hats or hoods inside the seat.
- Positioning: The car seat should recline at 30-45 degrees rear-facing (use the built-in level indicator). For forward-facing, it should be upright.
Warning: Never place a rear-facing seat in front of an active airbag—it can cause serious injury. All toddlers should ride in the back seat.
If your toddler has special needs (e.g., medical conditions), consult a certified child passenger safety technician (CPST) via safekids.org for customized advice. Preparation takes about 2-3 minutes but prevents errors that could compromise safety.
Step-by-Step Guide to Buckling Your Toddler
Now, let’s get to the core: how to buckle toddler in car seat. This process should take 1-2 minutes once you’re practiced. We’ll break it into phases for rear- and forward-facing seats, as the harness routing differs slightly. Always refer to your car seat’s manual for model-specific details.
Phase 1: Positioning Your Toddler
- Place the car seat securely in the back seat (center position is safest if LATCH-compatible).
- Lift your toddler into the seat feet-first, supporting their head if needed. Have them sit all the way back against the seat’s bottom and shell.
- Adjust the seat’s recline and harness height: For rear-facing, the harness straps should come from slots at or below the child’s shoulders. For forward-facing, straps should be at or above the shoulders.
– Time Estimate: 30 seconds.
– Tip: If your toddler resists, use a favorite toy to encourage sitting still.
Important: Ensure the child’s bottom is flat on the seat—no gaps under their legs, which could indicate improper recline.
Phase 2: Routing and Securing the Harness
- Feed the harness straps through the appropriate slots (check the manual for color-coded guides on many seats like the Evenflo EveryStage).
- Pull the straps flat and smooth—no twists, as they can cause uneven tension.
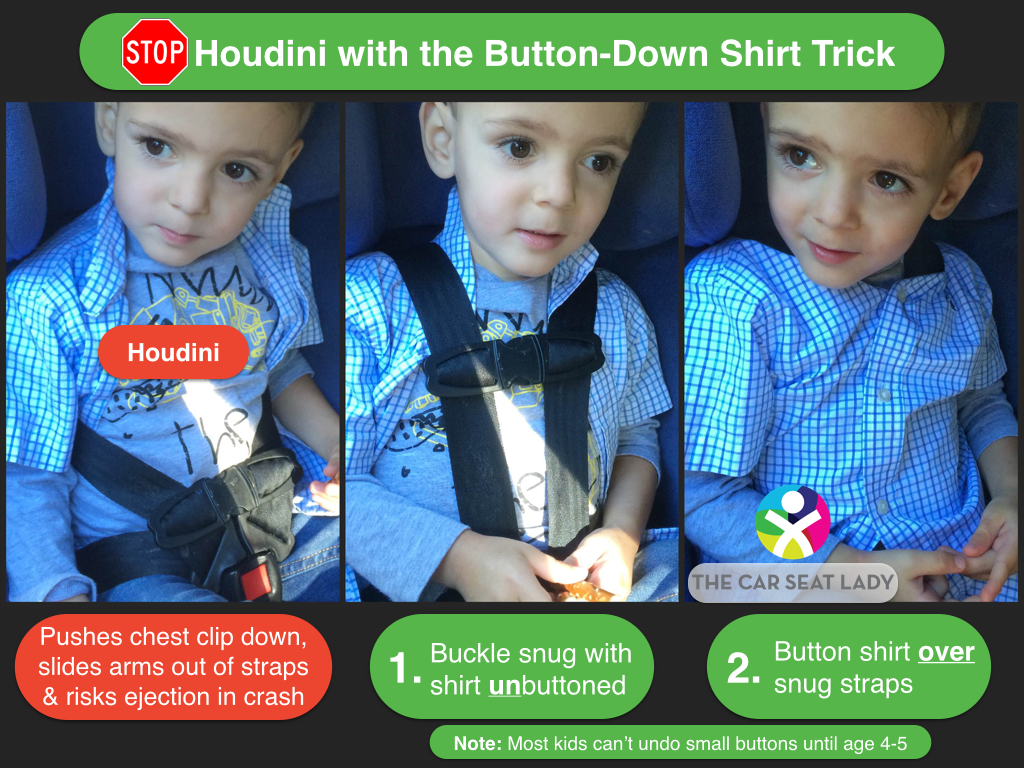
- Place your toddler’s arms through the straps, then buckle the chest clip (the metal or plastic piece at chest level) first—listen for a click.
- Connect the lower buckle tongues into the receptacle between the legs. Again, confirm the click; tug firmly to test.
– For Rear-Facing: Straps should lie flat across the collarbone and thighs, with minimal slack.
– For Forward-Facing: Ensure the top tether (if applicable) is attached to the vehicle’s anchor point behind the seat.
– Time Estimate: 45 seconds.
Warning: If the buckle won’t latch, check for debris or incorrect routing—never force it, as this could fail in a crash.
Phase 3: Tightening and Final Adjustments
- Pull the harness adjustment strap (usually at the front) to tighten. The goal: Snug fit where you can’t pinch fabric at the shoulders (pinch test). The chest clip should be at armpit level.
- For forward-facing seats, tighten the top tether to remove slack—most models have a quick-adjust dial.
- Wiggle your toddler gently to ensure no movement greater than 1 inch side-to-side or front-to-back at the harness.
– Time Estimate: 30 seconds.
– Common Variation: For harnessed boosters (for older toddlers), follow similar steps but ensure the vehicle seat belt crosses the shoulder and lap properly.
Once buckled, praise your toddler to build positive associations—turn it into a game with songs like “Buckle Up, Little One!”
Post-Completion Testing and Troubleshooting
After buckling, test the setup to confirm security. Shake the car seat base side-to-side and front-to-back; it shouldn’t move more than 1 inch at the belt path. Drive a short distance and recheck for looseness caused by bumps.
Common Issues and Quick Fixes
- Straps Too Loose: Re-thread and pull harder on the adjustment strap. If persistent, the seat may need re-installation—use the “push down and wiggle” method for LATCH.
- Fussy Toddler: Practice buckling at home or in a parked car with rewards. For extreme resistance, consult pediatric advice on car seat aversion.
- Uneven Harness: Double-check for twists; adjust the height selector if shoulders aren’t aligned.
- Buckle Stuck: Clean with mild soap and water (unbuckled); avoid oils that attract dirt.
If tests fail, stop driving and reinstall. For ongoing problems, visit a CPST—many offer virtual consultations now.
Pro Tips for Effortless Buckling
Mastering how to buckle toddler in car seat gets easier with these expert strategies:
– Pre-Adjust Everything: Set harness height and recline before placing your child in; saves time during meltdowns.
– Use Harness Extenders Sparingly: Only if the child is at the edge of fit limits—better to upgrade seats than risk improper use.
– Winter Buckling Hack: Layer clothes after buckling, or use approved car seat coats with thin insulation to maintain snugness.
– Avoid Common Mistakes: Don’t forget the chest clip (it keeps straps positioned) or top tether (reduces forward movement by 40%, per NHTSA).
– Optimize for Long Trips: Install a mirror for rear-facing visibility and pack anti-nausea aids if your toddler gets carsick.
– Routine Maintenance: Inspect straps monthly for frays; clean the seat cover per manufacturer guidelines (spot-clean, air-dry) to prevent harness slippage.
– Tech Aids: Apps like “Car Seat Check” from the AAP provide reminders and fit quizzes.
These tips can cut buckling time in half and boost your confidence on every outing.
When to Seek Professional Help
While most parents can handle buckling with practice, some situations call for experts:
– Signs You Need Help: Repeated failed pinch tests, installation wobbles >1 inch, or if your vehicle has unique features (e.g., captain’s chairs).
– Finding a Provider: Look for certified CPSTs via safekids.org or nhtsa.gov—insist on NHTSA-approved technicians. Local hospitals or auto shops often host free clinics.
– Costs: Inspections are usually free; professional installation might run $20-50. New car seats average $150-300.
– Warranty Notes: Proper use preserves warranties; document buckling routines if claiming defects.
Don’t hesitate—professional input ensures compliance with laws in all 50 states requiring child safety seats.
FAQ
Q: At what age can I switch my toddler from rear-facing to forward-facing?
A: The AAP recommends keeping toddlers rear-facing until they max out the seat’s weight or height limits, often around 2-4 years. This provides better crash protection for the head and neck. For example, seats like the Britax Boulevard allow rear-facing up to 50 pounds, so check your model’s specs and transition only when necessary.
Q: How tight should the car seat harness be for a toddler?
A: Tight enough that the straps don’t loosen when you pinch the fabric at the shoulder—aim for flat against the body with no more than 1 inch of slack. It should feel snug but not uncomfortable; your toddler shouldn’t be able to lean forward much.
Q: What if my toddler’s legs are too long for rear-facing?
A: Their knees can bend naturally; legs dangling over the edge is fine as long as the head is at least 1 inch below the top of the seat shell. If they’ve outgrown the limits, upgrade to a forward-facing seat with higher capacities, like the Graco 4Ever, which lasts up to 120 pounds.
Q: Can I use aftermarket accessories like harness pads?
A: Only if provided by the manufacturer—adding unapproved items can interfere with the harness. Stick to official pads for comfort without compromising safety.
Q: How often should I replace my toddler’s car seat?
A: Every 6-10 years from the manufacture date (stamped on the seat), or immediately if it’s in a moderate crash. Side-impact crashes may not require replacement if no visible damage, but consult the manual.
Q: Is it legal to buckle a toddler without the chest clip?
A: No—federal standards require the five-point harness, including the chest clip, to position straps correctly during a crash. Omitting it increases injury risk.
Q: What do I do if the car seat doesn’t fit my vehicle well?
A: Test compatibility before buying; some sedans need narrow seats like the Clek Fllo. If it doesn’t fit, try different anchor points or consult a technician for belt routing adjustments.
Conclusion: Secure Your Toddler Safely on Every Ride
With this guide, you’ve got a complete roadmap for how to buckle toddler in car seat—from preparation and step-by-step securing to testing and pro tweaks. Key takeaways include using the right seat type, ensuring a snug five-point harness, and addressing issues promptly to maintain top safety standards.
Following these steps not only complies with safety laws but gives you peace of mind knowing your toddler is protected. Start practicing today, and soon it’ll be second nature. You’re taking a vital step in keeping your family safe—great job!
Have you mastered buckling your toddler yet? Share your tips or challenges in the comments below to support other parents! If you’re still unsure, schedule a free car seat check today.