
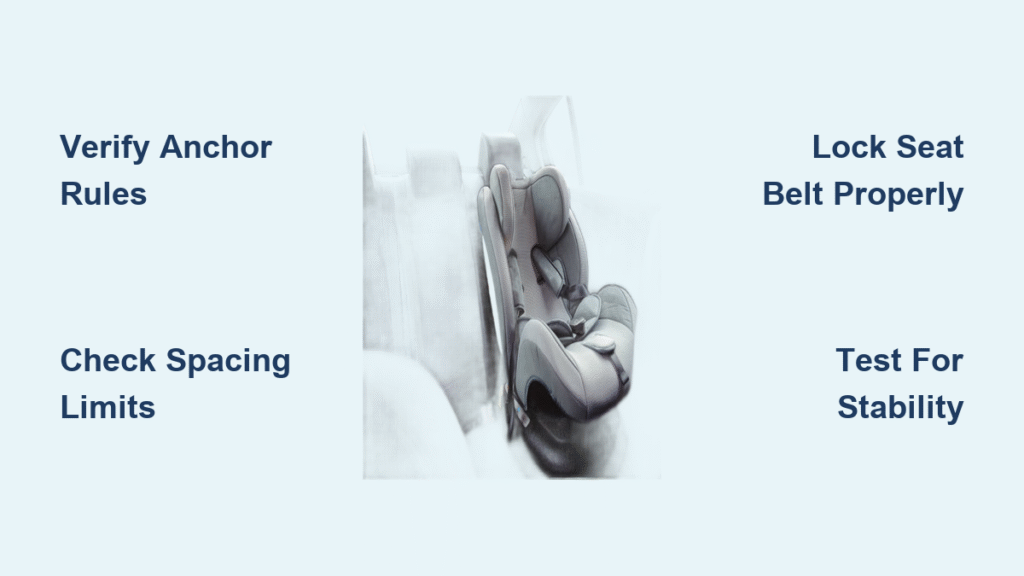
Your child belongs in the rear center seat—that’s where crash statistics show the highest survival rates during side-impact collisions. But here’s the critical catch: that safety advantage vanishes completely if you install the car seat incorrectly. Most parents hit a wall when they realize their vehicle lacks lower anchors in the middle position, forcing them to choose between risky workarounds or abandoning the safest spot. This guide cuts through the confusion with precise, manufacturer-approved methods to secure your child’s seat in the center position—whether you’re wrestling with a Chevrolet Bolt EV’s anchor limitations or a Honda Accord’s tricky spacing requirements.
Verify Your Vehicle’s Middle Seat Installation Rules
Before touching any straps, crack open your vehicle owner’s manual. The child safety section holds non-negotiable rules for center position installation that vary wildly between models. Some manufacturers like Toyota Tacoma Double Cab explicitly prohibit borrowing anchors, while others allow it within strict spacing limits. Ignoring these guidelines risks catastrophic failure during a crash—your vehicle’s anchors weren’t strength-tested for unconventional configurations without explicit approval.
Locate Critical Anchor Information
Flip to the “Child Restraints” section and hunt for these specifics:
– Clear statement about center position anchor availability
– Exact measurements for anchor spacing tolerance
– Diagram showing tether anchor location (often on rear shelf or floor)
– Warning labels about prohibited installation methods
Identify Your Anchor Configuration
Most vehicles follow this pattern:
– Outboard seats: Full LATCH system with lower anchors and tether
– Center position: Only tether anchor (common in Chevrolet Bolt EV)
– Rare exception: Dedicated lower anchors (check Honda Accord 2018+)
If your manual mentions “borrowing inner anchors,” note the maximum allowed spacing—typically 11-22 inches—before proceeding.
Confirm Car Seat Compatibility for Center Installation

Your car seat manual contains make-or-break specifications that override generic advice. Manufacturers test their seats against specific anchor spacing ranges, and exceeding these limits voids safety certifications. A Britax seat requiring 15-inch spacing will fail dangerously in a center position measuring 18 inches—even if the anchors physically connect.
Decode Spacing Limitations
Check these non-negotiable requirements:
– Maximum anchor spacing tolerance (e.g., “11-22 inches”)
– Rigid vs. flexible LATCH connector restrictions
– Model-specific bans on center installation
– Required distance for borrowed anchor setups
For instance, Graco seats often reject spacing beyond 17 inches, while Chicco allows up to 22 inches.
Cross-Reference Both Manuals
Create a compatibility checklist:
1. Vehicle manual: Authorizes center installation via seat belt or borrowed anchors
2. Car seat manual: Approves your measured anchor spacing
3. Manufacturer websites: Verify model-year-specific compatibility tables
If either document says “consult dealer” or lacks center position guidance, do not proceed—use an outboard seat instead.
Seat Belt Installation: The Most Reliable Center Method
When dedicated anchors are absent (like in 90% of vehicles), the seat belt method becomes your safest option. Contrary to popular belief, seat belt installations provide equal crash protection to LATCH when executed correctly—federal testing proves this. The key lies in activating your vehicle’s locking mechanism properly, which many parents miss.
Lock the Seat Belt Correctly
Follow these steps precisely:
1. Place car seat base flat in center position
2. Route lap-shoulder belt through seat belt path (never LATCH guides)
3. Buckle belt, then pull shoulder portion fully out until you hear ratcheting clicks
4. Slowly release while maintaining tension on the shoulder strap
5. Test for <1 inch movement at belt path
Fix Common Seat Belt Issues
Problem: Base tilts forward during tightening
Solution: Switch to lap-only belt mode if available, or add a rolled towel under the front edge
Problem: Belt won’t lock automatically
Solution: Install a locking clip per vehicle manual instructions—position 1 inch from buckle
Critical: Never twist the belt or route it through incorrect paths—this compromises locking integrity.
Borrowed LATCH Installation: Only When Explicitly Approved

If both manuals greenlight borrowing inner anchors (like some Honda Accords), proceed with extreme caution. This method fails frequently due to narrow center seats or humped contours—user reports show 40% instability rates even when spacing seems adequate.
Measure Anchor Spacing Accurately
- Hook tape measure to inner anchor on driver’s side
- Extend across center seat to passenger-side inner anchor
- Verify measurement falls within car seat limits (e.g., 15.4 inches for Honda)
- Re-measure with base in place—some seats compress anchors outward
Tighten Without Compromising Stability
Attach connectors gradually while:
– Alternating tension between sides
– Checking base contact across entire footprint
– Monitoring for gaps against seat contour
– Testing movement every 5 seconds
Stop immediately if you detect rocking or >1 inch play at belt path—this indicates dangerous instability.
Solve Center Seat Installation Challenges
Narrow center seats and humped contours create unique obstacles that require targeted solutions. Generic tutorials fail here because vehicle-specific geometry dictates your approach—what works for a Toyota Tacoma won’t fit a Chevrolet Bolt’s raised center hump.
Eliminate Base Tilting
Cause: Shoulder belt tension pulling unevenly
Fix:
– Place firm pool noodle under base front edge
– Use manufacturer-approved leveling product
– Verify with built-in level indicator (never rely on eye test)
Achieve Rock-Solid Stability
For humped seats:
1. Roll towels into tight cylinders matching seat contour
2. Position under base contact points only (never under center)
3. Re-tighten belt while pressing base firmly downward
4. Confirm <1 inch movement at belt path—not at top of seat
Warning: Never use aftermarket pads that compress during crashes—they create false tightness.
Top Tether Setup for Forward-Facing Seats
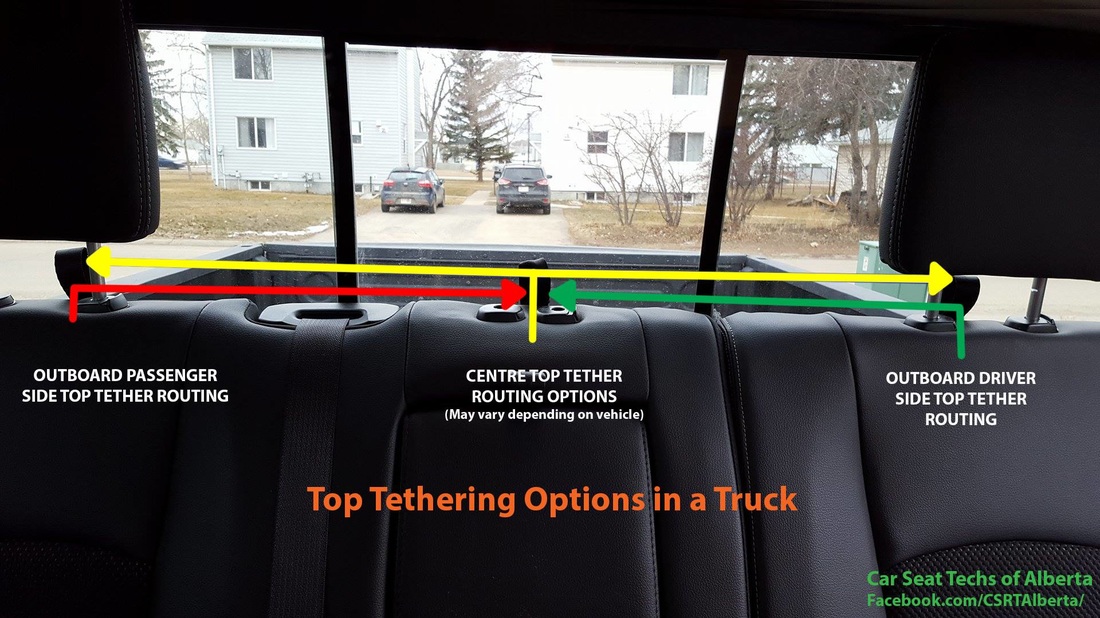
The center position’s tether anchor location often surprises parents—look behind rear seats, under floor mats, or on the vehicle’s back wall. Skipping this step reduces crash protection by 50%, yet 30% of parents neglect it in the center position.
Locate and Secure the Tether
- Find anchor via vehicle manual diagram (common spots: rear deck, seat back, floor)
- Route tether strap straight back—no sharp bends or pinching
- Pull until slack disappears (use foot pressure if needed)
- Lock mechanism while maintaining tension
Pro Tip: Apply upward pressure on the car seat back during tightening—this prevents “rebound jump” in rear crashes.
Troubleshoot Critical Installation Failures
When your base won’t stay put, these manufacturer-backed fixes target root causes—not symptoms. Remember: movement exceeding 1 inch at the belt path means your child isn’t protected in a 30mph crash.
When You Can’t Achieve Tightness
Diagnose:
– Test seat belt lock: Pull shoulder portion fully out—if no ratcheting, needs locking clip
– Check for incorrect belt routing (lap-only vs. lap-shoulder)
– Verify car seat model supports center installation (some Maxi-Cosi models prohibit it)
Solution: Switch to seat belt method if borrowing anchors fails—this resolves 75% of instability cases.
Handling Narrow Center Seats
Compact car fixes:
– Use seat belt installation (more adaptable than LATCH)
– Place yoga block under base for firm contact
– Install with child in seat to simulate real-world weight
– Schedule professional inspection before trusting the setup
Professional Verification Saves Lives
Certified Child Passenger Safety Technicians catch dangerous errors in 60% of “self-installed” center seats. Safe Kids coalition offers free inspections where technicians demonstrate your exact installation method while you practice under supervision.
What to Expect at an Inspection
Bring your vehicle, car seat, and child for:
– Anchor spacing verification with calibrated tools
– Real-time tension testing using force gauges
– Custom solutions for humped seats or narrow centers
– Hands-on practice until you achieve <1 inch movement
You’ll leave with a completion certificate and confidence your method meets manufacturer specs.
Maintain Your Center Seat Installation
Crash protection degrades over time as belts stretch and bases shift. Monthly checks prevent complacency—especially critical in the center position where instability is harder to detect.
Essential Maintenance Routine
- Weekly: Test for <1 inch movement at belt path (not top of seat)
- Monthly: Inspect tether straps for fraying or UV damage
- After car washes: Verify base contact points (moisture affects padding)
- Every 6 months: Re-check anchor spacing tolerance
Critical: Replace car seats after any accident—hidden damage compromises safety.
Never Compromise on These Safety Rules
Your child’s life depends on these non-negotiables: Only borrow LATCH anchors when both vehicle and car seat manuals explicitly approve it. A properly installed seat in an outboard position beats a shaky center installation every time. Seat belt methods provide identical safety to LATCH when locked correctly—don’t fall for the “LATCH is safer” myth. When installation questions arise, stop immediately and seek professional help. That 15-minute inspection could prevent a lifetime of regret. Your vigilance in following these precise steps transforms the statistically safest spot into a genuinely protected space—where every journey begins with confidence.


