
That first drive home with your newborn should be filled with joy, not panic. Yet nearly half of all car seats are installed incorrectly, putting children at unnecessary risk. The truth is simple: a properly installed car seat reduces fatal injury risk by 71% for infants and 54% for toddlers. Whether you’re wrestling with LATCH anchors or deciphering seat belt routing, this guide cuts through the confusion with actionable steps tailored to your specific seat and vehicle. You’ll learn exactly where to position the seat, how to achieve rock-solid security, and critical verification tests most parents miss.
Skip the guesswork with these vehicle-tested techniques. By the end, you’ll confidently install any rear-facing infant seat or forward-facing convertible seat – because your child’s safety depends on getting how to install a car seat right the first time.
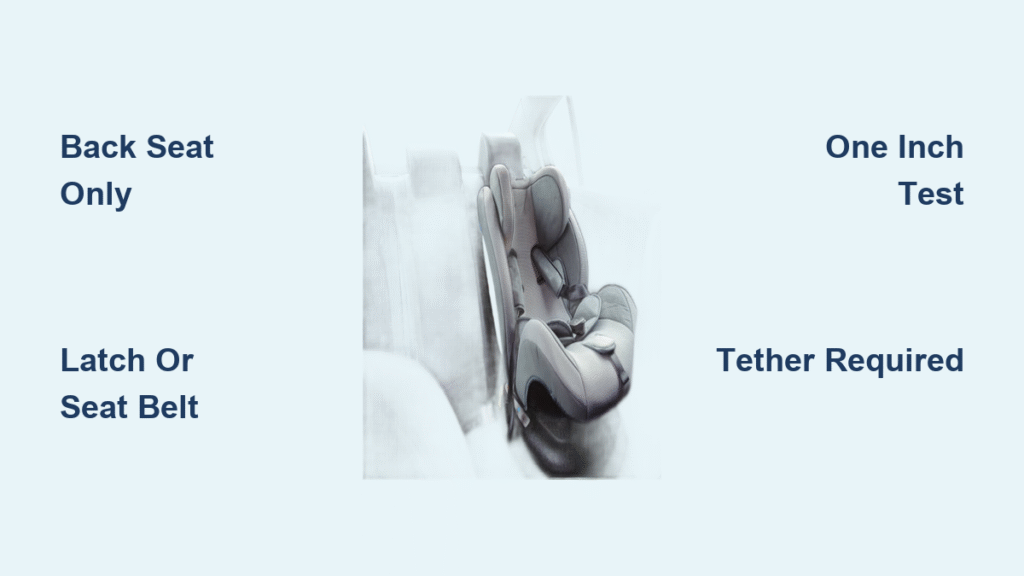
Never Install in Front Seat: Back Seat Positioning Rules
Front passenger airbags deploy with enough force to fatally injure a child in a car seat. Always install rear-facing seats in the back seat, with the center position offering maximum protection from side-impact collisions. This location provides 43% more survival space than outboard positions during T-bone crashes. If your vehicle lacks a center lower anchor or the seat won’t recline properly there, choose either outboard position – both remain dramatically safer than the front seat.
Age determines critical orientation: Keep infants rear-facing until at least age 2, or until they exceed the seat’s height/weight limits. This position distributes crash forces across the entire shell, protecting delicate spines. Convertible seats often accommodate rear-facing up to 50 pounds – check your model’s maximum limits before switching orientations. Never force a child forward-facing based on age alone; their physical development dictates the transition.
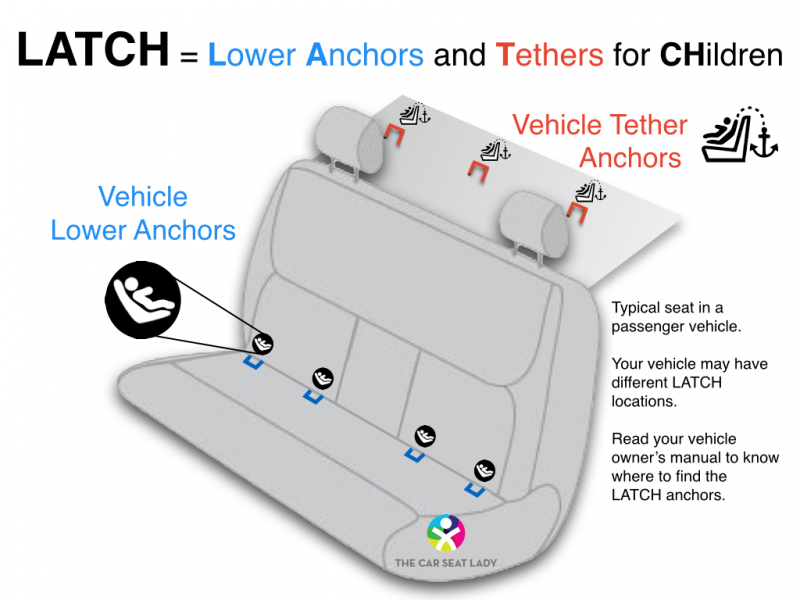
LATCH vs. Seat Belt: Choosing Your Installation Method
Two equally safe installation systems exist, but never combine LATCH and seat belt simultaneously unless your car seat manual explicitly permits it. This critical error compromises stability during crashes. Choose one method based on your vehicle and child’s weight:
LATCH System (Lower Anchors and Tethers for Children) uses dedicated metal anchors between seat cushions. These anchors have strict weight limits – typically 65 pounds combined (child + seat). Once your child approaches this limit, switch to seat belt installation. Locate anchors via horizontal bars or fabric tags in your seat crease; they’re standard in vehicles manufactured after 2002.
Seat Belt Method works universally in all vehicles made after 1996. Older models may require a locking clip (included with most seats) to maintain tension. This method has no weight restrictions, making it essential for larger toddlers. Always follow your vehicle’s manual for locking the seat belt – usually achieved by pulling the belt fully out then allowing retraction while applying downward pressure.
Install Rear-Facing Car Seat with Base: No-Error Method
Prepare Vehicle and Seat for Perfect Fit
Start by reading both your vehicle owner’s manual and car seat manual – critical details like anchor locations and belt paths vary by model. Remove seat covers, cushions, or aftermarket accessories that could create instability. Clean the vehicle seat thoroughly to eliminate slippery residues, and ensure it’s flat without deep contours that prevent solid contact.
Check your car seat’s expiration date stamped on the base – expired seats (typically 6-10 years) lose structural integrity. Verify all components are present: base, carrier, LATCH strap, and tether. For newborns, confirm the recline indicator shows 30-45 degrees; improper angles can cause breathing difficulties.
LATCH Installation Steps That Guarantee Security
Locate lower anchors in your vehicle seat crease – marked by small bars or tags. Attach each base connector until you hear a distinct “click”. Now tighten correctly: compress the base downward into the seat cushion while pulling the LATCH strap adjustment tail. This technique removes hidden slack most parents miss.
Check the built-in level indicator – many bases have bubble levels or angle lines. Adjust the recline foot or use manufacturer-approved pool noodles under the base to achieve proper newborn recline. Never use rolled towels unless specified in your manual; they can compress during crashes.
Critical Security Test: Beyond the Inch Rule
Perform the Inch Test correctly: Grasp the base at the belt path (where the seat belt/LATCH strap routes through) and shake front-to-back and side-to-side. Movement must not exceed one inch in any direction. If loose, re-tighten by stepping on the base while pulling the strap – don’t just yank the adjustment tail.
Add the Wiggle Test: Lift the front of the base slightly. If it lifts more than 1 inch without the rear lifting, the recline angle is too steep. Adjust until the entire base moves as one unit. This prevents “submarining” during frontal impacts where the baby could slide under the harness.
Install Without Base: Baseless Rear-Facing Technique
Position and Route Belt for Maximum Stability
Place the carrier in the back seat center when possible, ensuring the infant’s feet point toward the seat back. Route the lap belt through the carrier’s belt path – look for molded arrows or “R” labels indicating rear-facing routing. Incorrect routing through forward-facing slots creates dangerous instability.
Critical detail: Buckle the seat belt before routing. This prevents accidental unbuckling during tightening. Position the carrier so its base sits flat against the vehicle seat – no gaps at the front or rear. If your vehicle seat has a pronounced curve, use a tightly rolled towel under the carrier’s front only (never under the entire base).
Lock and Tighten Seat Belt Like a Pro
Fully extend the seat belt, then allow it to retract while applying downward pressure on the carrier. This engages automatic locking mode in most vehicles. For older cars without auto-locking, slide the locking clip onto both webbing layers per your seat’s diagram.
Tighten until the carrier moves less than one inch at the belt path. Use the Knee Test: Kneel on the carrier while pulling the shoulder belt tight – your body weight compresses the vehicle seat cushion for optimal tension. Re-check recline angle with the carrier’s bubble level after tightening.
Forward-Facing Installation: Tether Is Non-Negotiable
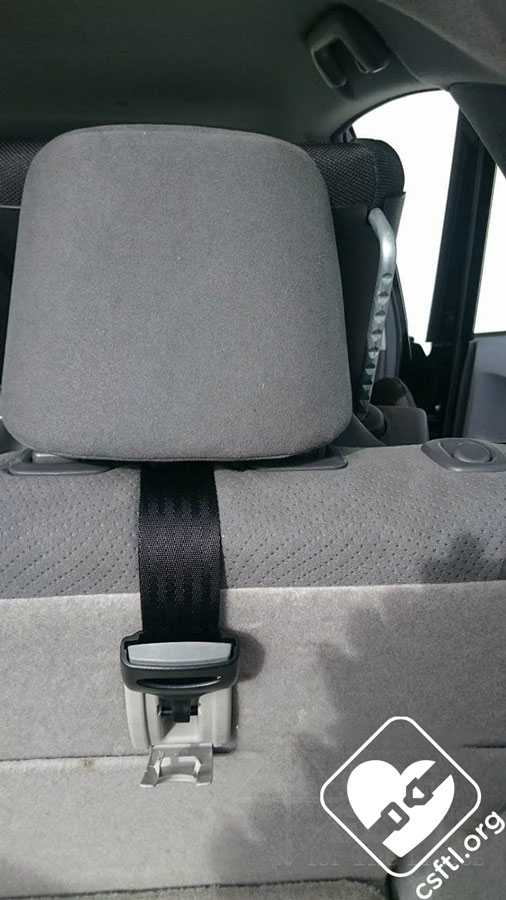
Essential Tether Connection That Saves Lives
Always connect the top tether – this reduces head movement by 6-8 inches during crashes, preventing brain injuries. Locate the tether anchor behind your vehicle seat (check owner’s manual); it’s often in the trunk, seatback, or ceiling. Route the tether over the vehicle seatback, not through headrest slots, to maintain strength.
Clip securely and remove all slack by pulling the tether strap taut. Many parents skip this step, but tethered seats reduce injury risk by 50% compared to untethered. If your vehicle lacks anchors, contact the manufacturer – most provide retrofit kits.
Installation Sequence for Heavy Toddlers
Use the forward-facing belt path – typically higher slots labeled “F”. Follow LATCH or seat belt tightening as before, but maintain an upright angle (check level lines). Remember: Once your child reaches LATCH weight limits (usually 40-65 lbs combined), switch to seat belt installation immediately.
For extra security, use the Shoulder Belt Lock: After buckling, pull the shoulder belt tight while pushing the seat forward. This engages the vehicle’s locking mechanism more effectively than lap-belt-only methods.
Verify Every Installation: Three Life-Saving Tests
The Inch Test Done Right
Grasp the seat at the belt path only – not the top handle or carrier. Shake firmly front-to-back and side-to-side. Less than one inch of movement is mandatory. If loose, re-tighten by compressing the seat while pulling the strap – most failures stem from inadequate downward pressure during installation.
The Pinch Test for Proper Harness Tightness
After buckling your child, attempt to pinch the harness strap at their collarbone. If you can pinch excess webbing, the harness is dangerously loose. Tighten until the strap lies flat against the body. This prevents ejection during rollovers.
Chest Clip Positioning Mistakes to Avoid
Position the chest clip at armpit level – never on the abdomen (causes abdominal injuries) or neck (choking hazard). Verify it lies flat against the harness; tilted clips can break during impacts. Adjust after every ride as straps loosen with movement.
Troubleshoot Common Installation Issues
Fix Over- or Under-Recline Immediately
Too upright: Causes head slump that obstructs breathing. Add a tightly rolled towel or manufacturer-approved pool noodle beneath the seat base. Too reclined: Creates excessive head movement in crashes. Adjust built-in recline feet or choose a more upright vehicle seating position.
Three-Across Configurations That Actually Fit
Install the center seat first, then overlap belt paths carefully. Measure vehicle width against car seat dimensions – narrow-profile seats under 17″ wide are essential. Choose seats with flexible bases that allow slight angle adjustments to prevent belt path interference.
Airplane Installation Without FAA Approval Risks
Use only FAA-approved seats (clearly labeled on shell). Install using the aircraft seat belt only – LATCH anchors don’t exist on planes. Position in a window seat to avoid blocking egress. Never install rear-facing on aircraft; all approved seats require forward-facing.
Maintain and Replace: Critical Long-Term Safety
Regular Inspection Schedule That Saves Lives
- Every ride: Check harness tightness and chest clip position
- Weekly: Confirm installation tightness after cleaning
- Monthly: Inspect straps for fraying – replace if damaged
- After any crash: Replace immediately, even without visible damage
Cleaning Guidelines That Preserve Integrity
Remove covers per manual instructions – hand-wash only unless specified. Never use bleach on straps; spot-clean with mild soap. Air-dry completely before reassembly. Cleaning with harsh chemicals degrades webbing strength by up to 40%.
Expiration and Replacement Non-Negotiables
Car seats expire 6–10 years from manufacture date (stamped on shell). Register your seat with the manufacturer and check NHTSA’s website monthly for recalls. Replace immediately after moderate-to-severe crashes – internal cracks compromise safety even if invisible.
Get Professional Help: Free Safety Net
Locate Certified Child Passenger Safety Technicians for free inspections at fire stations, hospitals, and community events. Find local technicians through NHTSA’s inspection locator. These experts catch subtle errors like incorrect belt path routing or hidden slack that most parents miss.
Keep your manufacturer’s customer service number (in manual) for model-specific questions. When you search how to install a car seat online, verify advice against your manual – generic tutorials often contradict specific seat requirements.
Mastering how to install a car seat transforms anxiety into confidence. Take 15 minutes for professional verification – it’s the ultimate safety insurance. Remember: No installation is “good enough” if movement exceeds one inch at the belt path. Your child’s safety depends on perfect execution every single time. Register your seat, track expiration dates, and never skip the inch test. When you buckle that harness knowing it’s installed flawlessly, you’ve given your child the most important gift: a safe journey home.


