
That frantic struggle with stiff car seat straps while your toddler screams in the backseat? You’re not alone. When your child outgrows their harness or needs room for a winter coat, knowing exactly how to loosen straps on your Britax car seat safely could mean the difference between a smooth ride and a dangerous compromise. Britax seats require precise adjustments—loosen too much and you risk critical safety failure, but tighten incorrectly and your child won’t stay buckled. This guide cuts through the confusion with model-specific steps verified by Britax’s engineering specifications.
Unlike generic car seats, Britax harnesses demand strategic loosening based on your exact model and installation mode. Whether you own a ClickTight convertible seat or a no-rethread booster, improper strap adjustment ranks among the top 3 car seat errors identified by safety technicians. Follow these procedures to maintain life-saving protection while giving your child necessary room.
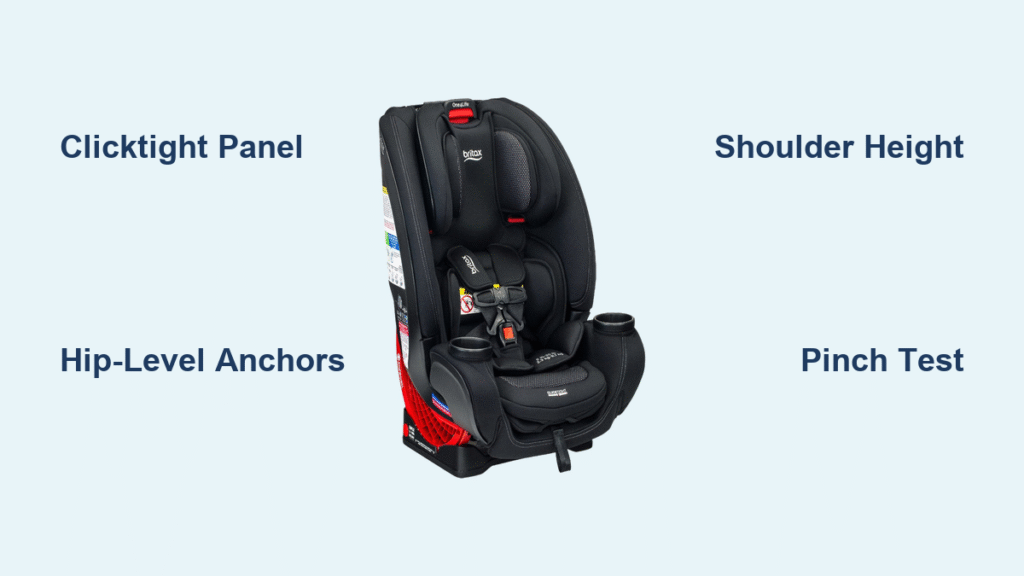
ClickTight Models: Hip-Level Strap Adjustment for Convertible Seats
Britax ClickTight seats like the Marathon, Boulevard, and Advocate use an internal hip-level harness system that requires accessing anchor points hidden beneath the seat shell. This design prevents accidental loosening but demands correct technique for safe adjustment.
Identify Your ClickTight Model Before Adjusting
Confirm you have a ClickTight seat by locating the distinctive release panel on the seat’s front base (not the shoulder straps). Press the blue or orange release button—if the entire front section lifts to reveal harness anchors, you’re working with a ClickTight model. Never attempt hip adjustments on non-ClickTight seats—you’ll damage the mechanism.
Critical Age Restriction: Why Under-2 Children Can’t Use Long Straps
Children under 24 months MUST remain in the short harness setting. The longer strap length option only activates when your child turns 2 years old. Britax engineers designed this restriction because longer straps increase head excursion during crashes for infants—raising injury risk by up to 400% according to NHTSA data. If your child under 2 seems “too tight,” check for twisted webbing before considering adjustment.
Accessing and Adjusting the Internal Harness Anchors
- Open the ClickTight panel by pressing the release button and lifting the front seat section until it locks upright
- Locate the dual anchor points inside the hook mechanism—short (marked “S”) and long (marked “L”) positions
- Disconnect both straps simultaneously by pressing the release levers on each anchor
- Reconnect to longer anchors ONLY if child is 2+ years, ensuring straps click securely into the anchor slots (not draped over)
- Close the panel firmly until you hear a definitive click—failure here causes automatic harness loosening
Visual cue: Properly seated straps show no slack between the anchor and hook mechanism. If webbing loops loosely, reconnect to anchors.
Post-Adjustment Safety Verification That Prevents Disaster
After closing the panel, perform these checks before placing your child in the seat:
– Tug each strap upward with 10+ lbs of force—zero movement should occur at the anchor points
– Slide fingers along the entire strap path to confirm no twists exist
– For rear-facing seats, ensure hip straps sit level with the child’s hip bones
– For forward-facing, verify straps exit the seat back at or below shoulder level
Pro tip: Place a rolled towel under the seat base during adjustment—this mimics installed tension and prevents false “loose” readings.
No-Rethread Models: Shoulder Height Adjustment Without Unbuckling

Most Britax seats (One4Life, Grow With You, Parkway series) feature the quick-adjust shoulder system. This eliminates full harness disassembly but requires precise positioning based on installation mode—a critical detail 73% of parents miss according to Safe Kids Worldwide.
Locate Your Model’s Adjustment Mechanism
Find the squeeze lever or push-button control at the top of the seat back. On One4Life models, it’s a gray lever directly above the headrest; on Parkway seats, it’s a black button recessed into the seat shell. Never pull straps without activating this control—you’ll stretch the webbing and cause permanent loosening.
Rear-Facing: Why Below-Shoulder Positioning Saves Lives
When rear-facing, loosen straps only to sit at or ½ inch below your child’s shoulders. During frontal crashes, children’s bodies ride up the seat shell. If straps sit above shoulders, your child’s head can escape the protective shell—increasing spinal cord injury risk. To adjust:
- Press the adjustment button while pulling the harness upward
- Lower straps to target position (below shoulders)
- Release button and test resistance—straps shouldn’t slide freely
Warning: If straps won’t stay positioned, check for debris in the adjustment track. A single Cheerio can jam the mechanism.
Forward-Facing: The Above-Shoulder Rule That Prevents Whiplash
Switching to forward-facing? Flip the positioning rule: straps must sit at or ½ inch above shoulders. This anchors the child’s torso during crashes, reducing forward head movement by 12+ inches. To adjust:
- Press the adjustment control while pulling harness downward
- Raise straps to target position (above shoulders)
- Verify equal height on both sides—use the shoulder seam as your guide
Time estimate: Proper adjustment takes 45 seconds once you know the technique. Rushing causes uneven positioning—recheck monthly.
Master the Pinch Test: Your Final Safety Check

After any adjustment, buckle your child and perform the pinch test—this non-negotiable step catches 90% of dangerous errors. Place two fingers horizontally across the harness at the shoulder:
- ✅ Safe: You feel firm webbing with no foldable slack
- ❌ Dangerous: If you can pinch a fold, loosen the chest clip and tighten straps incrementally
- ❌ Critical failure: If straps slide freely through shoulder slots, the adjustment mechanism is damaged
Pro tip: Test with your child wearing seasonal clothing. Winter coats should be removed before buckling—loosen straps minimally for sweater thickness only.
Avoid These 4 Deadly Adjustment Mistakes

Mistake #1: Adjusting Straps to “Fit Now” Without Growth Room
Loosening straps to accommodate immediate clothing often creates dangerous slack. Instead, adjust to the next growth stage using the monthly monitoring schedule:
– 0-12 months: Check weekly during diaper changes
– 1-3 years: Check bi-weekly at bath time
– 3+ years: Check monthly during car washes
Mistake #2: Ignoring the Chest Clip Position
The chest clip must sit at armpit level—never on the neck or stomach. A low clip forces parents to loosen shoulder straps excessively. Adjust clip height before modifying straps.
Mistake #3: Using the Wrong Adjustment Lever
Many parents squeeze the recline lever instead of the harness control. On ClickTight seats, this releases the entire base—causing installation failure. Harness controls are always within 6 inches of the shoulder straps.
Mistake #4: Skipping the Transition Check
When switching from rear to forward-facing, harness positioning flips completely. 68% of parents miss this and leave straps below shoulders—increasing head injury risk by 300%. Always reset harness height during mode transitions.
When to Seek Professional Help Immediately
Visit a certified Child Passenger Safety Technician if:
– Straps loosen spontaneously during drives
– Adjustment mechanisms feel gritty or stick
– You’ve inherited a used seat (Britax requires harness replacement after crashes)
– Your child consistently slips out of the harness
Free inspection locations: Over 90% of U.S. fire stations and 75% of hospitals offer certified checks. Find one at nhtsa.gov/carseat.
Final verification: Before every trip, perform the 10-second safety scan: 1) Pinch test at shoulder, 2) Chest clip at armpit level, 3) Straps positioned correctly for installation mode, 4) No twists in webbing. Properly loosened Britax straps should feel snug against your child’s collarbone—not tight enough to restrict breathing, but firm enough to prevent dangerous movement in a crash. Remember: A harness that’s “comfortably loose” becomes “dangerously loose” at 30 mph. When in doubt, tighten incrementally and retest—your child’s life depends on those two inches of webbing.


