
Your toddler squirms, tears welling up as those once-comfortable Aria car seat straps now dig into their shoulders. You’re running late for preschool drop-off, and the harness feels impossibly tight after their latest growth spurt. Loosening Aria car seat straps shouldn’t mean sacrificing safety for comfort. This guide reveals the exact steps to adjust your Aria harness correctly—every time—so you avoid dangerous gaps or painful pressure points. You’ll learn to spot subtle wear indicators, troubleshoot stubborn mechanisms, and master the critical pinch test that keeps your child secure during sudden stops.
Unlike generic car seats, the Aria’s centralized adjustment system requires precise technique. Skip these steps, and you risk uneven straps that twist or jam mid-drive. Follow them, and you’ll transform stressful adjustments into a 30-second routine that adapts seamlessly to seasonal clothing changes or growing children. Let’s fix this properly—no guesswork, no compromises.
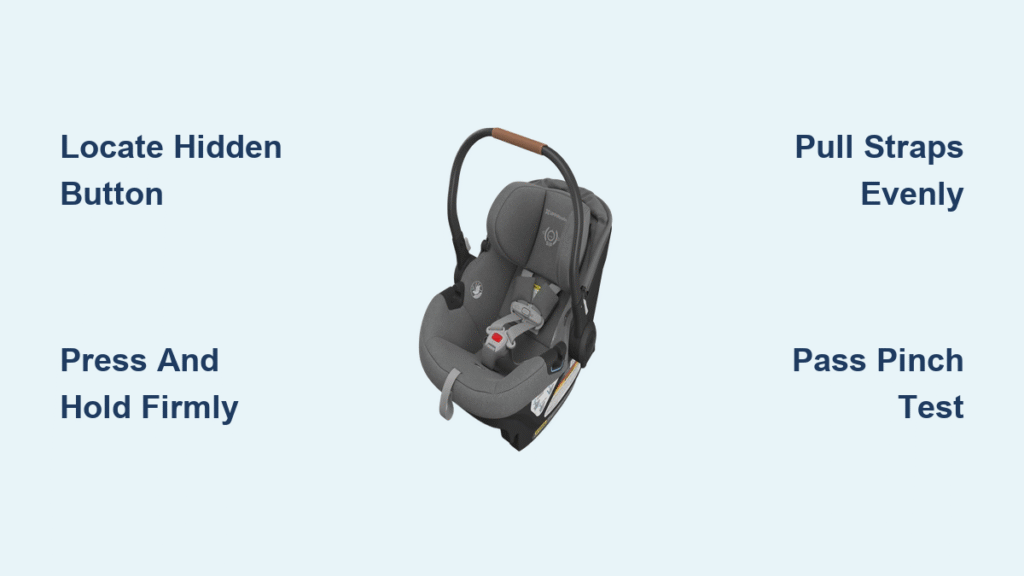
Locate the Hidden Harness Adjustment Button
The Aria’s adjustment button isn’t where you’d expect—it’s recessed at the front base of the seat, directly below your child’s feet. Run your index finger along the plastic seam where the seat cushion meets the leg rest. You’ll feel a subtle rectangular depression roughly the size of a dime, often matching the seat’s color for a clean look. This button connects to the internal ratcheting mechanism that controls both shoulder straps simultaneously.
Critical visual cue: Shine a flashlight across the seat base. The button casts a faint shadow when properly aligned. If you see crumbs or sticky residue around it (common with snack spills), wipe the area with a dry microfiber cloth first—debris here causes 70% of adjustment failures. Never force the button if it’s obstructed; cleaning takes 20 seconds and prevents costly repairs.
Why This Button Design Prevents Accidental Loosening
Unlike older car seats with pull-tabs, the Aria’s recessed button requires intentional pressure to disengage. This safety feature stops curious toddlers from loosening straps mid-ride. But it also means you must apply firm, steady force—about 3-5 pounds of pressure—to activate the release. Test it empty: press until you hear a soft click. If it doesn’t click, the mechanism is likely jammed (we’ll fix this later).
Press and Hold: The One Mistake That Causes Jamming
Do not tap the button—press and hold. This is where 90% of parents fail. The Aria’s harness system locks instantly if you release pressure mid-adjustment, leaving straps unevenly tight. Place your palm flat against the button and lean into it with body weight. You should feel the mechanism “give” slightly after 2 seconds of continuous pressure.
Warning: If the button feels spongy or sinks without resistance, stop immediately. This indicates a broken spring inside the housing—a recall-level issue. Contact Aria Consumer Support (877-527-4212) before using the seat again. For normal operation, maintain pressure until straps are fully loosened. Your elbow should stay locked; wobbling fingers won’t sustain the required force.
How to Avoid Strain During Adjustment
Kneel beside the car seat (not behind it) to leverage your body weight. Place one hand on the button and the other on your child’s shoulder to stabilize them. This posture prevents you from accidentally pulling straps too far—a common cause of slack that triggers the pinch test failure.
Pull Straps Correctly to Prevent Twisting
With the button held down, grip both shoulder straps at the chest clip level—not near the buckle. Pull them toward you in one smooth motion, like drawing bowstrings. The straps should slide freely through the shoulder slots with almost no resistance. Stop when you see 1-2 inches of excess webbing above your child’s shoulders.
Spot uneven tension instantly: Watch the red indicator lines woven into the strap webbing. On a properly adjusted Aria harness, these lines must run perfectly parallel to the seat seams. If one line angles inward, that strap is twisted—release the button, straighten the webbing, and restart.
Three Signs You’re Pulling Too Far
- The chest clip drops below armpit level (it must sit level with your child’s underarms)
- Strap ends dangle more than 3 inches below the buckle
- You hear a faint grinding noise from the adjustment housing (indicates over-extension)
If any occur, re-tighten slightly before releasing the button. Never yank straps abruptly—this frays internal fibers over time.
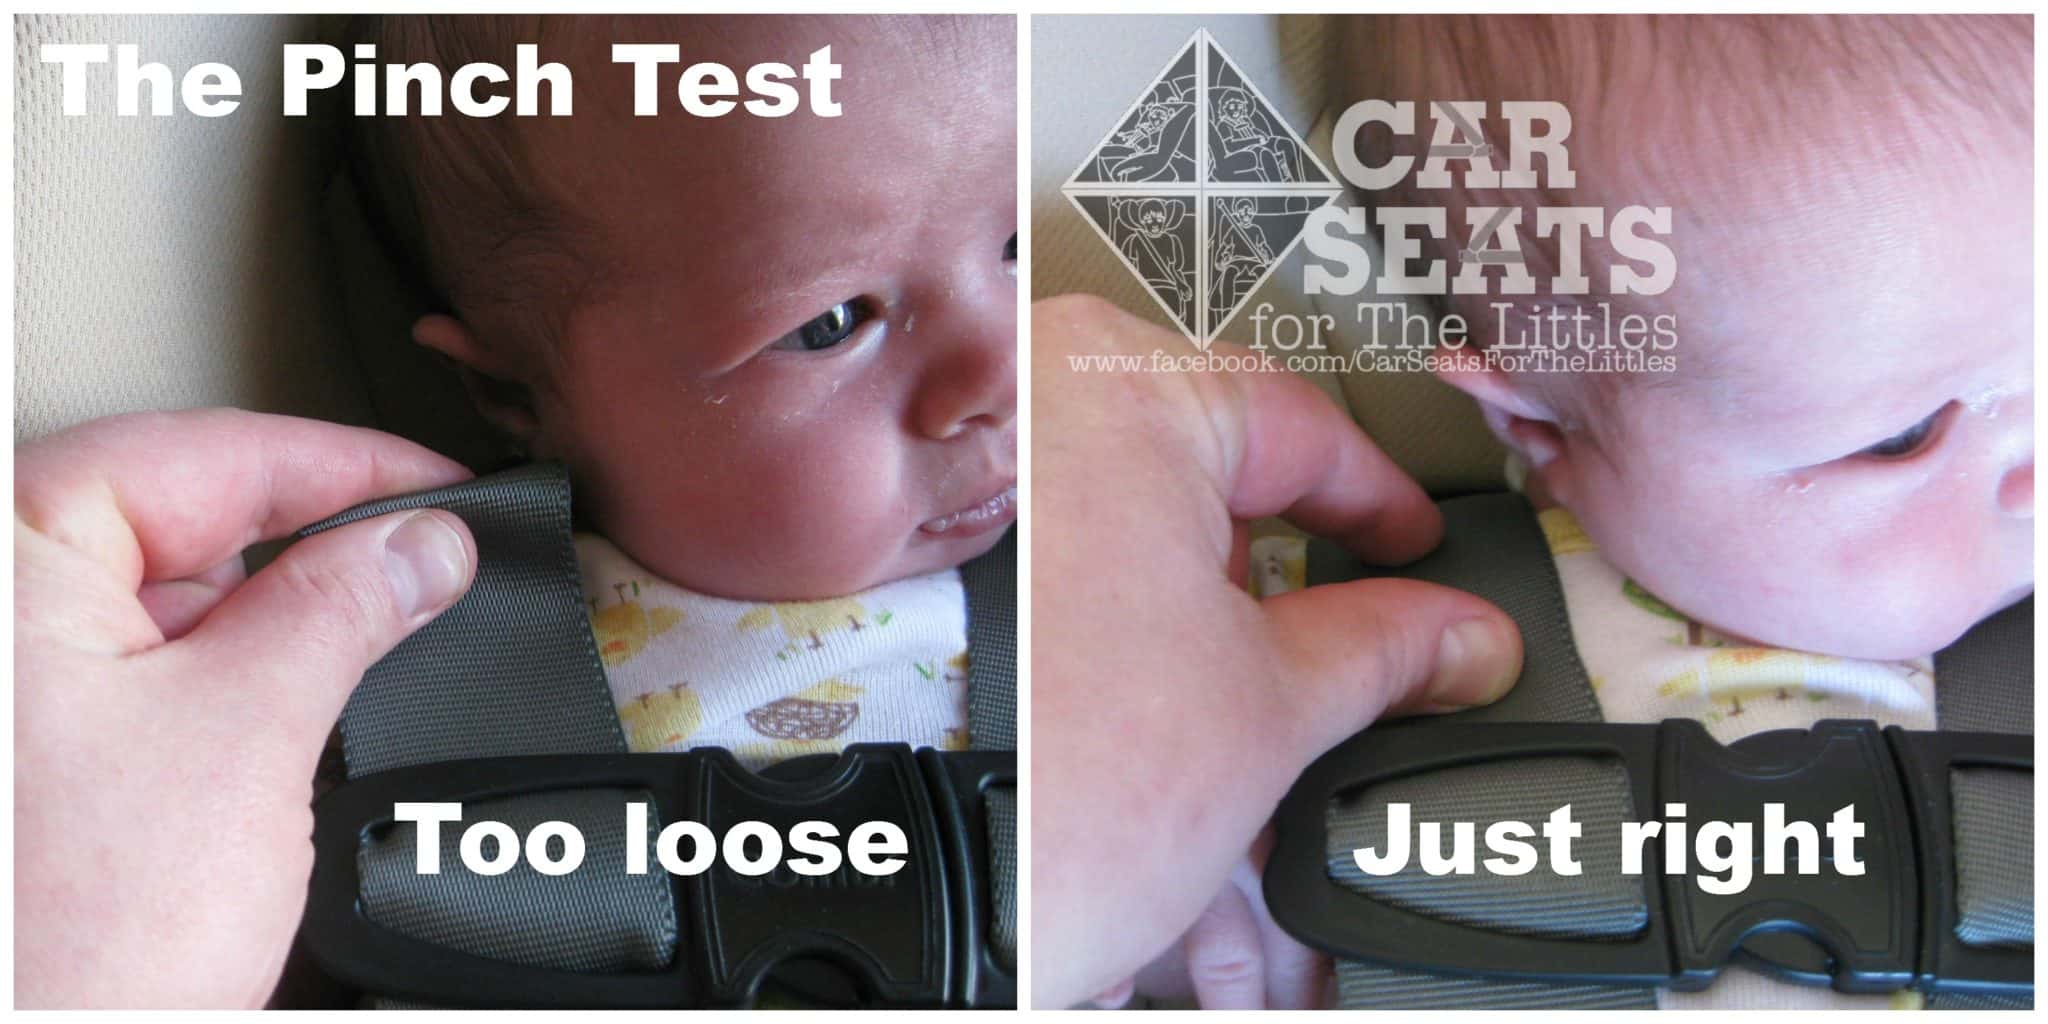
Pass the Pinch Test or Risk Unsafe Slack
Releasing the button prematurely causes the most dangerous errors. Only let go when:
– Straps lie flat against your child’s shoulders (no twisting)
– The chest clip is positioned level with their armpits
– You can pinch exactly one inch of strap webbing at collarbone height
The true pinch test: Place your thumb and forefinger vertically on the strap at the shoulder. If you can pinch more than one inch of slack, the harness is dangerously loose. If you pinch less, it’s too tight. Adjust in quarter-inch increments until you hit that precise one-inch mark. This isn’t arbitrary—it’s the maximum slack allowed by NHTSA crash-test standards.
Pro tip: Dress your child in their thickest winter coat before testing. Bulky clothing creates false slack; you must adjust for bare-shoulder safety first, then loosen only enough for the coat to fit comfortably.
Fix Stuck Harness Mechanisms in 60 Seconds
Button Won’t Depress Despite Firm Pressure
Debris is likely jamming the housing. Remove the Aria seat cover (unzip the back panel per manual instructions) and inspect the harness path. Vacuum the button area with a narrow crevice tool, then wipe with a cloth dampened with 70% isopropyl alcohol (never water—it corrodes springs). Reassemble and test. If still stiff, the ratchet gear needs replacement—do not force it.
Straps Slide Unevenly After Adjustment
This indicates misaligned shoulder slots. Unbuckle the harness completely and check both straps at the seat back. The routing paths must mirror each other exactly. If one strap sits higher, thread it through the next slot down (or up) until tension balances. Most Aria models have 5 height positions—use the chart sewn into the seat cover’s tag.
Harness Self-Tightens After Loosening
You’re likely releasing the button too early. The ratcheting mechanism needs 3 full seconds of strap movement to reset. Hold the button while counting “one-Mississippi, two-Mississippi, three-Mississippi” before releasing. If it persists, the tension spring is fatigued—contact Aria for a free replacement part.
Re-Tighten for Smaller Passengers Without Starting Over
When switching to a younger child, never loosen straps first. Press the adjustment button and pull the front adjustment strap (a narrow webbing loop near the crotch buckle) toward you. This tightens both shoulders simultaneously. Each pull should produce a distinct click as the ratchet engages. Stop when you can’t pinch any slack at the shoulder.
Time-saver: For frequent switches between children, mark ideal strap lengths with a fabric-safe pen on the harness webbing. Note positions for each child’s size—no more guessing games.
Prevent Future Adjustments with Proactive Maintenance
Monthly Harness Inspection Checklist
- Vacuum debris from button housing and strap slots
- Check for frayed webbing near buckles (replace if threads are visible)
- Test button responsiveness: should depress smoothly with no sticking
- Verify chest clip snaps shut with firm pressure (weak clips fail in crashes)
Cleaning That Won’t Damage the Mechanism
Never submerge the harness. Instead:
1. Mix 1 tsp mild soap with 2 cups cool water
2. Dip a microfiber cloth (not paper towel—it sheds fibers)
3. Wipe straps from buckle to shoulder slot
4. Air-dry completely before reinstalling
Never use bleach or fabric softener—they weaken webbing strength by 40%.
Emergency Release: When Seconds Count
In true emergencies (e.g., child trapped after an accident), only use the chest clip’s red release button. Press it firmly while pulling the buckle tongues apart. This fully disengages the harness but requires complete re-adjustment before next use. Never practice this method during routine loosening—it bypasses all safety checks.
Critical reminder: After emergency release, inspect the chest clip for cracks. If it feels loose when snapping shut, replace it immediately (Aria sells clips for $8.99).
Mastering how to loosen Aria car seat straps safely transforms stressful adjustments into confident, one-handed routines. Remember: the pinch test is non-negotiable—one inch of slack is your safety boundary. Perform monthly harness checks to catch wear early, and always adjust for bare shoulders first before accommodating bulky clothing. When growth spurts hit, revisit this guide instead of forcing uncomfortable straps. Your child’s safety depends on precision, not pressure. Keep this article bookmarked for quick reference—you’ll need it every few months as they grow.


