
As a new parent, nothing is more nerve-wracking than buckling your baby into their infant car seat and wondering if it’s secure enough for the road. If you’ve ever asked yourself, “how tight should infant car seat harness be,” you’re not alone—many parents struggle with this, fearing either too much slack that could endanger their child or over-tightening that might cause discomfort. The good news? There’s a simple pinch test and adjustment method that ensures the harness is snug without being restrictive, providing that critical layer of protection in a crash.
In this comprehensive guide, we’ll go beyond the basics to cover everything from understanding safety standards to step-by-step instructions for checking and adjusting your infant car seat harness tightness. You’ll learn common pitfalls to avoid, pro tips for long-term use, and when to seek expert help. By the end, you’ll feel confident installing and verifying your baby’s seat every time, keeping them safe on every drive.
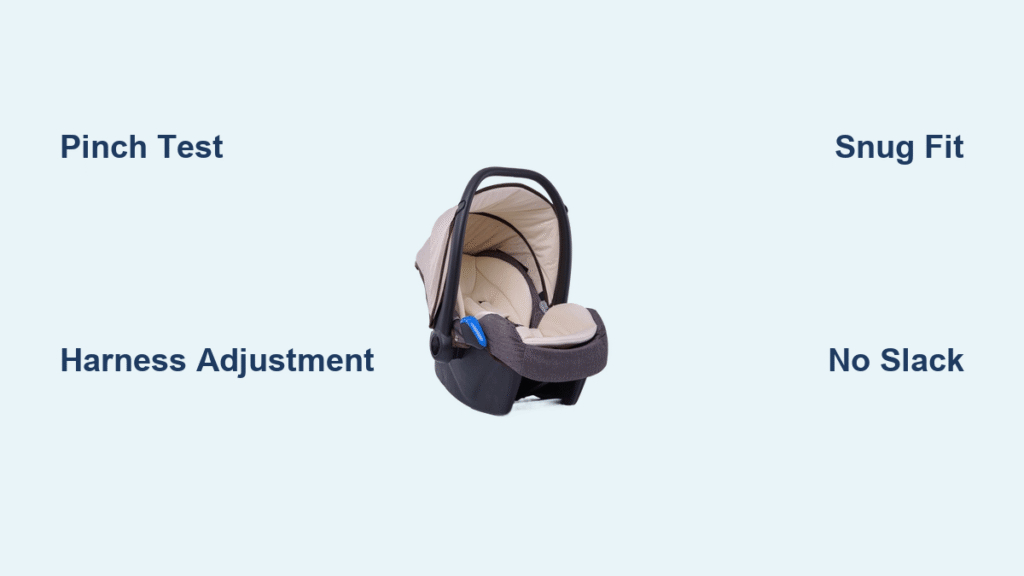
Understanding Proper Harness Tightness for Infant Car Seats
Before diving into adjustments, it’s essential to grasp what “tight” really means for an infant car seat harness. According to the National Highway Traffic Safety Administration (NHTSA), a properly fitted harness should hold your baby securely against the seat’s shell, minimizing movement during sudden stops or impacts. This isn’t about squeezing your child—it’s about eliminating excess slack that could allow the body to shift forward by more than an inch.
Infant car seats, typically rear-facing for babies up to 1 year old and 20-35 pounds (depending on the model), use a five-point harness system: two shoulder straps, two hip straps, and a crotch buckle. The harness tightness directly affects crash performance; studies from the American Academy of Pediatrics show that even 1-2 inches of slack can increase injury risk by up to 50%. Key indicators of correct tightness include no pinchable fabric between the straps and your baby’s body, flat-lying chest clip at armpit level, and straps that don’t ride up over the shoulders.
Why Tightness Matters More Than You Think
Loose harnesses can lead to what’s called “submarining,” where the baby slides under the straps in a collision, potentially causing abdominal injuries. On the flip side, overly tight straps might irritate skin or restrict breathing, but this is rare if you follow guidelines. Always refer to your car seat’s manual—brands like Graco, Chicco, or Britax have model-specific instructions, but the universal rule from safety experts is: snug, not loose.
Tools and Materials Needed for Harness Adjustment

Adjusting your infant car seat harness doesn’t require fancy tools, but having the right items on hand makes the process quick and accurate. Most adjustments can be done with what’s already in your vehicle, but here’s a checklist to ensure you’re prepared.
| Item | Quantity | Specifications |
|---|---|---|
| Car Seat Manual | 1 | Specific to your model (e.g., Graco SnugRide or Uppababy Mesa); download from manufacturer’s site if lost |
| Soft Cloth or Towel | 1 | For padding under baby if needed during fitting; avoid bulky items that add slack |
| Mirror (Optional) | 1 | Rear-facing seat mirror to check positioning without disturbing baby |
| Tightening Strap Tool (If Included) | 1 | Some seats like Peg Perego have built-in levers; otherwise, use hands |
| Ruler or Measuring Tape | 1 | To verify strap recline angle (aim for 30-45 degrees per NHTSA) |
Important: Never use aftermarket add-ons like harness extenders unless approved by the manufacturer, as they can compromise safety certifications.
Preparation Steps and Safety Considerations
Before touching the harness, prepare your setup to avoid common errors. Park in a safe, well-lit area, and ensure the car is off with the emergency brake engaged. Remove any winter coats or bulky clothing from your baby—these can create dangerous slack. Dress them in thin layers, like a onesie and light sweater, so the harness fits directly against their body.
Safety first: Always register your car seat with the manufacturer for recall alerts, and check the expiration date (usually 6-10 years from manufacture). If your seat has been in an accident, replace it immediately, as harness integrity could be compromised. For infants under 6 months, consult your pediatrician if your baby has special needs, like reflux, which might affect positioning.
Diagnosing Current Tightness Issues
Start by inspecting the harness without your baby in it. Look for frays, twists, or worn buckles—these can mimic looseness. Place a stuffed animal or towel in the seat to simulate weight, then buckle and pull on the straps. If they extend more than 1 inch, the base installation might be loose, which we’ll address later.
Step-by-Step Guide to Checking and Adjusting Harness Tightness
Now, let’s get hands-on. This process takes about 5-10 minutes and should be done every time you use the seat, especially as your baby grows (recheck weekly for the first few months). Follow these phases for rear-facing infant seats.
Phase 1: Positioning Your Baby
- Recline the seat to the correct angle—most infant models have a built-in level indicator. Place it rear-facing in the back seat, ideally behind the passenger.
- Gently lay your baby in the seat, feet toward the front. Ensure their head is at least 1 inch below the top of the shell (use the insert if provided for newborns).
- Thread the shoulder straps through the appropriate slots (lowest for infants under 1 year). The straps should lie flat, not twisted.
Warning: Never twist straps, as this reduces their strength by up to 20%, per NHTSA testing.
Phase 2: Buckling and Initial Tightening
- Fasten the crotch buckle first, then connect the hip straps.
- Pull the tightening strap (usually at the front) while holding the chest clip away from the body. Aim to remove all slack—the fabric shouldn’t bunch.
- Position the chest clip at armpit level. For newborns, use the infant insert to fill gaps.
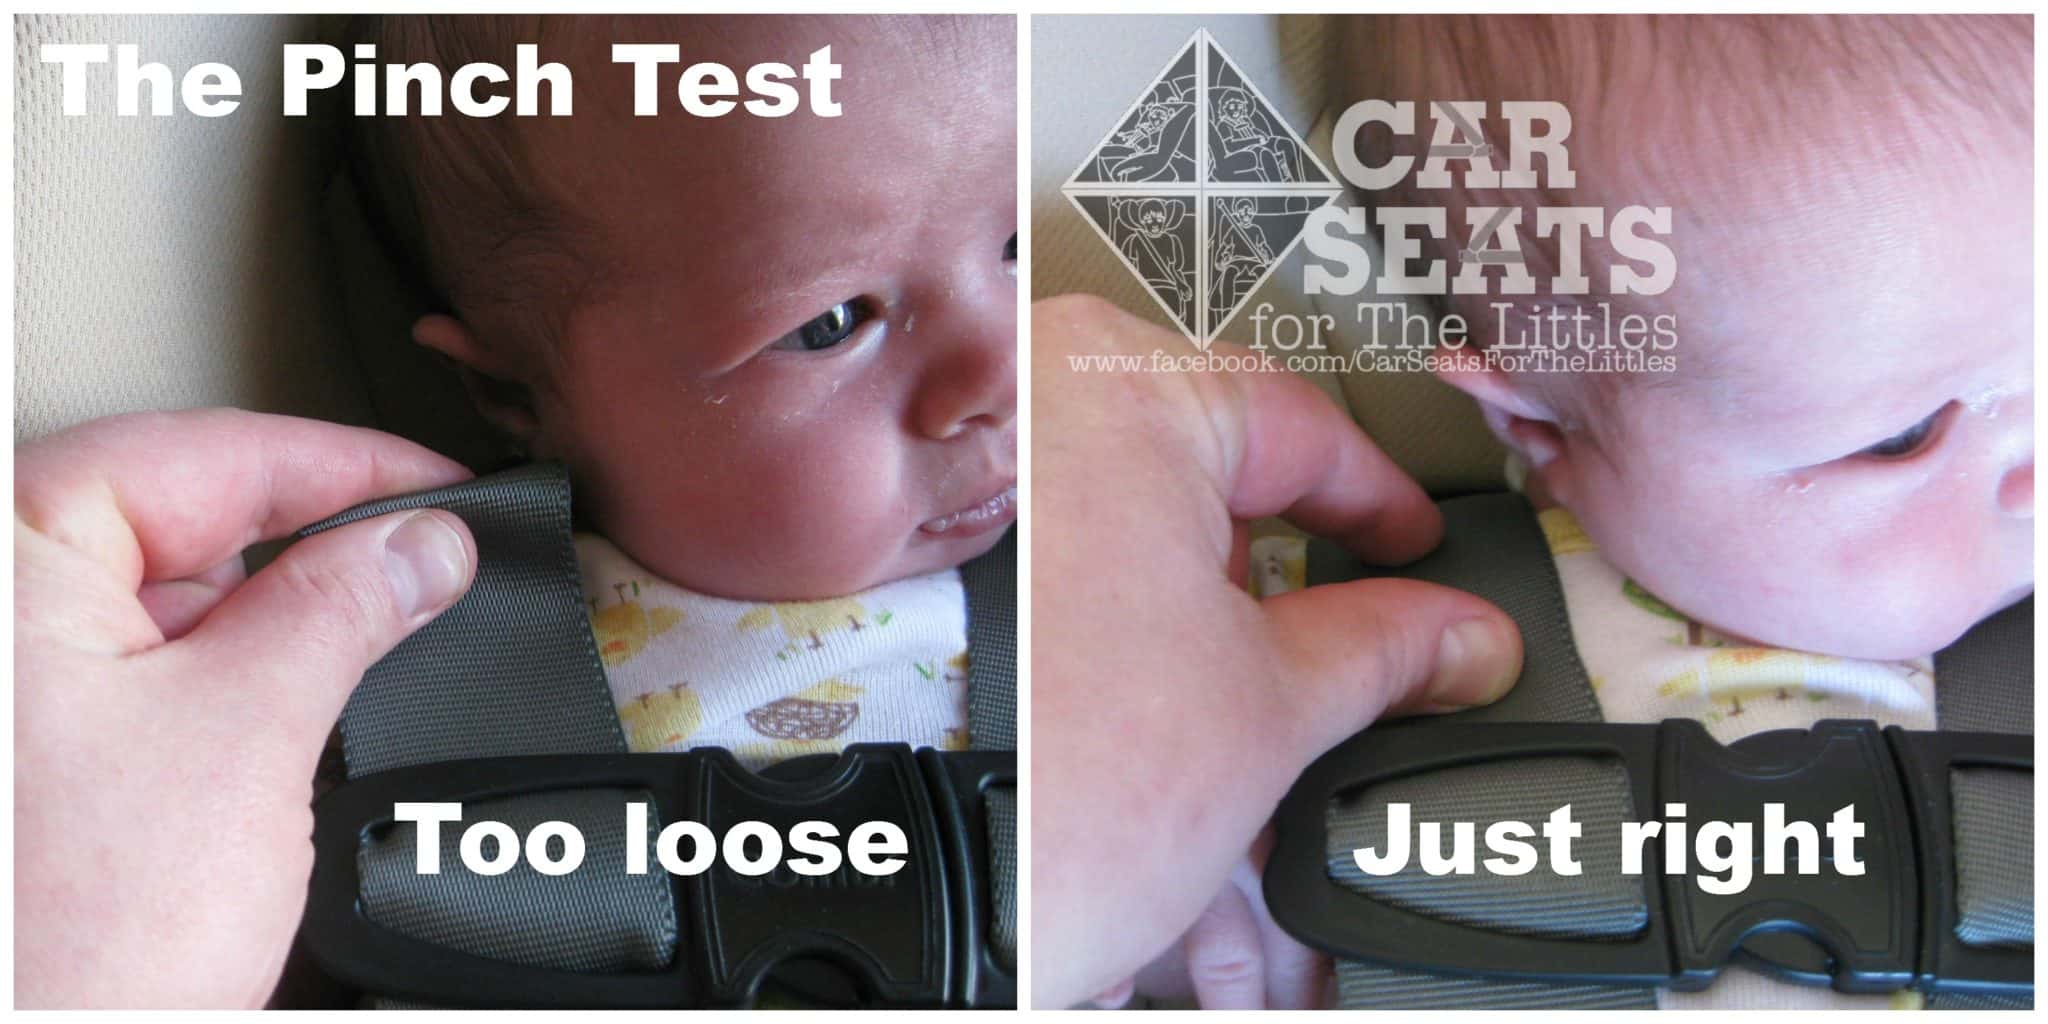
Phase 3: The Pinch Test for Proper Tightness
This is the gold standard for “how tight should infant car seat harness be.” With your baby buckled:
1. Pinch the shoulder strap material over the collarbone. If you can pinch more than 1/4 inch of fabric, it’s too loose—tighten further.
2. Tug gently on the harness above the hips; it should not lift more than 1 inch off the seat shell.
3. Check the shoulders: Straps should be snug but not digging in. Your baby’s chest should rise slightly with each breath, indicating no restriction.
If adjustments are needed, loosen the straps fully (via the release at the front or back), reposition, and retighten. For seats with lock-off mechanisms (like in some Peg Perego models), engage it after buckling to prevent loosening during drives.
Phase 4: Verifying the Base Installation
Harness tightness starts with a secure base. Use the car’s LATCH system or seat belt:
1. For LATCH: Connect anchors firmly; the seat shouldn’t move side-to-side more than 1 inch at the belt path.
2. For seat belt: Thread it through the guides, buckle, and lock (pull the shoulder belt fully first). Rock the seat—it should wiggle less than 1 inch forward/back.
3. If it’s still loose, try the “push-knee” method: Kneel on the seat while tightening.
Time Estimate: Full check and adjustment: 10-15 minutes initially, 2-3 minutes for routine verifications.
Post-Adjustment Testing and Troubleshooting
Once adjusted, test the setup with a short drive. Use a mirror to monitor your baby’s position— their head shouldn’t flop forward. If the harness loosens over bumps, recheck the base installation or consider a different vehicle position (middle seat can be tighter).
If the pinch test fails repeatedly:
– Twisted Straps: Untwist and rerun through slots.
– Growth Spurts: Babies grow fast; up to 1 inch per month. Adjust slots upward as shoulders align with or above the strap holes.
– Worn Hardware: If buckles stick, clean with mild soap (no lubricants). Replace if damaged—contact the manufacturer for parts.
For complications like a preemie or multiples, use padding only as recommended to avoid uneven tightness.
Pro Tips for Optimal Infant Car Seat Use

To keep your harness at the perfect tightness long-term, here are expert insights from child safety advocates like Safe Kids Worldwide:
– Daily Quick Checks: Before every trip, do the pinch test—it takes 30 seconds and could save lives.
– Avoid Bulk: Skip puffy jackets; use blankets over the harness post-buckling for warmth.
– Temperature Tweaks: In hot weather, loosen slightly for airflow but never more than the pinch test allows.
– Rotation Practice: Practice installing in multiple cars; tightness can vary by vehicle seat shape.
– App Assistance: Use free apps like NHTSA’s Car Seat Check to log inspections and get reminders.
– Common Mistake to Dodge: Don’t double-check only after long drives—do it fresh each time, as vibrations can subtly loosen straps.
– Optimize for Growth: Mark growth milestones on your calendar; transition to convertible seats around 9-12 months when ready.
These tips not only ensure proper tightness but can extend your seat’s usability, saving you money on replacements.
When to Seek Professional Help
While most parents can master harness tightness at home, some situations call for experts. Signs include: persistent looseness despite adjustments, damaged components, or if you’re using the seat in rideshares/taxis where installation varies.
Look for certified Child Passenger Safety Technicians (CPSTs) via safekids.org— they offer free inspections at fire stations or hospitals. Expect 30-60 minutes for a session. Costs are usually free, but private services run $50-100. Check your warranty (1-2 years typical); improper tightness from misuse might void it, so document your efforts.
If your car seat is recalled (check cpsc.gov), get a free replacement—don’t attempt fixes on faulty models.
FAQ
Q: How tight should the infant car seat harness be for a newborn?
A: For newborns, the harness should be extra snug to prevent head flopping, but use the provided infant insert for support. The pinch test still applies—no more than 1/4 inch of fabric pinchable. Straps at the lowest slots, and ensure the recline is 30-45 degrees to support their developing neck.
Q: Can I use a blanket under the harness for tightness?
A: No—blankets or padding under the harness add slack and increase injury risk in crashes. Layer clothing thinly and add blankets over the harness after buckling. Exceptions: Manufacturer-approved inserts for preemies.
Q: What if the harness pinches my baby’s skin when tight?
A: Slight redness is normal from snug fit, but if it pinches painfully, check for twists or improper slot threading. Loosen minimally while passing the pinch test, and use soft clothing. Consult a pediatrician if skin issues persist, as it might indicate an ill-fitting model.
Q: How often should I check harness tightness?
A: Every single use, plus weekly as your baby grows. Also after any car wash, heavy rain, or if the seat tips over—moisture can stretch straps subtly.
Q: Does harness tightness differ between brands like Graco and Chicco?
A: The principles are the same (per federal standards), but mechanisms vary—Graco uses a front adjuster, while Chicco has a one-pull tightener. Always follow your manual, but the pinch test is universal.
Q: What if my car seat base is tight but the harness isn’t?
A: The base and harness are separate; a secure base prevents seat movement, but harness tightness secures the child. Retighten the harness independently, and if issues continue, the shoulder straps might need rerouting for your baby’s size.
Q: Is it okay to install the car seat tighter than recommended?
A: Snug is good, but over-tightening (e.g., indenting skin deeply) can restrict breathing or cause discomfort. Stick to the pinch test—it’s calibrated for safety without excess pressure.
Ensure Your Baby’s Safety on Every Ride
With this guide, you’ve got the tools to answer “how tight should infant car seat harness be” confidently:
– Master the pinch test and step-by-step adjustments for a secure fit every time.
– Avoid common pitfalls like bulky clothing or skipped checks to maintain peak safety.
– Use pro tips and know when to call in CPSTs for peace of mind.
Following these steps isn’t just about tightness—it’s about protecting your little one from the unpredictability of the road. Take action today: Grab your manual, do a quick pinch test on your next outing, and make safety a habit. Your baby deserves the best start.
Have you adjusted your infant car seat harness using the pinch test? Share your tips or challenges in the comments to help other parents!


