
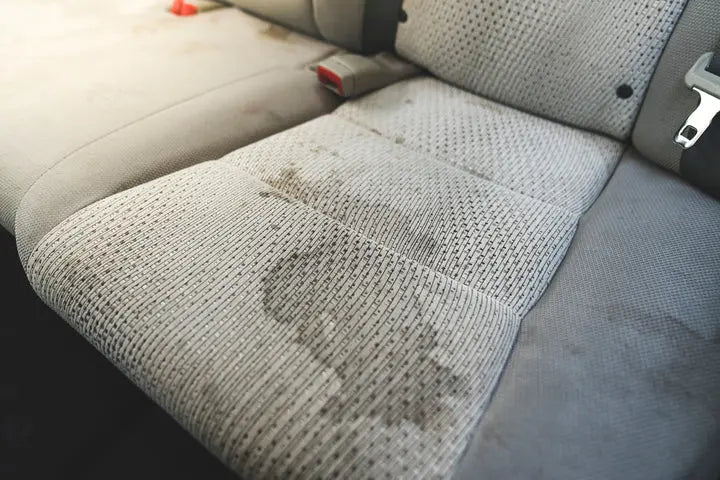
Your morning coffee spills across the driver’s seat during rush hour. Your child’s juice cup tips over in the back. That stubborn ketchup stain from last week’s drive-thru mocks you every time you slide behind the wheel. These stains aren’t just embarrassing—they can permanently damage your car’s interior and erode its value. But here’s the good news: how to get car seat stains out doesn’t require expensive detailing. This guide delivers exact methods for fabric and leather seats, using solutions already in your pantry. You’ll discover why vinegar works better than store-bought sprays, how to freeze gum off in 10 minutes, and the critical pre-cleaning step 90% of drivers skip.
Most people grab the first cleaner they find and scrub immediately—this often sets stains deeper. The key is matching your approach to your seat material. Leather demands pH-neutral solutions and feather-light pressure, while fabric tolerates stronger agitation. Rush this step, and you’ll end up with discolored patches or cracked upholstery. Before we dive into stain-specific fixes, let’s ensure you’re using the right weapons for your battle.
Identify Your Seat Material Before Cleaning
Why Leather and Fabric Need Different Treatments
Leather seats absorb liquids differently than fabric, making standard carpet cleaners disastrous for hides. Apply vinegar directly to leather without dilution, and you’ll strip its protective coating within minutes. Fabric seats, however, handle baking soda pastes and steam cleaning that would ruin leather. Always test solutions in your seat’s least visible spot—like under the headrest or behind the seat base—for 24 hours. If the color bleeds or texture changes, that solution is unsafe.
Vacuum First: The Overlooked Critical Step
Skip vacuuming, and you’ll grind dirt deeper during scrubbing. Start with your vacuum’s crevice tool along all seams, focusing where crumbs and sand collect. For fabric seats, follow with an upholstery brush to lift fibers. On leather, wipe gently with a dry microfiber cloth first to remove surface grit. This 5-minute prep prevents scratches and ensures cleaners penetrate stains—not dirt layers.
Remove Coffee Spills from Fabric Seats in 15 Minutes
Fresh Coffee Stain Emergency Protocol
Blot—not rub—with a clean microfiber cloth the second a spill happens. Rubbing forces liquid into foam padding. Mix 1 cup white vinegar, 1 gallon hot water, and 3 drops dish soap in a bucket. Dip a soft-bristled brush into the solution, scrub in tight circles for 30 seconds, then rinse with a water-dampened cloth. For lingering rings, apply a 3:1 baking soda paste (3 tablespoons soda to 1 tablespoon water), wait 10 minutes, and wipe clean. Dry with open windows for 2 hours minimum.
Old Coffee Stains That Won’t Budge
Dried coffee creates tannin-based discoloration that resists basic cleaners. Use an enzyme cleaner (like those for pet accidents) sprayed directly onto the stain. Let it sit 20 minutes—enough time for enzymes to break down organic compounds. Then, steam clean at 245°F. The high heat lifts deep-set stains while killing odor-causing bacteria. Never use bleach; it yellows fabric permanently.
Erase Ink and Permanent Marker from Leather Seats
Acetone Method That Won’t Bleach Seats
Dip a cotton ball in acetone nail polish remover—never apply full-strength. Blot the ink stain gently for 15 seconds max. Immediately wipe residue with a cloth dampened in warm water and dish soap. Test this first on your seat’s inner fold; some dyes react poorly. If the ink returns after drying, repeat once more, but no more—excessive acetone dries leather out. Finish by conditioning to prevent cracks.
Warning Signs Your Leather Is Too Damaged
Stop immediately if you see:
– White residue after wiping
– Color transfer onto your cloth
– A sticky or tacky surface
These indicate the leather’s topcoat is failing. At this point, professional help is needed—DIY will cause irreversible damage.
Freeze and Scrape Gum Off Car Seats Safely

The Ice Cube Trick for Gum, Candy, or Sap
Press an ice pack directly onto the sticky substance for 3 minutes until rock-hard. Use a butter knife’s dull edge to gently lift the frozen mass away from fibers. Any residue? Dab with club soda on a microfiber cloth, then blot dry. Avoid heat guns or solvents—they melt gum deeper into fabric.
Why Solvents Fail on Car Upholstery
Goo Gone or WD-40 might remove gum but leave oily stains worse than the original problem. These petroleum-based products degrade fabric coatings and attract more dirt. Stick to freezing—it’s the only method that won’t compromise your seat’s integrity.
Baking Soda Power Paste for Oil and Odor Stains
Targeted Application for Grease or Food Spills
Mix 2 tablespoons baking soda with 1 tablespoon water into a thick paste. Apply only to the stained area (not the whole seat), cover with plastic wrap, and wait 30 minutes. The baking soda draws oil to the surface without oversaturating padding. Wipe clean with a vinegar-dampened cloth, then vacuum residue. For stubborn grease, extend wait time to 2 hours.
Overnight Odor Elimination Hack
Sprinkle undiluted baking soda across the entire seat after cleaning. Leave it for 8+ hours (overnight is ideal), then vacuum thoroughly. This neutralizes lingering smells from sweat, food, or pets. For extra potency, add 5 drops of lemon essential oil to the baking soda first.
Steam Cleaning Secrets for Deep Fabric Stains
Why Detailers Charge $150 for This Method
Professional steam cleaners blast seats with water at 245°F, melting embedded grime that surface cleaners miss. Before steaming, vacuum thoroughly—you don’t want dirt forced deeper. Hold the nozzle 2 inches from fabric, moving slowly in overlapping strokes. Focus extra time on stained zones. Afterward, run your HVAC on max heat with windows cracked for 4 hours to dry padding completely. Skip this drying step, and mildew will grow inside your seats within days.
When Not to Use a Steam Cleaner
Never steam leather, vinyl, or suede seats—moisture causes irreversible warping. Avoid it on seats with existing water damage (look for bubbling foam). If your car smells musty after rain, steam cleaning could worsen mold issues.
Leather Seat Rescue Protocol After Stain Removal
pH-Neutral Cleaning That Prevents Cracking
Use only auto-specific leather cleaners (like Chemical Guys Leather Cleaner). Spray onto a microfiber cloth—not the seat—to avoid pooling. Wipe in small circles with zero pressure; your palm weight should be the only force. For dried stains, lightly dampen a soft toothbrush, apply cleaner, and brush with the grain for 10 seconds max. Rinse by wiping with a water-dampened cloth.
Non-Negotiable Conditioning Step
Wipe every cleaned leather section with conditioner within 20 minutes. Unconditioned leather dries out within days, creating micro-cracks where new stains hide. Apply conditioner in dime-sized amounts, buffing until absorbed. Skipping this turns a $5 fix into a $500 reupholstery job.
When to Call Professionals vs. DIY
DIY Only If:
- Stains are under 48 hours old
- You have standard cloth or leather (not Alcantara/suede)
- No mold or mildew is present
- You can fully dry seats within 24 hours
Call a Detailer If:
- Stains penetrated into seat foam (check by lifting seat edge)
- You see white salt rings (indicates deep dehydration)
- Previous attempts left discoloration
- Seats are perforated or vintage leather
Professionals use extraction machines that pull stains out rather than scrubbing them in. For under $100, they often save seats you’d assume were ruined.
Prevent Future Stains with 3 Simple Habits
Spill-Proof Your Daily Commute
Keep a glove compartment kit with:
– 2 microfiber cloths
– Small spray bottle of 1:2 vinegar-water mix
– Travel-sized dish soap
– Baking soda in a sealed container
Install waterproof seat covers for kids or pets—water beads right off them. Opt for insulated travel mugs with secure lids; most spills happen from flimsy cups.
Post-Cleaning Maintenance That Lasts
After any stain removal, apply UV protectant to seats. Sun exposure sets stains permanently within hours. For leather, condition monthly. For fabric, sprinkle baking soda quarterly, wait 1 hour, then vacuum—it absorbs oils before they become stains.
Don’t let one spill dictate your car’s appearance for years. The how to get car seat stains out process starts with identifying your seat material and ends with preventative conditioning—but the real victory is acting fast. Remember: vinegar solutions for fresh fabric stains, freezing for sticky messes, and strict leather conditioning after cleaning. Apply these methods within 24 hours, and you’ll restore seats to near-new condition. Keep your emergency kit stocked, and the next spill becomes just a minor hiccup—not a permanent eyesore. Your car’s interior is worth protecting; treat stains like the time-sensitive threats they are.


