
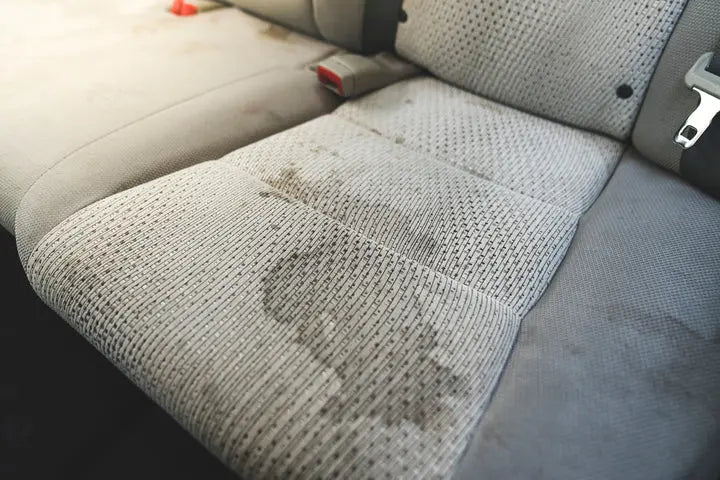
Coffee spills seep into the driver’s seat, muddy paw prints cover the back bench, and mysterious crumbs cling to every crevice. If your car seats look like a toddler’s art project, you’re not alone—87% of drivers admit to eating in their vehicles, turning interiors into stain magnets. But here’s the good news: how to clean car seats properly takes less time than your morning commute, and you likely already own most tools needed. Skip the expensive detailing shops and learn to tackle cloth, leather, and child seats safely with techniques that won’t strip finishes or void warranties. This guide reveals the exact steps mechanics and professional detailers use, including material-specific pitfalls most owners miss.
Your seats endure daily abuse from UV rays, food debris, and harsh cleaning mistakes. Using the wrong method on pre-2015 Nissan leather can permanently strip its dye, while submerging child seat harness straps risks catastrophic failure in a crash. By following these protocols, you’ll restore fresh interiors in under an hour and add years to your upholstery’s life. Let’s dive into the critical first step everyone skips.
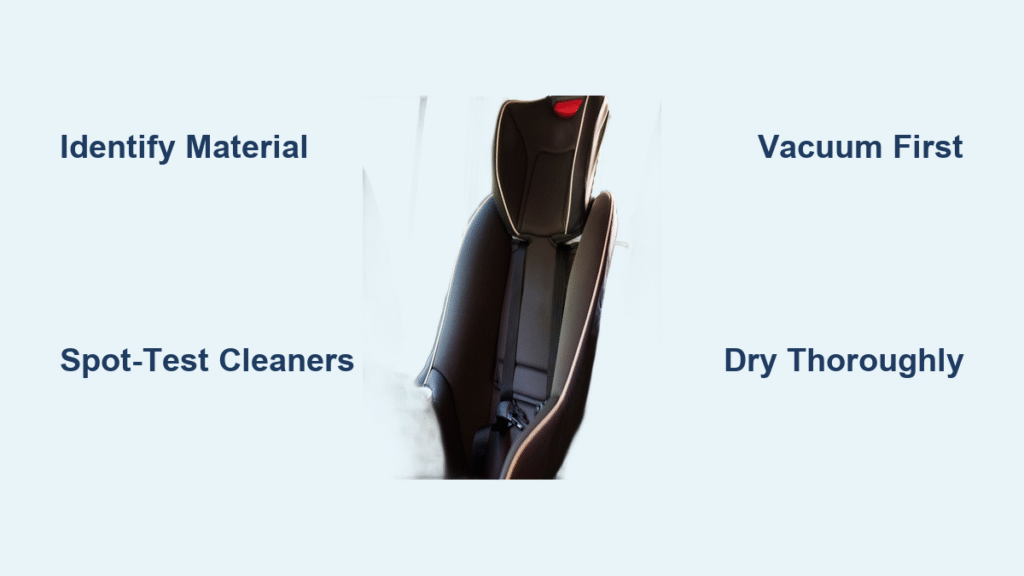
Identify Your Seat Material Before Touching a Cleaner

Grab your flashlight and inspect the side seams of your seats—this reveals whether you’re dealing with cloth, leather, or child seat components. Cloth seats (nylon/polyester blends common in Toyota Camrys or Honda Accords) absorb spills instantly but tolerate vigorous scrubbing. Leather or vinyl (found in BMWs, Audis, or Nissan Armadas) wears a fragile clear coat that alcohol or ammonia destroys. Child seats combine plastic shells, fabric covers, and life-critical harness straps—each demanding radically different care. Your vehicle manual’s material code (check page 300+) or a hidden tag near the seat base holds the key. Never assume; one wrong cleaner can cost $500 in reupholstery.
Spot-Test Every Cleaner Like a Pro Detailer
Skip this step and you’ll regret it when your black seats turn white. In a hidden 2×2-inch patch (under headrest or near floor), apply your chosen solution, wait 10 minutes, then check for color bleeding or texture changes. Pre-2015 Nissan leather? Test with just water first—many owners ruin seats by using store-bought cleaners. For child seats, spot-test harness straps with diluted soap since chemical absorption could irritate your child’s skin. If residue forms a ring or color lifts, abandon that product immediately.
Hidden Safety Hazards That Cause Costly Mistakes
Powered seats require disconnecting your vehicle battery before removing bolts—a step 90% of DIYers ignore, risking electrical shorts. Older leather? Alcohol-based cleaners on pre-2015 Nissan models strip dye permanently. Child seats? Check the expiration date sticker (usually on the shell base)—expired units can’t be safely disassembled. Always work in shade; sun exposure while wet accelerates UV damage. Keep replacement part numbers handy: your child seat’s model/date sticker avoids buying incompatible harnesses later.
Vacuum and Pre-Treat Stains in 3 Minutes Flat
Start with a high-powered vacuum using both upholstery and crevice tools—this removes 80% of embedded dirt before liquids touch your seats. Vacuum in one direction first, then cross-hatch perpendicular to lift grit trapped deep in fibers. Pay special attention to buckle slots; use tweezers for stubborn debris. Skip this and you’ll grind dirt deeper during scrubbing.
Target Stains Before Deep Cleaning
Spray only the affected area with your chosen solution (see material-specific guides below), then let it dwell for 3–5 minutes. Never saturate seats—excess moisture breeds mold in foam padding. For coffee or juice, use a vinegar-water mix; grease needs baking soda paste. Blot protein spills (milk/vomit) immediately with a dry cloth before pre-treating. This dwell time breaks bonds between stains and fibers, making scrubbing effortless.
Remove Coffee and Grease from Cloth Seats Safely
Choose the Right Cleaner for Your Stain Type
- Coffee/Juice: Mix 1 cup vinegar + 1 gallon hot water + 1 tsp bleach-free dish soap. Spray, wait 3 minutes, then blot cold water to prevent browning.
- Grease/Oil: Rub baking soda paste (¼ cup baking soda + 1 cup warm water) gently with a soft brush. Blot—never rub—to lift oil without spreading.
- Light Freshening: Spray club soda directly on stains for instant lift (no rinsing needed).
Avoid store-bought “miracle” sprays containing bleach or ammonia—they leave sticky residues that attract more dirt.
Hand-Scrub Without Damaging Fibers
Work in 2×2-foot sections using a soft interior brush (Nifty Interior Detail brush recommended). Apply light pressure in cross-hatch motions—heavy scrubbing frays fibers. For set-in stains, use a drill with a Gray Light Duty brush attachment on low speed (2–3 passes max). After scrubbing, wipe with a damp microfiber towel, then vacuum again to extract soapy residue. Rinse failure causes rapid re-soiling.
Dry Fabric Seats in Under 3 Hours
Wet seats invite mildew within 24 hours. Pull excess moisture with a dry microfiber towel, then place box fans facing seats with all doors open. Never close your car while seats are damp. For faster drying, run the A/C on fresh-air mode or tuck desiccant packs under seats overnight. Sun-dry child seat covers to kill odor-causing bacteria—just never machine-dry straps.
Restore Cracked Leather Seats Without Stripping the Finish

Use Only pH-Balanced Cleaners for Leather
Pre-2015 Nissan leather? Stick to mild soap and water only—alcohol or solvents strip its dye permanently. For other leathers, choose pH-balanced leather cleaner or saddle soap. Avoid vinegar mixes on perforated or semi-aniline leather; they cause irreversible stiffening. Apply cleaner to a microfiber towel first—never spray directly onto seats—to prevent oversaturation.
The 5-Step Leather Revival Process
- Vacuum seams with a soft brush attachment to remove grit.
- Wipe entire seat with damp (not wet) cleaner-soaked microfiber.
- Gently scrub seams using a soft-bristle brush in circular motions.
- Dry immediately with a fresh microfiber towel.
- Massage in natural conditioner (petroleum-free), wait 1 hour, then buff.
Never use conditioners containing waxes or silicones—they create slippery surfaces that compromise safety. Re-condition every 3–6 months, especially if parked outdoors.
Prevent Future Leather Damage Daily
Keep a microfiber towel in your glovebox to blot spills within 10 seconds—leather absorbs liquids instantly. Park in shade or use a windshield sunshade; UV rays cause 70% of leather cracking. For ink stains, dab immediately with 70% isopropyl alcohol on cotton, then re-condition. If cracks persist after deep conditioning, consult a professional—DIY fixes often worsen damage.
Deep Clean Child Seats Without Compromising Safety

Follow Component-Specific Rules to the Letter
| Part | Safe Cleaning Method | NEVER DO THIS | Drying Method |
|---|---|---|---|
| Fabric Cover | Hand wash cold + mild detergent | Bleach or hot water | Air-dry flat |
| Harness Straps | Spot-clean with damp soapy cloth | Submerge or machine wash | Sun-dry only |
| Buckles | Swish in warm water + tweezers | Lubricants or solvents | Air-dry 24h |
| Plastic Shell | Wipe with warm sudsy cloth | Ammonia or bleach | Air-dry |
Submerging harness straps weakens fibers—a crash could cause catastrophic failure. Always check your manual’s washing instructions; some brands like Britax forbid machine washing covers.
Reassemble Harnesses Correctly or Risk Injury
After air-drying, route harness straps through slots exactly as shown in your manual’s photos. Twisted straps reduce crash protection by 40%. Lay straps perfectly flat with zero twists, then test fit: the seat should move less than 1 inch at the belt path. If straps are frayed, faded, or moldy, order replacements from the manufacturer using your seat’s model/date sticker—never use generic parts.
Erase Stubborn Stains Before They Set Permanently
| Stain Type | Best Tactic | Critical Time Limit |
|---|---|---|
| Grease/Oil | Baking soda paste + blotting | 5 minutes max |
| Coffee/Juice | Vinegar solution + cold water rinse | Blot within 30 seconds |
| Milk/Vomit | Enzyme cleaner + sun-drying | Remove solids first |
| Ink on Leather | 70% alcohol dab + re-condition | Immediate action |
For vomit or urine, remove solids first with a dry cloth, then apply enzyme cleaner and let dwell 10 minutes before blotting. Sun-drying kills odor-causing bacteria—never skip this step for protein stains. On leather, condition immediately after alcohol treatment to prevent drying.
Keep Seats Cleaner Longer With These Pro Habits
Install waterproof, machine-washable seat covers if you have kids or pets—they block 90% of stains. Vacuum weekly with a 60-second pass to prevent grit abrasion that wears fibers. Always keep microfiber towels in your car to blot spills within seconds (wiping spreads stains). Apply UV window tint or use sunshades; they slow fabric fading by 50%. For cloth seats, spray fabric guard after deep cleaning to repel future spills.
When to Call a Professional Detailer Immediately
DIY fails for deep biological stains (urine/vomit soaked into foam), delicate perforated leather, or luxury marques requiring warranty documentation. Medical-grade steam disinfection is essential for post-illness sanitizing (e.g., norovirus). If your seats still smell after baking soda treatment, or leather cracks persist after conditioning, stop—further DIY risks permanent damage. Professionals have extraction tools that pull moisture from foam cores, reducing drying time by 75%.
Your 5-Minute Seat Rescue Kit: High-powered vacuum, 5 microfiber towels, soft interior brush, pH-balanced leather cleaner, natural conditioner, white vinegar, baking soda, 70% isopropyl alcohol. Following these steps restores like-new seats safely—no expensive mistakes. Remember: the fastest way to clean car seats starts with knowing your material, not grabbing the nearest cleaner. Safe travels with fresh, stain-free rides!


