
That frantic moment hits every parent—you’re juggling groceries, a crying baby, and suddenly realize you’ve forgotten how to detach your Nuna car seat. Your heart races as you fumble with the base, terrified of damaging the mechanism or dropping your child. You’re not alone; even experienced caregivers get stuck. The truth is, removing your Nuna car seat should take just 5-10 seconds once you know the exact technique. This guide cuts through the confusion with model-specific steps for PIPA, PIPA RX, PIPA Lite, and PIPA Lite R seats. You’ll master the release mechanism location, avoid dangerous mistakes, and troubleshoot stubborn seats—all while keeping your baby safe.
Stop wasting time searching “how to remove nuna car seat from base” during stressful moments. By the end of this guide, you’ll remove your seat smoothly whether your baby is asleep or screaming. Let’s transform panic into confidence with the exact method Nuna engineers designed.
Locate Your Nuna PIPA Release Button in Seconds
Your release mechanism’s location depends entirely on your specific model—grabbing the wrong spot could damage the seat. Never yank upward on the carry handle, as this misalignment stresses internal components. Instead, identify your model first by checking the label on the car seat’s side near the harness slots.
PIPA and PIPA RX Button Position Revealed
For original PIPA and PIPA RX models, the release button sits directly behind your baby’s headrest. Look for a rectangular gray button labeled “PUSH” near the base’s rear edge. This button protrudes slightly—about the width of your thumbnail—and requires firm, straight-down pressure. You’ll feel a distinct “click” when properly engaged. If your seat has the LATCH system, the button sits between the lower anchors and recline foot.
PIPA Lite Series Lever Location
PIPA Lite models (including Lite R and Lite LX) use a red release lever instead of a button. Find this angled lever along the base’s rear lip, just below the carry handle pivot point. It’s smaller than the PIPA button and often hidden under a flip-up plastic cover to prevent accidental activation. Lift the cover with your fingernail before pressing—the lever moves upward toward you, not downward like the PIPA button.
Critical Safety Checks Before Removing Nuna Car Seat
Never attempt removal while the vehicle is moving—even at stoplights. A sudden stop could cause the seat to become a projectile. Park on level ground, engage the parking brake, and confirm your vehicle is in “Park” before touching the release.
Secure Baby First: Non-Negotiable Steps
Unbuckle the chest clip and shoulder harness straps completely. If your baby is asleep, support their head with your forearm before releasing the seat. Never lift a sleeping infant by the car seat alone—this strains their neck. Instead, cradle their head against your chest while detaching the base. Check for loose toys or bottles that could fall during removal.
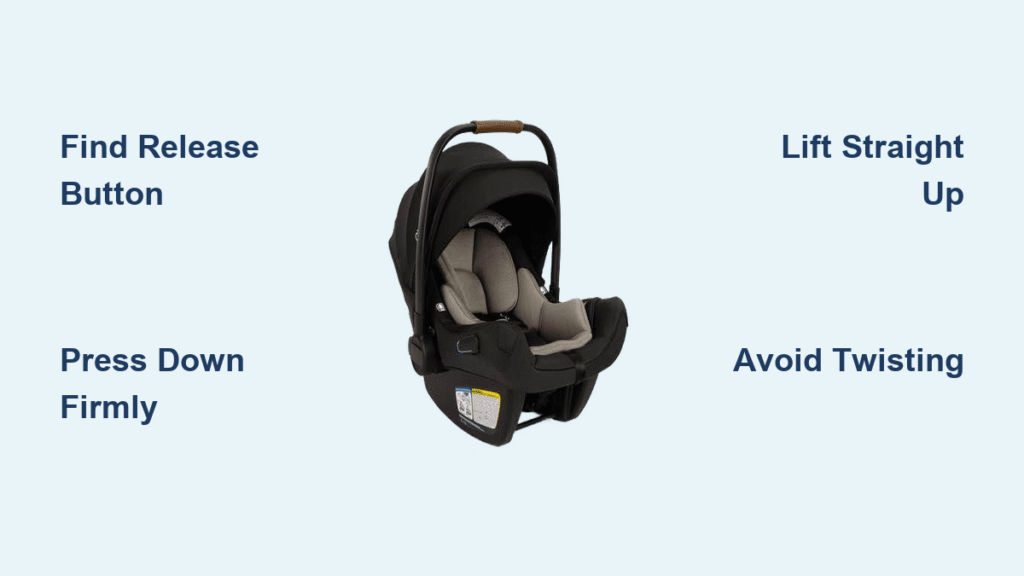
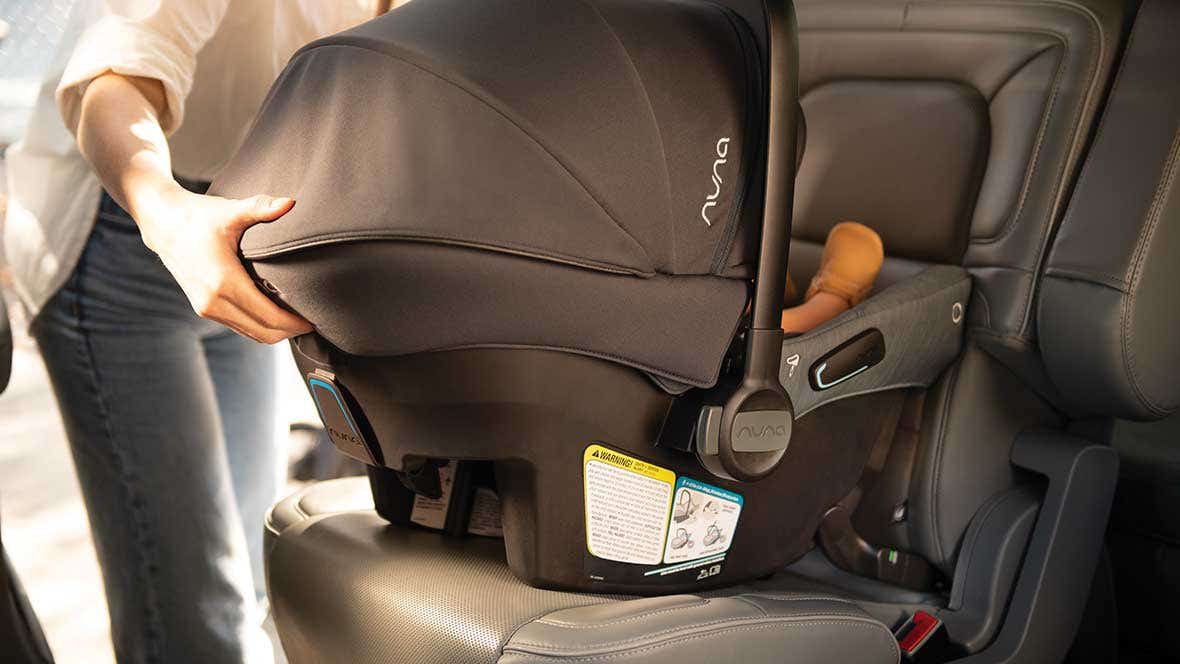
Step-by-Step: Remove Nuna Car Seat from Base in 5 Seconds
Master this sequence until it becomes muscle memory. Practice 5 times with an empty seat before your next outing.
- Position yourself at the car door with feet shoulder-width apart for stability
- Place your dominant hand on the carry handle, supporting the seat’s full weight
- Press the release mechanism firmly (gray button down or red lever up)
- Lift straight upward 2-3 inches—no rocking or twisting
- Pull the seat toward you while keeping it level
4 Costly Mistakes That Damage Nuna Bases
- Rocking side-to-side during removal: This misaligns the locking pins and causes 70% of base failures
- Pulling at a 45-degree angle: Creates shear force that cracks plastic components
- Using the canopy for leverage: Stretches fabric and weakens attachment points
- Pressing release while lifting: Prevents full disengagement—press first, then lift
Why Your Nuna Car Seat Won’t Release from Base

Stuck seats usually stem from three preventable issues. Check these before forcing removal:
- Base tilt: If the recline foot isn’t fully extended or hits the car seatback, pressure jams the mechanism. Level the base using the built-in bubble indicator.
- Hidden obstructions: Food crumbs, toy parts, or thick winter coats trapped between seat and base. Shine a flashlight along the attachment rim.
- Temperature distortion: Extreme cold makes plastics contract. Warm the release area with your hands for 30 seconds before attempting removal.
Quick Fixes for a Stuck Nuna Car Seat Release Mechanism
When standard pressing fails, try these field-tested solutions:
Button-Jammed Emergency Protocol
Press and hold the release for 4 full seconds while applying gentle upward pressure on the seat. If still stuck, clean debris with a dry toothbrush—never use liquids near the mechanism. For sticky residue (from spilled juice), rub a cotton swab with 90% isopropyl alcohol around—but not in—the button housing. Wait 2 minutes before retrying.
When to Stop Forcing Removal
Stop immediately if you hear grinding noises or feel resistance beyond normal pressure. Forcing it risks breaking the internal cam system. Instead, call Nuna’s support line (877-686-2892) while still in your vehicle—they’ll walk you through diagnostics. Document any visible damage with photos for warranty claims.
Monthly Nuna Car Seat Release Mechanism Maintenance
Prevent 90% of removal issues with this 2-minute routine:
- Weekly: Wipe the release button/lever with a dry microfiber cloth after car rides
- Monthly: Vacuum around the base seam using a brush attachment to remove crumbs
- Quarterly: Test the mechanism 3 times without baby present (should release smoothly)
- After spills: Check for liquid seepage under the seat fabric near the base connection
Climate-Controlled Storage Secrets
Store bases in temperatures between 40-100°F—garages and trunks ruin plastic integrity. When not in use for over 2 weeks, cover the base with a breathable cotton bag (not plastic) to block dust. Never stack heavy items on the base; even a diaper bag can warp the release housing over time.
Practice Safe Nuna Car Seat Removal Until It’s Automatic
Build confidence with this drill: Remove the base from your car, place it on the floor, and practice detachment 5 times daily for one week. Time yourself—you should hit 8 seconds consistently. Focus on keeping your wrist straight to avoid strain.
Master One-Handed PIPA Removal for Emergencies
For PIPA models: Hook your forearm under the base’s front edge, thumb pressed firmly on the release button. Lift using leg strength while keeping your back straight. The seat should glide upward effortlessly.
For PIPA Lite models: Grip the carry handle with your index finger, pull the red lever with your middle finger, and pivot the seat toward your hip. This technique saves critical seconds if your other arm is holding a sick child.
Emergency One-Handed Nuna Car Seat Removal Protocol
In true emergencies (like smoke detection), prioritize speed over perfect form:
- Pull the release lever/button while lifting (normally discouraged but acceptable here)
- Grip the handle with both hands if possible, elbows locked
- Lift straight up then immediately cradle baby against your chest
- Verify baby’s airway before checking the seat
Never sacrifice baby safety for seat preservation—if the mechanism fails, cut harness straps with scissors to evacuate immediately.
When the Base Fails: What to Do If Nuna Mechanism Breaks
Complete release failure requires immediate action:
- Unbuckle baby first before attempting seat removal
- Remove the entire base with seat attached using LATCH straps
- Contact Nuna within 24 hours for free replacement (warranty covers manufacturing defects)
- Document the failure with video showing normal installation and removal attempts
Removing your Nuna car seat becomes effortless when you know your specific model’s release points and avoid common pitfalls. Remember the golden rule: Press the mechanism first, lift straight up, and never force resistance. For PIPA models, the gray button requires downward pressure; for Lite versions, the red lever pulls upward. Practice monthly maintenance to prevent 95% of removal issues—especially after snack spills or winter commutes. If your seat ever sticks, stop forcing it and call Nuna’s expert team instead. Within days of practicing these steps, you’ll detach your car seat faster than you buckle your own seatbelt, turning stressful moments into confident parenting wins. Keep this guide in your glove compartment for quick reference until the motion becomes second nature.


