
You’re standing curbside with your wiggling infant, suitcase in hand, and the Uber just arrived—only to realize you left your car seat base at home. This panic-inducing moment happens to parents daily, especially those navigating cities or traveling with babies. The immediate relief? Every infant car seat can be securely installed without its base using your vehicle’s seat belt system. Mastering this skill isn’t just convenient—it’s a critical safety necessity for urban parents and frequent travelers who rely on taxis, rideshares, or rental cars.
Learning how to install car seat without base properly transforms stressful travel moments into confident, safe journeys. This guide delivers the exact steps you need, verified by certified child passenger safety technicians, to secure your baby safely in any vehicle. You’ll discover why the center seat offers 43% better protection, how to identify and fix common installation failures, and the European belt path technique that creates rock-solid stability without a base—ensuring your child remains protected whether you’re catching a taxi across town or exploring a new city on vacation.
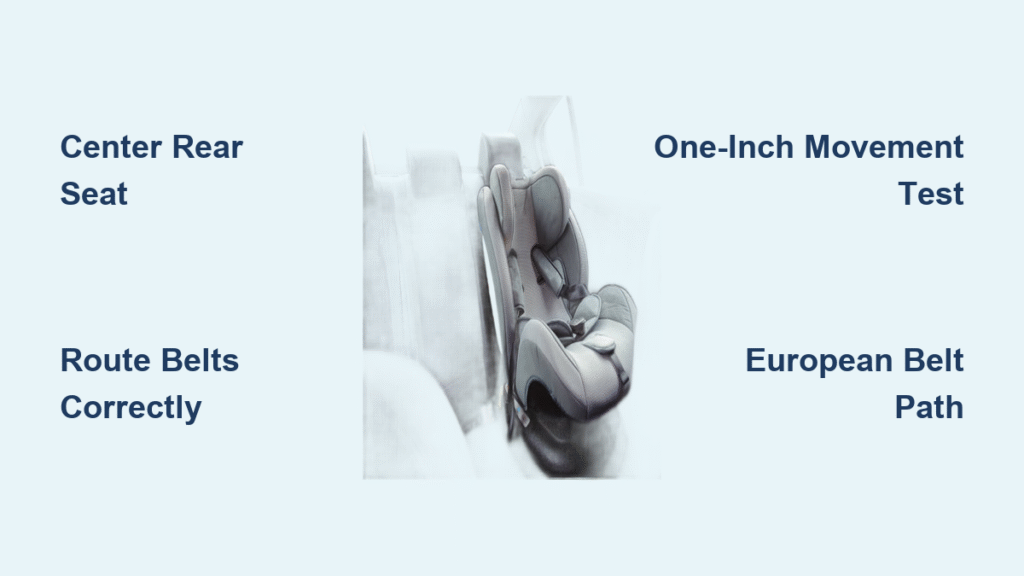
Center Rear Seat: Why It’s 43% Safer for Baseless Installation
The center rear position provides maximum crash protection, but don’t assume it’s always the best choice for baseless installation. Many vehicles feature center seats with pronounced humps, limited belt length, or awkward contours that prevent proper car seat contact. Before committing to any position, physically test the car seat’s fit—place it empty in the center and check if the seat belt reaches comfortably through the belt path with minimal slack.
When the center position proves problematic, both side rear seats remain excellent alternatives. Never install a rear-facing car seat in the front passenger seat—active airbags can cause catastrophic injury to infants during deployment. Ensure your chosen position offers a flat, stable surface without built-in cup holders or reclining mechanisms that could compromise installation integrity.
Remove Seat Covers & Test Belts Before Baseless Installation
Clear every obstacle between your car seat and vehicle seat before attempting installation. Strip away seat covers, decorative cushions, or aftermarket accessories that create dangerous gaps or prevent flush contact. These items compress during crashes, turning your baby’s safety system into a liability. The vehicle seat must provide direct, stable contact with the car seat base for maximum protection.
Test your seat belt system thoroughly before installation. Pull the belt fully out and allow it to retract slowly—modern vehicles typically engage automatic locking mode during this process. Listen for the distinctive clicking sound that confirms the locking mechanism is active. If the belt retracts freely without locking, you’ll need a lock clip (available for under $10 at auto parts stores) to secure the belt at proper tightness.
Route Seat Belts Correctly Without Base (Step-by-Step)
Position Your Infant Seat Facing Rearward
Place your car seat in the chosen position with the handle locked in its carry position (unless your manual specifies otherwise). Ensure the seat sits level—most models feature built-in level indicators showing the correct recline angle. For newborns, a more reclined position keeps airways open, while older infants can tolerate a slightly more upright angle.
Thread Belts Through Proper Pathway
Identify your car seat’s rear-facing belt path—typically marked with clear labels or color-coded guides near the base. Route the vehicle’s lap-shoulder belt through this path, ensuring the belt lies completely flat without twists. Twisted belts reduce strength by up to 50% and create dangerous pressure points during crashes.
Activate Seat Belt Locking Mechanism
Pull the entire seat belt out to its full extension, then allow it to retract slowly while maintaining downward pressure on the car seat. You’ll hear a clicking sound as the automatic locking mechanism engages. If your vehicle lacks this feature, position a lock clip within one inch of the latch plate to secure the belt at proper tightness.
Achieve Critical Installation Tightness

This step separates safe installations from dangerous ones. Press firmly on the car seat while pulling the seat belt tail to eliminate every bit of slack. The belt should press so tightly against the car seat that you cannot pinch any slack between your fingers. This often requires significant force—don’t be gentle during this critical safety step.
Pass the One-Inch Movement Test for Safety
Immediately test your installation by pushing the car seat at the belt path area with your non-dominant hand. The seat should not shift more than one inch in any direction. If movement exceeds this threshold, start over completely—this isn’t negotiable. Loose installations fail catastrophically in crashes, turning your baby into a dangerous projectile.
Recheck the recline angle after tightening, as the force often changes positioning significantly. Adjust towel or pool noodle placement under the base if needed to restore proper angle. Many parents skip this step, resulting in babies riding at dangerous angles that compromise airway safety.
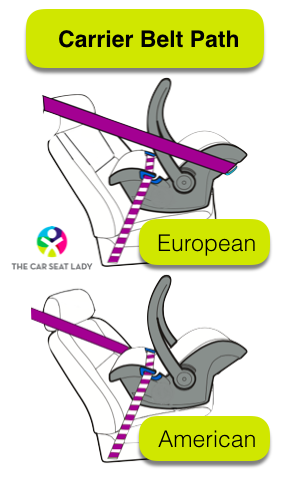
European Belt Path: Double Anchor Installation Technique
Car seats with European belt path features offer superior stability through dual anchor points. After completing standard installation steps, locate the additional belt path at the back of the seat—usually a slot near the top. Route the shoulder portion of the seat belt behind the entire car seat, then thread it through this secondary path.
This configuration creates two secure anchor points instead of one, dramatically reducing rotational forces during sudden stops or crashes. The seat feels noticeably more stable, with significantly less side-to-side movement. While not all car seats offer this feature, those that do provide enhanced safety for frequent baseless installations.
Harness Baby Correctly Without Bulky Clothing
Position harness straps at or below your baby’s shoulders for rear-facing seats. Tighten until you cannot pinch any slack at the shoulders—this usually feels uncomfortably tight to new parents, but loose harnesses are deadly in crashes. Position the chest clip level with your baby’s armpits—not on the belly or up near the neck.
Remove all bulky coats, snowsuits, or thick sweaters before buckling. These items compress during crashes, creating dangerous slack in the harness. Instead, dress your baby in thin layers and place blankets over the harness if additional warmth is needed. Never use aftermarket accessories like head supports unless specifically approved by your car seat manufacturer.
Troubleshoot Common Baseless Installation Failures
Fix Seat Belts That Won’t Lock Properly
If your vehicle lacks automatic locking retractors, purchase a dedicated seat belt lock clip. Position the clip within one inch of the latch plate for maximum effectiveness. Ensure the clip is specifically rated for car seat use—generic clips may not provide adequate security during crashes.
Eliminate Excessive Movement After Tightening
Check for twisted belts first—this common mistake creates hidden slack that prevents proper tightening. Next, verify you’re pulling tight at the correct angle—kneel in the car seat while pulling the belt to use your body weight effectively. Finally, ensure no seat covers or debris prevent flush contact between the car seat and vehicle seat.
Correct Dangerous Recline Angles
Most infant seats allow angle adjustment through built-in recline features or by adding rolled towels under the seat base. Measure the angle using your phone’s level app—rear-facing seats typically require 30-45 degrees of recline. Newborns need more recline to keep airways open, while older babies can ride more upright.
Practice Installation Before You Need It
Never attempt first-time baseless installation when rushed or stressed. Schedule dedicated practice sessions in your driveway, trying the installation both with and without your baby. Practice in different vehicles when possible—every car presents unique challenges. Time yourself during practice runs; most parents achieve secure installation in under three minutes with experience.
Document your successful setup with reference photos showing belt routing and final position. These images prove invaluable when installing in unfamiliar vehicles or when others need to replicate your work. Store these photos in your phone for instant access during travel emergencies.
Mastering how to install car seat without base transforms from emergency skill to daily confidence. With proper technique and practice, you’ll secure your baby safely in under three minutes, ensuring protection whether you’re hopping into a taxi across town or navigating airport transportation during family adventures. This critical skill provides peace of mind that your child remains protected regardless of which vehicle you’re using—turning potential travel disasters into smooth, safe journeys.


