
Installing a rear-facing car seat correctly is your child’s first line of defense in a vehicle collision. Yet even experienced parents often make critical errors that compromise safety—like using incompatible installation methods or mispositioning harness straps. With proper technique, you can ensure your car seat becomes a reliable protective cocoon rather than a false sense of security. This guide cuts through confusing manuals to deliver actionable steps for flawless rear-facing installation, verified by certified child passenger safety standards.
You’ll master both seat belt and LATCH installation methods while learning to avoid the top mistakes that inspectors see daily. By the end, you’ll confidently perform the 1-inch test, position your seat at the optimal angle, and know exactly when to transition to forward-facing mode. Let’s transform anxiety into assurance with a system that works for your specific vehicle and car seat model.
Secure Professional Installation Support Before You Begin
Get Hands-On Technician Verification
Skip the guesswork by scheduling a free inspection with a Certified Child Passenger Safety Technician (CPST) through Safe Kids Worldwide coalitions. These experts identify hidden risks like incompatible vehicle anchor points or incorrect harness routing that manuals rarely highlight. During appointments—which often last 20-30 minutes—they demonstrate proper techniques while you practice installations, ensuring you leave with confidence in your skills. Many fire departments, police stations, and hospitals offer these services weekly, so search “CPST near me” for same-day help if you’re struggling with installation.
Don’t rely solely on dealership staff for installation help—they typically lack specialized car seat training. Instead, bring both your vehicle and car seat to inspection events where technicians test compatibility using your actual equipment. If you’ve recently switched vehicles or car seats, make this your non-negotiable first step before transporting your child.
Prepare Your Manuals Like a Pro
Gather two critical documents before touching any straps: your vehicle’s owner manual and car seat instruction booklet. Flip directly to the “Child Restraints” section in your vehicle manual—it contains diagrams showing approved seating positions with LATCH anchors (often marked by metal tabs between seat cushions). Simultaneously, locate your car seat’s installation chapter, noting model-specific requirements like belt path arrows or weight limits.
Never assume installation is identical across car seats—even seats from the same brand may have different routing paths. Block 45 minutes of uninterrupted time, as rushing causes 70% of common errors like twisted seat belts or loose LATCH straps. Keep both manuals open beside you during installation; you’ll reference them at least six times for anchor locations, weight thresholds, and angle indicators.
Choose Your Vehicle’s Safest Seating Position

Identify Approved Back Seat Locations
Children under 13 must ride in the back seat—that’s non-negotiable for crash protection. But not all back seats work for car seats: your vehicle manual specifies which positions have LATCH anchors or seat belt lockability. For example, many SUVs disable LATCH in the center seat but approve seat belt installation there. Never install near active rear airbags—some luxury vehicles have them hidden in headrests. Check for anchor labels (usually “LATCH” or anchor symbols) between seat cushions before committing to a position.
If installing multiple seats, prioritize placing the rear-facing seat behind the passenger seat. This creates maximum distance from potential side-impact zones while allowing front passengers to monitor your child. Test positions with the car seat empty first—some vehicles require front seats moved 3+ inches forward to accommodate rear-facing bases without compromising adult seating.
Solve Tight Space Challenges Immediately
When the car seat base crowds front passengers, never recline the front seat excessively—this reduces critical crumple zones in crashes. Instead, move the front seat forward incrementally until the car seat base sits flush against the vehicle seatback. If your vehicle lacks center LATCH anchors (common in older models), switch to seat belt installation for that position—do not borrow anchors from side positions as this violates safety standards.
For narrow rear seats, choose a compact infant seat (typically 16-17″ wide) over bulkier convertibles. Models like the Graco SnugRide 35 fit 3+ inches narrower than average. If straps still interfere with adjacent seats, angle the car seat base slightly outward—most allow 5-10 degrees of rotation without compromising security.
Execute Flawless Seat Belt or LATCH Installation
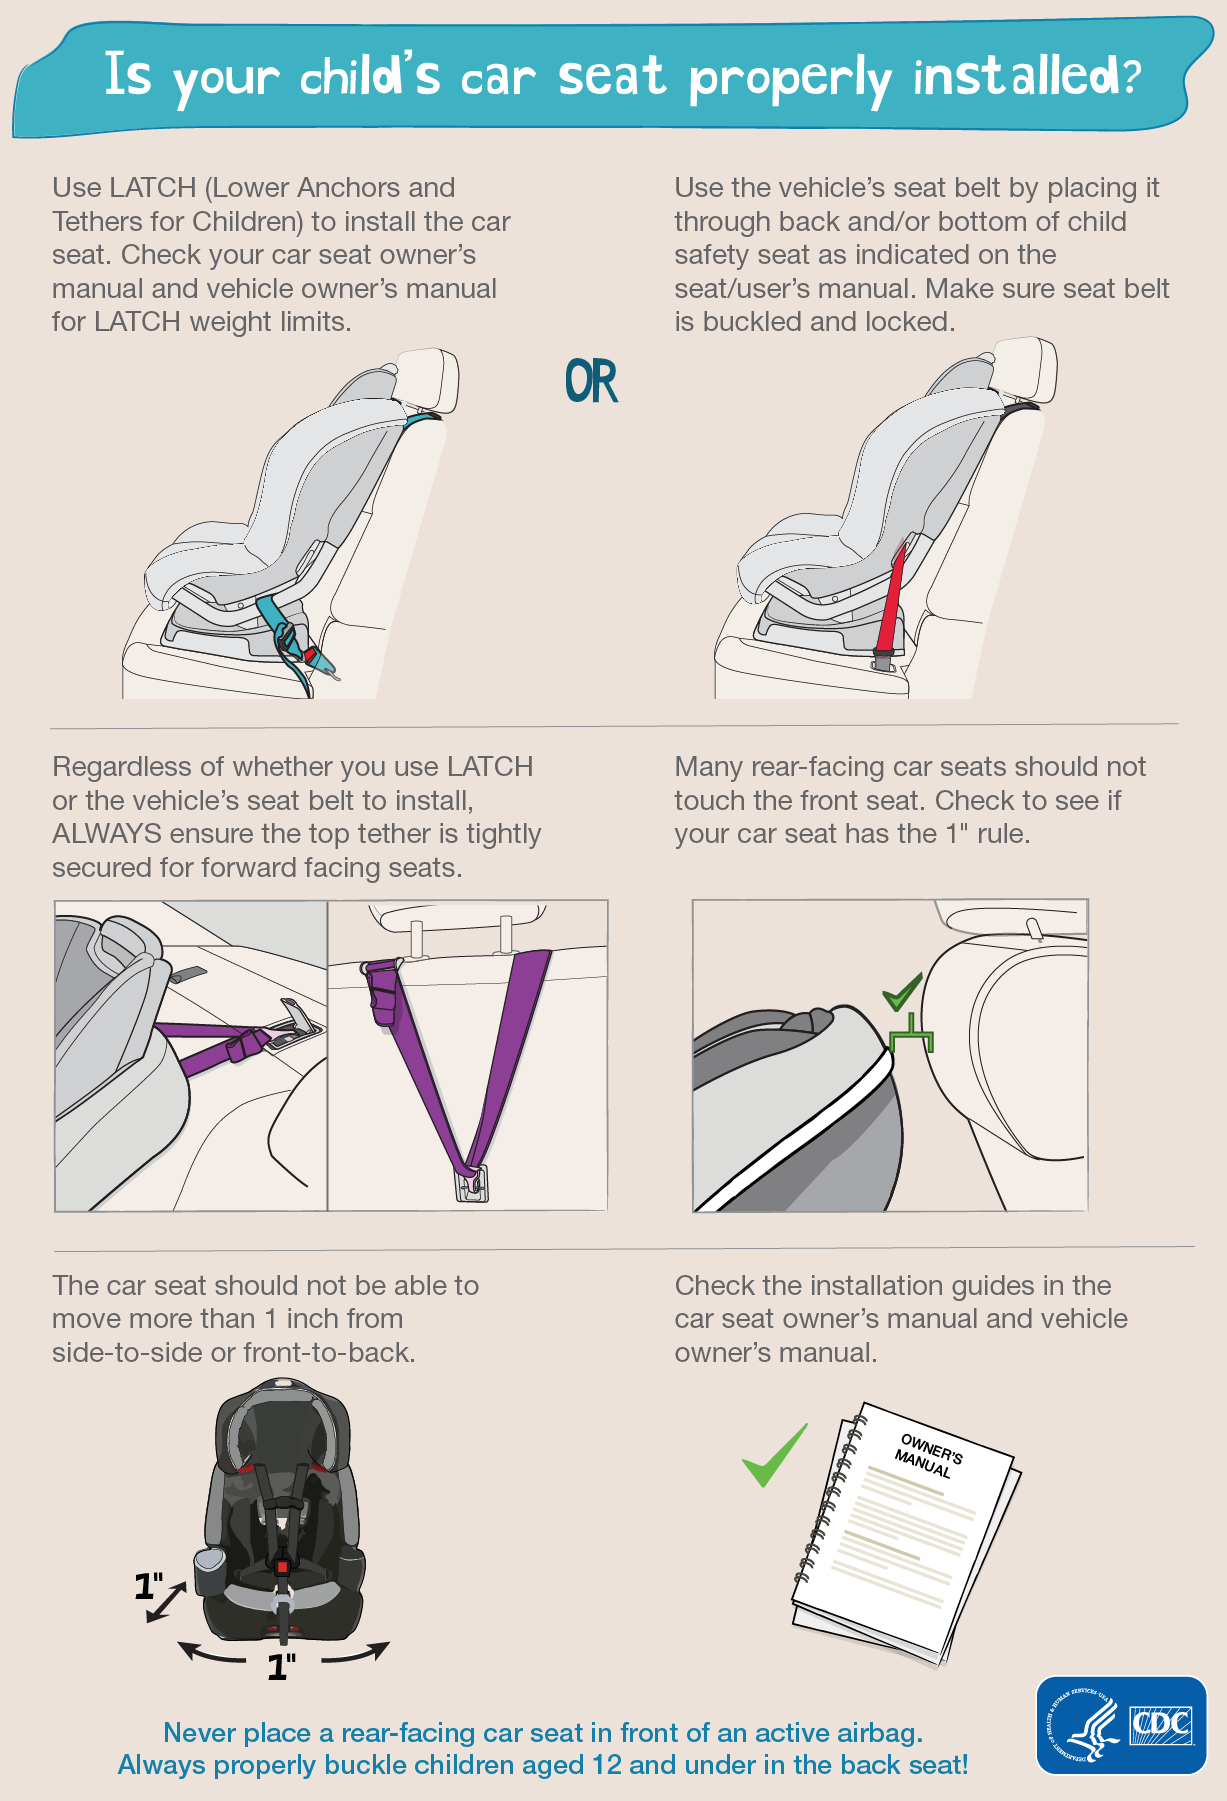
Install Using Your Vehicle’s Seat Belt Correctly
Thread the vehicle seat belt through the rear-facing belt path on your car seat—never use the forward-facing path, which is higher and creates dangerous tipping risks. You’ll find embossed arrows showing the exact route; most seats require the belt to run under the base’s support leg. Buckle the seat belt, then pull the shoulder portion fully out until it clicks (engaging the vehicle’s lock mode). While pressing down hard on the car seat base, slowly feed the belt back in to remove slack. Finish by tugging the release button strap to confirm it’s locked.
Critical pro tip: After installation, check for seat belt “give” by pressing your knee into the base while pulling the belt. If it feeds out more than ½ inch, reinstall—this indicates improper lock mode engagement. Never add seat protectors or aftermarket locking clips unless explicitly approved in your car seat manual.
Master LATCH System Installation with Precision
Locate lower anchors using your vehicle manual’s diagram—they’re metal bars hidden in seat crevices, often marked with yellow tags. Connect your car seat’s lower hooks until you hear distinct double-clicks. Now pull the LATCH strap (usually at the seat’s front) while simultaneously pressing down on the car seat base with your hip. Tighten until the strap has zero slack—most require 40+ pounds of force. Stop using LATCH when combined car seat + child weight exceeds 65 pounds (check your seat’s label for exact threshold).
Warning: If anchors feel loose or require excessive force to connect, stop immediately. This indicates worn vehicle anchors—switch to seat belt installation. Always stow unused LATCH straps in their storage slots to prevent damage during crashes.
Verify Installation with Critical Safety Tests

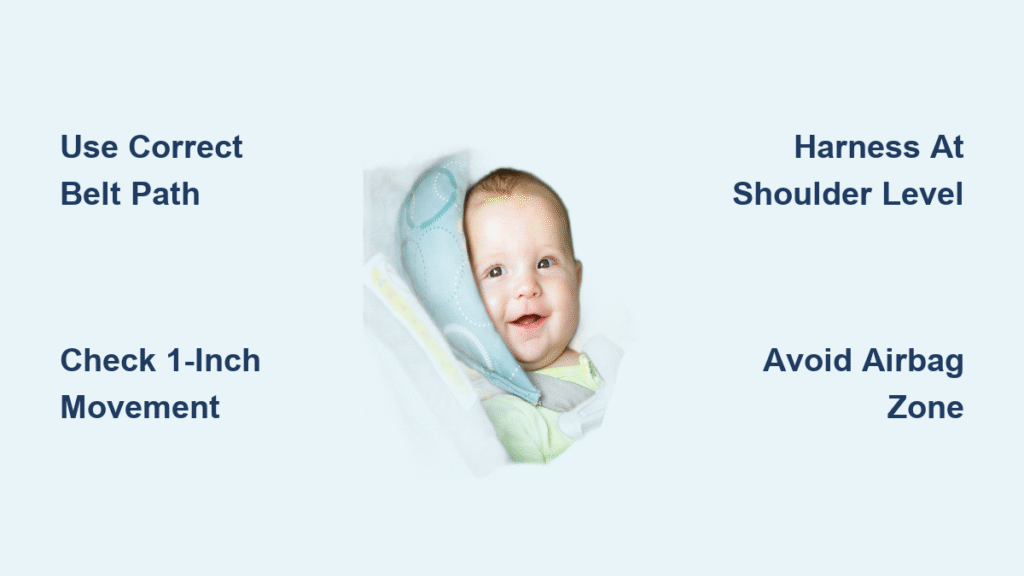
Pass the 1-Inch Movement Test Reliably
Grip the car seat at the belt path (where seat belt/LATCH runs through the base) and shake vigorously side-to-side and front-to-back. Proper installation allows less than 1 inch of movement at this exact point. Movement at the top of the seat is normal and acceptable. If it exceeds 1 inch, fully loosen and restart the installation—adding pool noodles or towels under the base invalidates safety certifications.
Common failure point: Installers often test movement at the car seat’s handle instead of the belt path. This gives false security since handles naturally wiggle. Always test where the securing system contacts the vehicle seat.
Confirm Correct Angle and Harness Position
Check your car seat’s built-in level indicator—bubbles should align within the green zone or lines should be parallel. For newborns, recline to 45 degrees; adjust using the seat’s footplate or a tightly rolled towel under the base (never under the child). Rear-facing harness straps must emerge at or below shoulder level—using higher slots risks ejection in crashes. Tighten straps until you cannot pinch excess webbing at the shoulder, positioning the chest clip at armpit height.
Pro tip: Place a rolled receiving blanket along the car seat’s sides (not under baby) to prevent head slump. Never add aftermarket head supports—they alter crash forces.
Eliminate Dangerous Installation Mistakes
Fix Critical Errors That Compromise Safety
The top mistake inspectors find? Using LATCH anchors and seat belts simultaneously—a practice that creates explosive pressure points during crashes. Choose one method exclusively. Another frequent error: positioning rear-facing harness straps above shoulders, which allows dangerous upward movement in collisions. Always route harnesses through the lowest slots for infants.
Never install rear-facing seats in front of active airbags—even “depowered” versions can cause fatal injuries. If your only back seat has airbags (common in pickup trucks), consult a CPST about vehicle-specific solutions like airbag cutoff switches.
Troubleshoot Center Seat Installation Issues
Most vehicles lack center LATCH anchors, requiring seat belt installation instead. If your manual approves center seating, thread the seat belt through the lower anchors (often a loop under the seat) and lock it using your vehicle’s specific method (usually pulling the belt fully out). For narrow center positions, choose a car seat with a narrow base footprint—models like the Chicco Fit2 measure under 16 inches wide.
When the base won’t recline sufficiently, use the car seat’s built-in angle adjuster rather than wedging objects underneath. If your vehicle seat is too upright, check if folding the front passenger seat back slightly creates more recline room (without blocking air vents).
Maintain Peak Safety with Ongoing Checks
Perform Monthly Installation Audits
Re-test the 1-inch movement rule monthly as your child grows heavier. Check harness tightness weekly—straps stretch over time, requiring re-tightening. When your child’s head nears the car seat’s top (usually around 12-15 months), transition to a rear-facing convertible seat with higher height limits. Most accommodate rear-facing up to 40-50 pounds—follow the “2 and up” rule for maximum spinal protection.
Before road trips, verify all components: ensure LATCH straps aren’t frayed, buckles click securely, and padding isn’t compressed. Clean seats with mild soap only—harsh chemicals degrade strap strength.
Plan Your Forward-Facing Transition Strategically
Keep your child rear-facing until they hit the car seat’s maximum height or weight limit—not just the minimum. When transitioning, always use the top tether with seat belt installation (even rear-facing seats lack tether use). Forward-facing harnesses must sit at or above shoulder level, with the chest clip positioned at collarbone height.
Pro tip: Install the forward-facing seat using the same method (LATCH or seat belt) you used rear-facing—switching methods introduces new error risks. Consult your vehicle manual for tether anchor locations, which differ from lower anchors.
Mastering rear-facing car seat installation transforms overwhelming anxiety into empowering confidence. By prioritizing certified technician verification, respecting vehicle-specific limitations, and rigorously testing your work, you create an unshakeable safety foundation for every journey. Remember: that 1-inch test isn’t just a guideline—it’s the difference between secure protection and preventable risk. When in doubt, visit a Safe Kids inspection event; your child’s safety is worth the 20-minute appointment. Start today, and drive with the peace of mind that comes from knowing you’ve built the ultimate mobile sanctuary for your most precious passenger.


