
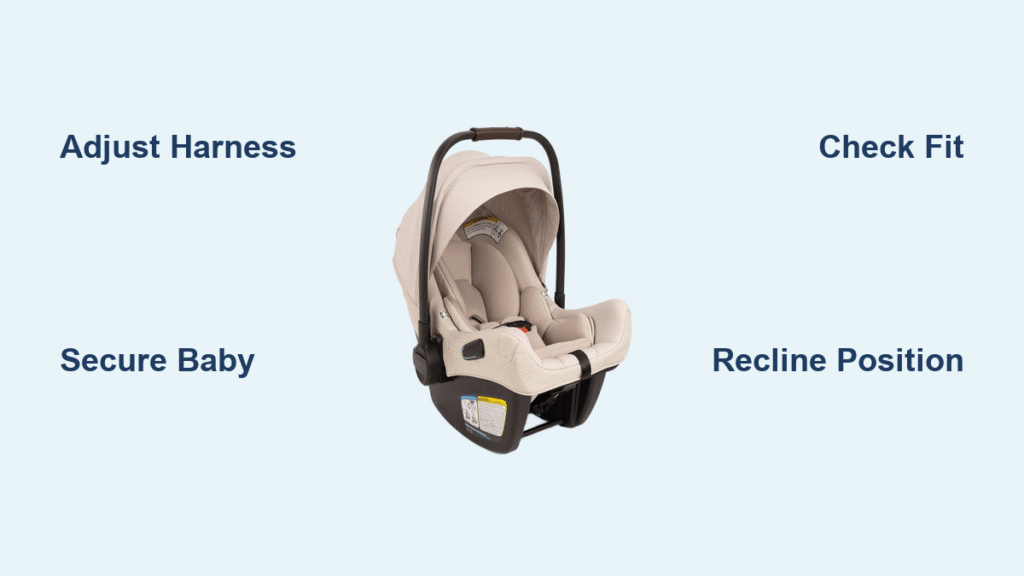
Transporting your little one can feel overwhelming, especially when you’re figuring out how to put baby in Nuna Pipa car seat for the first time. As a new parent, you might worry about ensuring everything is snug and secure without causing discomfort—it’s a common frustration that leaves many second-guessing their setup. The good news? A quick five-minute harness adjustment and proper positioning can get your baby safely buckled in, giving you peace of mind on every drive.
In this comprehensive guide, we’ll go beyond the basics to cover everything from preparation and step-by-step instructions to troubleshooting common issues and pro tips for long-term use. Whether you’re dealing with a wiggly newborn or adjusting for a growing infant, you’ll walk away confident in securing your baby in the Nuna Pipa car seat. By the end, you’ll have multiple methods to ensure a safe, comfortable fit every time, backed by Nuna’s safety standards and expert recommendations.
Safety First: Key Considerations Before Securing Your Baby
Before diving into how to put baby in Nuna Pipa car seat, prioritize safety—it’s non-negotiable for your infant’s protection. The Nuna Pipa series (including models like the Pipa RX, Lite, or Aire RX) is designed for rear-facing use from birth up to 32-35 pounds or 32 inches, depending on the model. Always check your specific model’s manual, as features like the Sky Drape or load leg can vary.
Warning: Never leave your baby unattended in the car seat, even for a moment. Improper installation can lead to serious injury in a crash. The National Highway Traffic Safety Administration (NHTSA) recommends that car seats be installed correctly 100% of the time—double-check yours meets federal standards with the included certification label.
Preparation Steps
Start by ensuring the car seat is properly installed in your vehicle. If it’s not already secured:
1. Place the Nuna Pipa rear-facing on the vehicle’s back seat (center position is ideal for safety).
2. Use the LATCH system or seat belt as per Nuna’s guidelines—tighten until the seat doesn’t move more than 1 inch side-to-side or front-to-back at the belt path.
3. Level the base using the built-in indicators; the anti-rebound bar or load leg should be extended if applicable.
4. This prep takes about 10-15 minutes and is crucial before focusing on the baby.
Gather your baby gently from a safe spot, like a bassinet, and avoid rushing. Dress them in weather-appropriate clothing—thin layers under the harness work best to prevent bunching.
Tools and Materials Needed
The Nuna Pipa is user-friendly, requiring minimal extras for buckling in your baby. Here’s what you’ll typically need:
| Item | Quantity | Specifications |
|---|---|---|
| Nuna Pipa Car Seat | 1 | Rear-facing infant seat (e.g., Pipa RX with RELX base) |
| Harness Clips/Covers | Included | Soft, adjustable for infant comfort |
| Optional Insert/Newborn Pillow | 1 | For babies under 11 pounds; removable for older infants |
| Clean Blanket or Swaddle | 1 | Lightweight, to keep baby cozy without bulk |
| Mirror (Optional) | 1 | Rear-view for monitoring baby during drives |
No special tools are required for daily use, but keep the user manual handy for model-specific details.
Step-by-Step Guide to Securing Your Baby in the Nuna Pipa Car Seat
Now, let’s get to the heart of how to put baby in Nuna Pipa car seat. This process should take 2-5 minutes once you’re familiar with it. We’ll break it into phases: adjusting the seat for your baby’s size, positioning them correctly, and securing the harness. Always test the fit after buckling—your baby’s chest should be 1-2 fingers’ width from the harness clip.
Phase 1: Adjust the Car Seat for Your Baby’s Size
Proper adjustment ensures the harness fits without slack or pressure points.
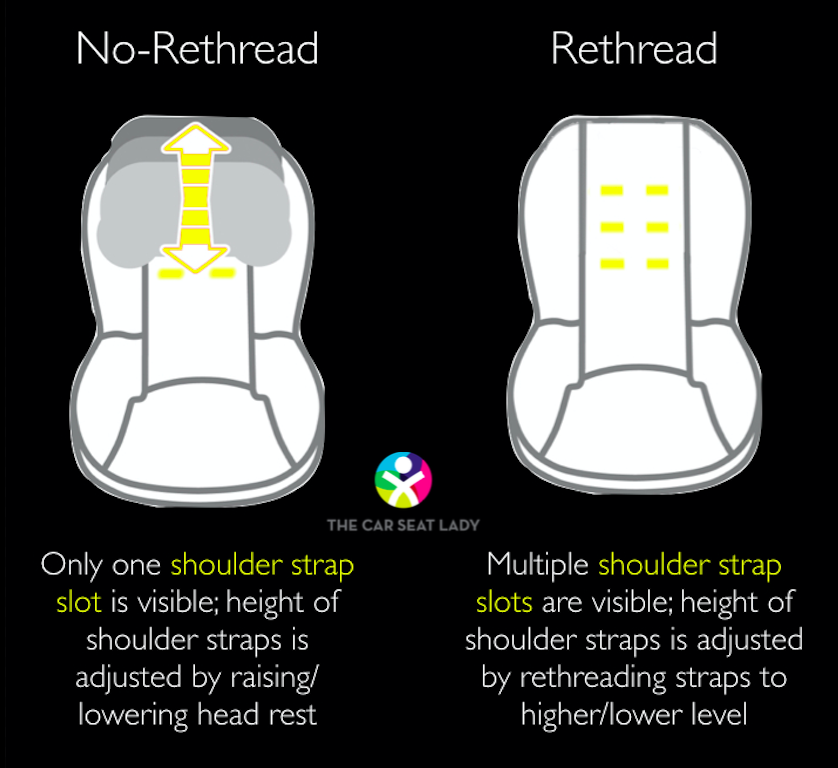
1. Recline and Height Setup: Confirm the seat is in the correct recline position (newborns need the most upright for head support). Slide the shoulder straps to match your baby’s height—straps should come from the lowest slots for infants under 1 year.
2. Harness Adjustment: Loosen the harness by pulling the adjustment strap at the front (usually red or labeled). The harness should lay flat and open wide.
3. Infant Insert Check: For newborns (4-11 pounds), insert the removable pillow or body support behind and under your baby. Remove it once they outgrow it for a snug fit without extra padding.
Important: If your baby has outgrown the insert, consult the manual—over-padding can reduce crash protection.
Phase 2: Position Your Baby Comfortably
Gently place your baby into the seat to minimize fussing.
1. Support the Head and Neck: Cradle your baby’s head with one hand while lowering them feet-first into the seat. Their back should rest fully against the seat’s shell, bottom flat on the seat bottom.
2. Leg Position: Bend their legs slightly at the knees; the Nuna Pipa’s design allows natural curling to prevent strain.
3. Arms Placement: Let arms fall naturally to the sides or across the body if swaddled lightly. Avoid crossing arms over the chest, as this interferes with the harness.
Tip for Wiggle-Worms: Distract with a soft toy or pacifier during placement. If your baby arches their back, they might need more recline—adjust and try again.
Phase 3: Secure the Harness and Final Checks
Buckle up to create a five-point harness system, the gold standard for infant safety.
1. Feed the Arms and Body Through: Guide each arm through the shoulder straps, ensuring the straps lie flat on the shoulders without twists.
2. Buckle the Crotch and Waist Straps: Align the leg openings, then snap the metal buckle tongues into the central buckle. You should hear a click—tug firmly to confirm it’s locked.
3. Tighten the Harness: Pull the front adjustment strap slowly and evenly until the harness is snug. Pinch test the chest area: You shouldn’t pinch any fabric between your fingers and your baby’s body. The clip should sit at or just below the collarbone.
4. Adjust the Chest Clip: Slide the chest clip up or down so it’s level with your baby’s armpits.
Time Estimate: This phase takes 1-2 minutes. For models with magnetic buckles (like the Pipa Aire RX), the process is even quicker.
Post-Installation Testing
Once secured, verify everything:
– Tug on the harness from all angles—no more than 1 inch of movement.
– Check for even strap tension; unevenness can shift in a crash.
– Ensure the baby’s airways are clear and they’re not overheated.
– Drive a short test route (under 5 minutes) while monitoring via mirror. If anything feels off, pull over and readjust.
If the harness won’t tighten, it might be twisted—unbuckle and redo Phase 3.
Common Mistakes and How to Avoid Them
Even with the Nuna Pipa’s intuitive design, pitfalls happen. Here’s how to sidestep them during how to put baby in Nuna Pipa car seat:
– Twisted Straps: Always run your fingers along the straps to flatten them before buckling.
– Loose Harness: Parents often underestimate tightness—aim for “snug but not pinching” skin.
– Incorrect Recline: Use the level indicator; a tilted seat reduces safety by up to 50%, per NHTSA studies.
– Over-Dressing: Bulky coats compress in crashes; layer inside the harness instead.
Addressing these early prevents frustration and ensures compliance with safety regs.
Pro Tips for Effortless Baby Securing in the Nuna Pipa
To make how to put baby in Nuna Pipa car seat a breeze every time, try these expert-recommended strategies:
– Practice Without Baby: Set up the seat empty a few times to build muscle memory—takes just 5 minutes.
– Use the Canopy for Calm: The Pipa’s UPF 50+ canopy can shade and soothe a fussy baby during buckling.
– Temperature Check: Feel the seat fabric before placing your baby; if it’s too hot or cold, use a seat cover.
– Growth Monitoring: Weigh and measure your baby monthly—the Pipa’s weight limit is clear, but switch to forward-facing only after 2 years and per guidelines.
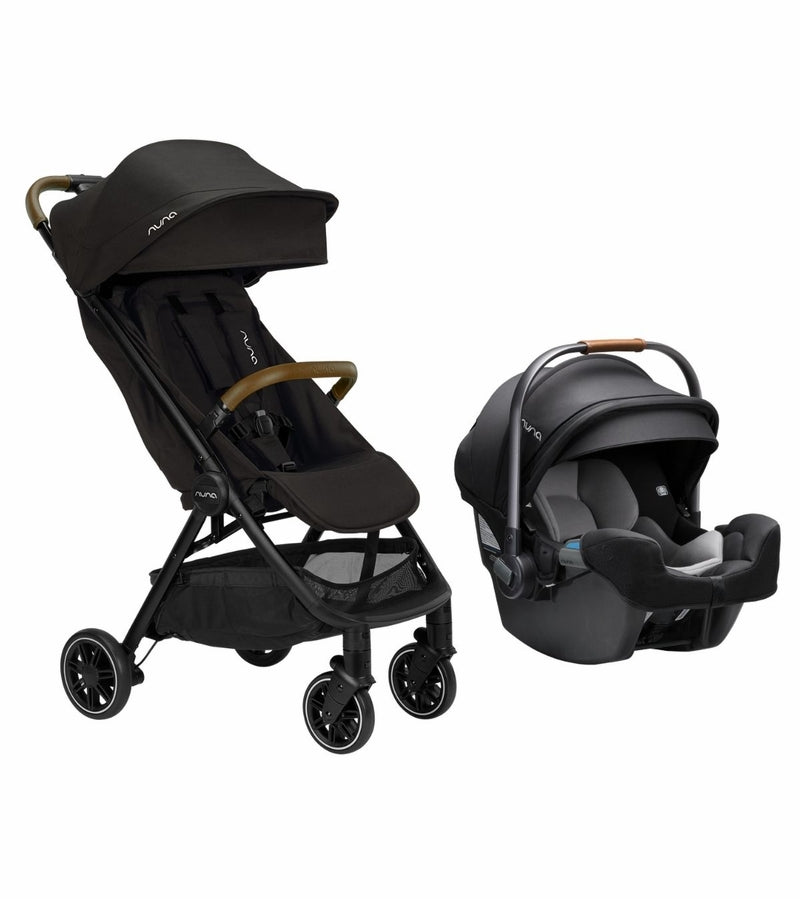
– Travel System Integration: If using with a Nuna stroller, practice the click-in for seamless transitions.
– Cleaning for Comfort: Wipe the harness weekly with a damp cloth; a clean seat keeps babies happier.
– Avoid Aftermarket Add-Ons: Stick to Nuna-approved accessories to maintain warranty and safety.
These tweaks can cut your setup time in half and optimize the seat’s Merino wool or organic inserts for breathability.
When to Seek Professional Help

While the Nuna Pipa is DIY-friendly, some situations call for experts:
– Signs You Need Help: The seat rocks excessively when installed, harness adjustments stick, or your vehicle has unique seating (e.g., captain’s chairs).
– Finding a Provider: Look for certified Child Passenger Safety Technicians (CPSTs) via Safe Kids Worldwide or Nuna’s website. Retailers like BuyBuy Baby often offer free inspections.
– Cost Ranges: A professional install check costs $20-50; full vehicle fitting might run $100+.
– Warranty Notes: Nuna’s 2-year warranty covers defects but not misuse—document your setup photos for claims.
If you’re unsure, schedule a free car seat inspection at a local fire station or hospital.
FAQ
Q: How do I know if the harness is too loose when putting my baby in the Nuna Pipa car seat?
A: Perform the pinch test: Try to pinch the harness strap over your baby’s collarbone or thighs. If you can grab fabric, it’s too loose—tighten further. The harness should hug the body without gaps, allowing only a small roll of fabric under your fingers. This ensures optimal crash protection, as loose straps can allow up to 2 inches of dangerous movement.
Q: Can I use the Nuna Pipa car seat for newborns right away?
A: Yes, it’s suitable from 4 pounds with the infant insert. Position the head even with or above the top of the seat shell, and use the lowest harness slots. For preemies, consult your pediatrician, as they may need extra support.
Q: What if my baby cries every time I put them in the Nuna Pipa?
A: Crying is common due to the enclosed feel—try buckling during a calm moment, like after feeding. Warm the seat with a blanket first, and ensure the recline supports their head fully. If it persists, check for irritation from straps; soft covers can help.
Q: How often should I replace the Nuna Pipa car seat?
A: Replace after any crash, or every 7-10 years from manufacture (check the expiration on the label). The Pipa’s durable materials last, but fading or wear signals time for an upgrade.
Q: Is the Nuna Pipa compatible with all strollers for easy transfer?
A: It’s designed for Nuna’s travel systems (like the MIXX Next), but adapters work with brands like Uppababy or Bugaboo. Always verify compatibility on Nuna’s site to avoid wobbly connections.
Q: What’s the weight limit for putting a baby in the Nuna Pipa car seat?
A: Up to 35 pounds and 32 inches for most models (e.g., Pipa Lite is 32 pounds). Monitor growth closely—transition to a convertible seat when nearing limits for continued rear-facing safety.
Q: Can I install the Nuna Pipa without the base?
A: Yes, using the vehicle’s seat belt for European belt path installation. It’s secure for taxis or secondary cars, but the base provides easier LATCH use. Tighten the belt firmly and lock it off.
Enjoy Safe Travels with Your Nuna Pipa Setup
With this guide on how to put baby in Nuna Pipa car seat, you’re equipped for secure, stress-free rides:
– Thorough preparation and adjustment for a custom fit
– Detailed steps for positioning and harnessing
– Testing methods to confirm safety every time
– Pro tips and FAQs to handle real-world challenges
Following these instructions not only meets Nuna’s high standards but also aligns with AAP and NHTSA guidelines for infant transport. Take a deep breath—you’ve got this. Your baby deserves the safest ride possible, and now you can provide it confidently.
Have you mastered buckling your little one into the Nuna Pipa? Share your tips or questions in the comments below—we’d love to hear how it went! If issues persist, describe your setup for tailored advice.


