
Installing an infant car seat for the first time can feel overwhelming, especially with the weight of your baby’s safety on the line. If you’re a new parent staring at straps, bases, and LATCH systems, you’re not alone—many feel the same anxiety. The good news is that properly installing an infant car seat is straightforward when done right, and it can take as little as 15-20 minutes with the right steps. In this guide, we’ll walk you through how to install an infant car seat securely to keep your little one protected on every ride.
Beyond the basics, this comprehensive how-to will cover everything from choosing the right seat and preparing your vehicle to advanced troubleshooting and long-term tips. By the end, you’ll have the confidence to handle rear-facing installations like a pro, ensuring compliance with safety standards from organizations like the National Highway Traffic Safety Administration (NHTSA). Whether you’re dealing with a sedan, SUV, or using the seat belt versus LATCH method, we’ll provide multiple options to fit your setup, so you can drive away worry-free.
What You’ll Need for Infant Car Seat Installation
Before diving in, gather the essential tools and materials. Most infant car seats come with built-in instructions, but having these on hand ensures a smooth process. Remember, always refer to your specific model’s manual—brands like Graco, Chicco, or Evenflo may have slight variations.
Here’s a quick checklist in table form for clarity:
| Item | Quantity | Specifications |
|---|---|---|
| Infant Car Seat | 1 | Rear-facing only, with 5-point harness; weight/height limits typically 4-35 lbs and up to 32 inches |
| Car Seat Base (if included) | 1 | Compatible with your model; for LATCH or seat belt installation |
| Vehicle Owner’s Manual | 1 | Check for LATCH anchors and seat belt compatibility |
| LATCH Connectors or Seat Belt | N/A | Use LATCH for vehicles 2002+; seat belt as alternative |
| Locking Clip (if needed) | 1 | For seat belt installations to prevent slack; often included with seat |
| Level Indicator Tool | 1 | Built into most seats; or use a separate bubble level app on your phone |
| Wrench or Screwdriver Set | 1 set | For tightening base adjustments; torque wrench optional for precision |
| Towel or Pool Noodle | 1-2 | For leveling on uneven seats; cut to 2-3 inches thick |
| Safety Vest or Cover | Optional | To protect seat during installation in dirty areas |
Important: Only use products approved by the NHTSA—look for the federal certification label on the seat. Avoid second-hand seats unless you know their full history, as expired or damaged ones (over 6-10 years old) are unsafe.
Preparing Your Vehicle and Safety Considerations
Proper preparation is key to a secure install and prevents common pitfalls like loose fits or improper angles. Start by parking your vehicle on a flat surface, engine off, and in park. Remove any clutter from the back seat to give yourself space—aim for the rear passenger side for easiest access.
Safety First: Essential Precautions
Child car seat safety isn’t just about installation; it’s about ongoing vigilance. According to the American Academy of Pediatrics (AAP), rear-facing seats reduce injury risk by up to 70% for infants. Here’s what to watch for:
– Never install in the front seat: Airbags can be deadly for babies. Always use the back seat.
– Check vehicle compatibility: Not all cars have LATCH systems in every position—consult your manual.
– Avoid extreme temperatures: Install in moderate weather (50-90°F) to prevent harness issues from heat or cold.
– Two-person install recommended: If possible, have a helper to hold the seat steady.
– Warning: If your vehicle has side curtain airbags, ensure the seat doesn’t interfere—test by reclining seats if needed.
Pre-Installation Checks
- Inspect the car seat for damage: Look for cracks, frayed straps, or expiration dates (usually 6-10 years from manufacture).
- Read both manuals: Your car’s and the seat’s—cross-reference LATCH weight limits (child + seat under 65 lbs total).
- Clean the area: Wipe down seat belts and anchors to remove debris that could cause slippage.
- Test fit without securing: Place the seat in position to gauge angle (aim for 30-45 degrees recline for newborns).
This prep phase should take 5-10 minutes and sets you up for success.
Step-by-Step Infant Car Seat Installation Process
Now, let’s get to the core: how to install an infant car seat. We’ll break it into phases, covering both LATCH and seat belt methods. The goal is a rock-solid fit—no more than 1 inch of movement at the belt path. Time estimate: 15-30 minutes total.
Phase 1: Positioning the Seat
Rear-facing is the only way for infants—keep them facing the back until at least age 2 or the seat’s max limits.
- Place the base (if using one) or carrier on the vehicle seat, centered in the chosen position.
- Adjust the recline: Use the seat’s level indicator. For newborns, add a rolled towel or pool noodle under the front base edge to achieve 30-45 degrees—remove it after for older babies.
- Thread the LATCH straps or seat belt through the designated paths on the base/carrier, per the manual.
– Pro Tip: Pull belts taut but not locked yet.
If your seat lacks a base (like some travel systems), secure the carrier directly.
Phase 2: Securing with LATCH System
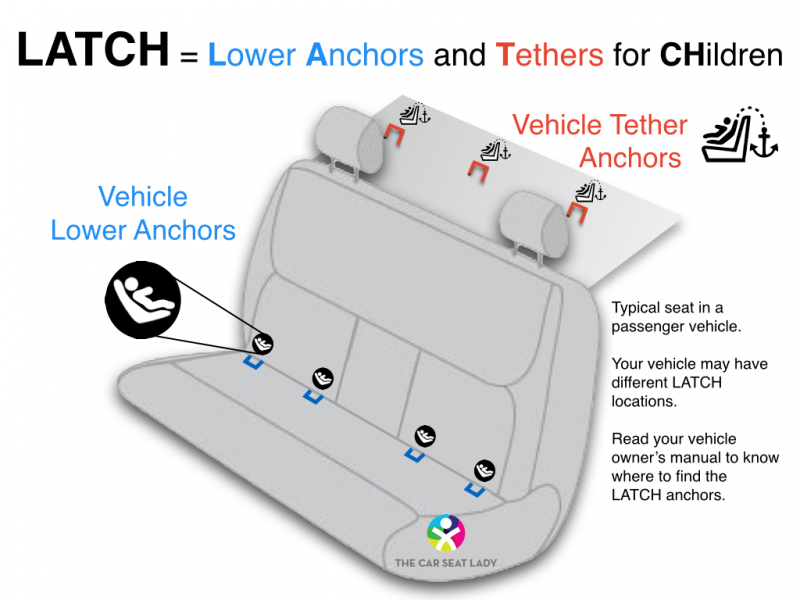
LATCH (Lower Anchors and Tethers for Children) is the preferred method for most vehicles built after 2002—it’s quicker and more reliable than belts.
Diagnosing LATCH Fit
- Locate the lower anchors: Metal bars between the seat cushions, usually marked with icons.
- Ensure your seat’s connectors clip on firmly—hear a “click.”
Installation Steps
- Attach the LATCH connectors to the vehicle anchors, wrapping straps around the base if required.
- Pull the straps to tighten: Use your full body weight, pushing down on the seat while yanking. It should be flush against the vehicle seat.
- Check the top tether: If your seat has one, route it to the rear anchor point (often in the trunk or seatback) and clip securely. Tighten until snug.
- Wiggle test: Grasp the seat at the belt path and shake side-to-side and front-to-back. Movement over 1 inch means redo it.
- Lock it in: Most LATCH systems self-lock; if not, use the locking clip.
Warning: LATCH isn’t suitable for heavier kids over 35-40 lbs total—switch to seat belt then.
Phase 3: Securing with Vehicle Seat Belt
If LATCH isn’t available or compatible (e.g., center seat), use the seat belt method. This works in any vehicle and is just as safe when done correctly.
Steps for Seat Belt Installation
- Buckle the seat belt through the car’s path on the base/carrier, ensuring no twists.
- Put the belt in lock mode: For most modern cars, pull the belt all the way out to activate the locking mechanism (or use the lock-off on the seat).
- Tighten firmly: Push down on the seat with one hand while pulling the belt tight with the other. Add knee pressure for extra force.
- Insert the locking clip (if provided): Place it 1 inch from the buckle to prevent slack—crucial for belt stretch.
- Perform the wiggle test again: Less than 1 inch movement is the gold standard.
- Double-check angle: Re-level if needed.
Time Saver: Practice on a dry run without the baby to build speed.
Phase 4: Installing the Infant Carrier into the Base
Once the base is secure, snap the carrier in.
- Align the tabs: Lower the carrier straight down onto the base until it clicks.
- Tug upward firmly: Ensure it doesn’t detach—most have visual indicators (green/red lights).
- Adjust harness: Set straps at or below baby’s shoulders for rear-facing; chest clip at armpit level.
Post-Installation Testing and Troubleshooting
After installation, verify everything before buckling in your baby. Drive a short test route (under 5 mph) to check for shifts.
Quick Testing Checklist
- Recline check: Use the level tool—adjust with built-in recline foot if off.
- Harness fit: Straps snug but not pinching; baby’s head doesn’t flop forward more than 2 inches.
- Movement test: Shake vigorously—secure if it feels like part of the car.
- Airbag interference: Ensure no contact with dashboard or sides.
Common Troubleshooting Issues
If it’s not secure:
– Loose fit: Retighten straps or add the locking clip. For uneven seats, use a towel shim.
– No click on base: Clean connectors; try wiggling while pressing down.
– Angle wrong: Reposition the pool noodle or check vehicle seat slope—SUVs often need more adjustment.
– Belt won’t lock: Consult your car manual for the specific locking method (some require a full pull-out).
– Still wobbly after tries? Get a free inspection at a certified station—find one via NHTSA’s website (nhtsa.gov).
If issues persist, variations like leather seats (slippery) or worn belts may require professional tweaks.
Pro Tips for Optimal Infant Car Seat Use
Go beyond the basics with these expert insights from certified child passenger safety technicians (CPSTs):
– Rotate seats annually: Even if unused, check for wear—straps can degrade from sun exposure.
– Layer clothing wisely: Dress baby in thin layers; bulky coats under harnesses reduce effectiveness by 50%.
– Use mirrors and shades: Add a baby mirror for rear-facing visibility and sunshades to block glare without overheating.
– Avoid add-ons unless approved: No aftermarket pillows or harness extenders—they can void warranties and safety.
– Practice buckling: Time yourself under 30 seconds for real-world ease; apps like “Car Seat Check” can guide.
– Update for growth: Switch seats at 30-35 lbs, but always rear-facing first.
– Common mistake to avoid: Forgetting the top tether— it reduces forward movement by 40%, per NHTSA studies.
These tweaks can enhance safety and comfort, extending your seat’s usability.
When to Seek Professional Help
While DIY installation is empowering, some situations call for experts. Signs include:
– Persistent movement over 1 inch after multiple attempts.
– Vehicle modifications (e.g., aftermarket seats or taxis).
– Uncertainty with older models or international cars.
– Post-accident checks—always replace seats involved in crashes.
Look for a CPST certified by Safe Kids Worldwide—verify via safekids.org. Expect $20-50 for an inspection; many fire stations or hospitals offer free ones. Costs for full professional installs range $50-150, depending on location. Check your seat’s warranty (usually 1-2 years) before DIY mods, as improper handling can void it.
FAQ
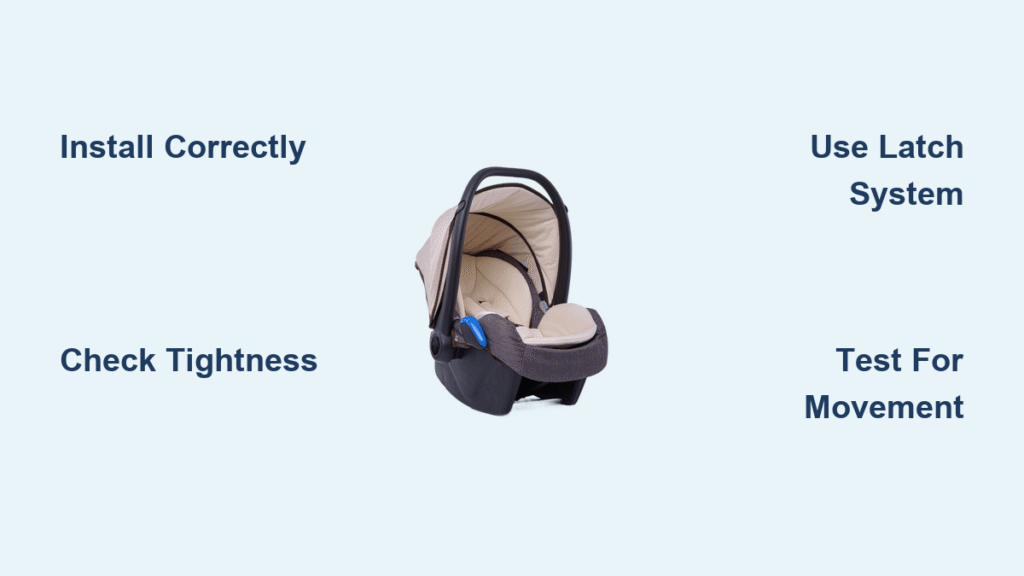
Q: How do I know if my infant car seat is installed correctly?
A: The key indicators are minimal movement (under 1 inch at the belt path), proper recline (30-45 degrees using the level tool), and a firm “click” when attaching the carrier. Always do the shake test and consult the manual for model-specific signs, like color-changing indicators on Graco seats.
Q: Can I install an infant car seat without a base?
A: Yes, using the seat belt method directly on the carrier. It’s secure for occasional use (e.g., taxis), but the base is easier for frequent transfers in travel systems. Follow the same tightening steps, and use a locking clip.
Q: What’s the difference between LATCH and seat belt installation?
A: LATCH uses built-in anchors for a rigid, easy-tighten fit, ideal for lighter setups. Seat belts are more universal but require locking mechanisms to prevent slack. Both are equally safe if installed right—NHTSA recommends LATCH for under 65 lbs total weight.
Q: How often should I check the installation?
A: Re-check after every ride initially, then weekly or after events like car washes, accidents, or moving the seat. Straps can loosen over time due to vibrations.
Q: Is it safe to use a towel for leveling?
A: Yes, a tightly rolled towel or foam pool noodle (2-3 inches thick) is fine for newborns to correct recline, but remove it once baby outgrows the need (around 1 year). Avoid loose materials that could shift.
Q: What if my vehicle doesn’t have LATCH?
A: Use the seat belt method—it’s the backup for all cars and works just as well. Ensure you lock the belt fully; older vehicles (pre-1990s) may need extra clips.
Q: Can I install the seat in the center position?
A: Yes, if your vehicle has LATCH there or allows seat belt use, but check for tether anchors. It’s often the safest spot, away from doors, but ensure a snug fit—center seats can be narrower.
Q: How do I clean the car seat after spills?
A: Wipe with mild soap and water; avoid soaking. For harnesses, spot-clean only—never submerge. Air-dry fully before reuse, and follow manufacturer guidelines to preserve integrity.
Alternative Solutions for Infant Car Seat Installation
If a standard install doesn’t suit your vehicle (e.g., no back seat space), consider these options. Always prioritize NHTSA-approved products.
| Solution | Pros | Cons | Best For |
|---|---|---|---|
| Convertible Car Seat (e.g., Britax One4Life) | Grows with child (rear- to forward-facing); no base needed | Bulkier, harder for tiny infants | Families wanting longevity (up to 120 lbs) |
| Travel System Stroller Combo (e.g., Uppababy Vista) | Seamless base-to-stroller transfer; lightweight carrier | Higher cost ($300+); base still required for install | Urban parents on the go |
| Professional Install Service (e.g., via AAA) | Expert verification; handles tricky vehicles | Fees apply ($50-100); not always immediate | New parents or complex cars like trucks |
| Belt-Only Seats (e.g., Clek Fllo) | Simpler for non-LATCH vehicles; rigid LATCH alternative | Less flexible for moving between cars | Older vehicles or frequent travelers |
Compare based on your needs—convertibles save money long-term but may feel less cozy for newborns.
Safely Transport Your Baby with Confidence
With this guide, you’ve got the tools to master how to install an infant car seat safely:
– Essential materials and prep for a hassle-free start
– Detailed LATCH and seat belt methods with troubleshooting
– Pro tips, FAQs, and alternatives for every scenario
Following these steps ensures your baby rides in the gold standard of protection, reducing crash risks significantly. Take action today—install, test, and hit the road with peace of mind. Your little one’s safety is worth every minute.
Have you installed your infant car seat yet? Share your tips or challenges in the comments to help other parents! If issues linger, describe them below for tailored advice.


