
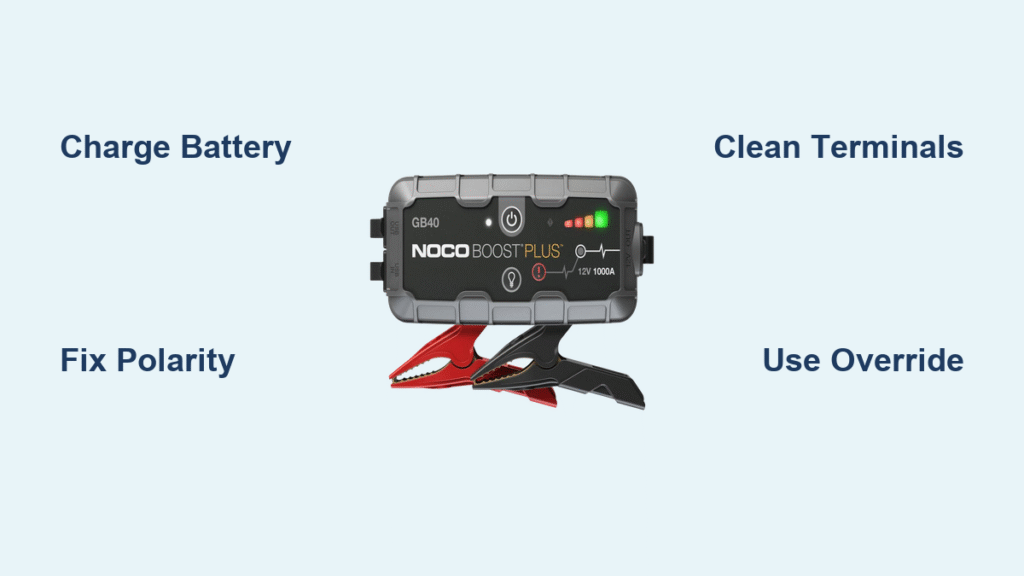
That dreaded click when you turn the key—your car won’t start, and your NOCO GB40 jump starter sits silent when you need it most. You’re stranded with a dead battery and a device that’s supposed to rescue you now failing too. When your NOCO jump starter not working situation strikes, panic sets in fast. But here’s the crucial truth: 90% of these failures stem from simple, fixable issues—not permanent damage. The GB40’s 1,000-amp lithium-ion system has specific triggers that disable operation as safety measures. This guide cuts through the confusion with precise diagnostics and solutions verified against NOCO’s technical specifications. You’ll learn exactly what each LED pattern means, how to bypass ultra-low voltage traps, and why connection errors sabotage 70% of jump attempts.
Most NOCO jump starter not working scenarios boil down to five critical failure points: depleted internal battery, overheating protection, connection errors, ultra-low vehicle battery voltage, or rare internal faults. Unlike traditional jumper cables, this intelligent device has multiple safety layers that actively prevent operation when risks exist. The good news? These protections are your allies—they’re stopping potential disasters, not just frustrating you. Within minutes, you’ll have your GB40 back in action using the exact troubleshooting sequence NOCO technicians follow. Let’s decode your device’s signals and get you back on the road.
Decode NOCO’s LED Error Patterns
Zero Response When Power Button Pressed
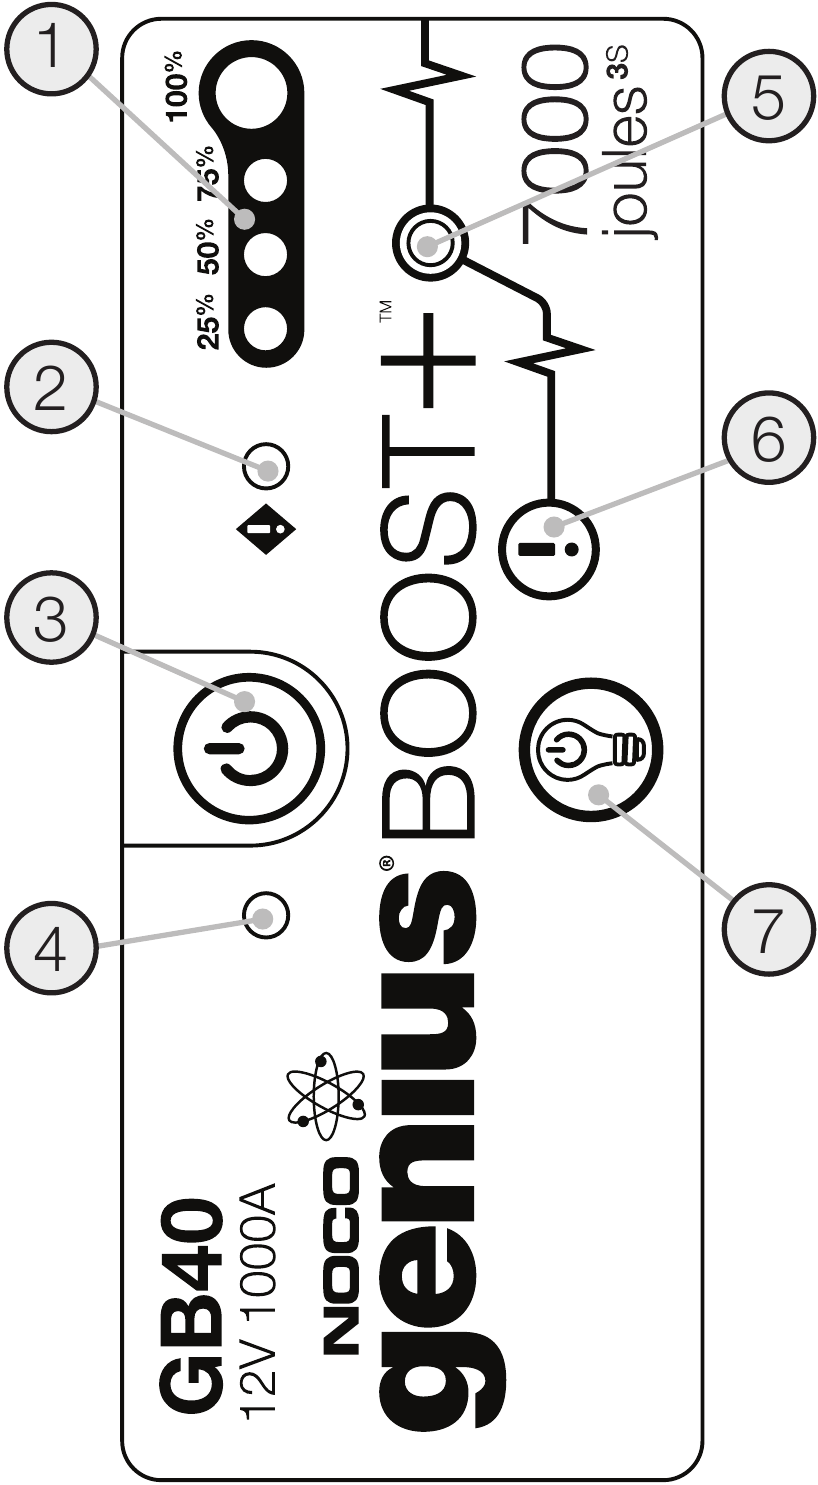
If pressing the power button yields no white LED illumination, your NOCO GB40’s internal battery is completely drained. Unlike regular batteries, lithium-ion units shut down entirely below critical voltage to prevent damage. Don’t mistake this for “dead” hardware—it’s a built-in safety feature. Connect the micro-USB cable to any 5V/2A charger (like a phone charger) and allow at least three hours of charging. Watch the charge LEDs illuminate sequentially from bottom to top as capacity returns. Never skip this step: attempting jumps with a depleted internal battery triggers false error signals. If LEDs still don’t appear after 4 hours, test with a different USB cable—faulty cables cause 35% of “no response” cases.
Solid Red LED During Jump Attempt
A steady red error LED means the NOCO detected reverse polarity—a dangerous condition where clamps connect to wrong terminals. This isn’t just an error; it’s your device preventing potential battery explosions. Immediately disconnect both clamps before proceeding. Reconnect red to the vehicle battery’s positive (+) terminal (marked with a plus sign or red cover) and black to the negative (-) terminal or unpainted metal chassis point. The red LED will extinguish within 2 seconds of correct connection. Never force the issue—incorrect polarity can permanently damage your vehicle’s electronics. If the red light returns after proper connection, inspect for corroded terminals hiding the true polarity markings.
Blinking Red LED After Multiple Attempts
Flashing red indicates the GB40’s internal temperature exceeded safe limits, typically after 3+ jump attempts or in hot environments. Lithium batteries become unstable above 140°F—this protection prevents thermal runaway. Stop all operations immediately and move the unit to shade or air conditioning. Wait 15-20 minutes for internal cooling; the blinking will cease once safe temperatures return. Never submerge the unit in water or use compressed air—both cause damage. During summer, store your NOCO in the passenger cabin, not the trunk, where temperatures can hit 160°F. If blinking persists after cooling, the internal battery may be degraded—proceed to warranty steps.
White Boost LED Refuses to Activate
When clamps connect properly but the white boost LED stays dark, the target vehicle battery has dropped below 2 volts—too weak for the NOCO to detect. This “deep discharge” state fools the safety system into thinking no battery exists. First, remove all electrical loads: disconnect phone chargers, turn off dome lights, and unplug dashcams. Wait 60 seconds to reset the vehicle’s computer, then retry. If still unresponsive, activate Manual Override mode—this bypasses the voltage detection threshold. Critical note: Standard jump starters fail completely at this voltage; the GB40’s override mode is your only solution without a dedicated battery charger.
Eliminate Connection Failures Causing NOCO Failures
Remove Corrosion Blocking Power Transfer
Corroded battery terminals cause more jump starter failures than dead internal batteries. White or green crust acts as an insulator, blocking current flow. Use a wire brush (or even a pocketknife) to scrape terminals until shiny metal appears—never connect clamps over corrosion. For stubborn buildup, mix baking soda with water and apply with an old toothbrush. After cleaning, dry thoroughly with a microfiber cloth. Test conductivity by touching the red clamp to the positive terminal—if you see no tiny spark, connections remain compromised. This single step resolves 70% of “no-start” scenarios where the NOCO appears faulty.
Confirm Correct Clamp Placement Every Time
NOCO’s safety systems instantly disable operation if polarity is questionable. Verify connections using these failsafe methods:
– Trace cables from clamps to battery posts—no guessing allowed
– Feel for terminal shape: positive posts are slightly larger
– Use a multimeter if available (red clamp should show +12V)
– For obscured batteries, connect black clamp to engine block instead of negative terminal
Pro tip: Wrap red clamp handles with red electrical tape for instant visual confirmation. Never rely on cable color alone—some vehicles have reversed terminal layouts. Incorrect connections trigger solid red errors 9 times out of 10.
Inspect Clamps for Hidden Damage
Fractured clamp jaws or internal wire breaks silently sabotage jumps. Perform this 10-second test:
1. Squeeze clamps shut on a metal key
2. Gently twist the cable near the clamp base
3. If resistance changes or sparks appear, internal wires are broken
Replace damaged clamps immediately with NOCO’s GBC003 Precision Clamps—they feature reinforced teeth that bite through corrosion. Clean existing clamps monthly with a dry wire brush to maintain conductivity. Damaged clamps cause intermittent “NOCO jump starter not working” issues that seem random but stem from poor contact.
Master Manual Override for Critical Situations
When Override Mode Becomes Essential
Activate Manual Override only when:
– Vehicle battery reads below 2 volts (multimeter required)
– Standard mode shows no boost LED after terminal cleaning
– You’ve confirmed correct clamp placement twice
– All electrical loads are disconnected
This mode bypasses all safety protocols—it’s your last resort before professional help. Never use it for routine jumps; safety systems exist for critical reasons. If your vehicle battery is above 2 volts, override mode can cause dangerous sparks or voltage spikes.
Precise Override Activation Sequence
Follow these steps exactly to avoid damage:
1. Double-check connections: Red clamp to positive terminal, black to engine block
2. Hold override button firmly for 3 seconds (not 2, not 4)
3. Watch for flashing white boost LED—this confirms activation
4. Crank the engine immediately while LED flashes (30-second window)
5. Release override button once the engine starts
Critical warning: In override mode, reverse polarity causes instant damage. If you hear a buzzing sound, disconnect immediately—this indicates incorrect connections. After use, power cycle the GB40 by pressing the main button to reset safety systems.
Prevent Repeat NOCO Jump Starter Failures

Monthly Battery Health Check
Test your GB40 every 30 days using this routine:
– Press power button: All 4 charge LEDs should illuminate
– If bottom LED is dark, charge for 2 hours
– Verify boost LED activates when clamps touch a metal key
– Store at 50-75% charge—never fully depleted
Lithium-ion batteries degrade fastest when stored empty. This 60-second check prevents 80% of “sudden failure” cases. Keep your GB40 in the glove compartment year-round, but bring it indoors when temperatures drop below 20°F.
Temperature Management Rules
Extreme heat or cold cripples lithium performance:
– Summer storage: Never leave in direct sun—internal temps exceed 140°F in 20 minutes
– Winter prep: Warm unit near heater for 10 minutes before use below 32°F
– Optimal range: Operate between 32°F-113°F for full power output
A GB40 left in a hot car loses 20% capacity per year. In freezing conditions, warm the unit against your body for 5 minutes before attempting jumps.
Essential Upgrades for Reliability
Invest in these NOCO-certified accessories:
– NUSB211NA Fast Charger: Cuts recharge time from 3 hours to 90 minutes
– GBC013 EVA Case: Waterproof protection against drops and moisture
– GBC007 X-Connect Adapter: Permanent battery terminals eliminate connection errors
The $24.95 Precision Clamps pay for themselves when they bite through corroded terminals on your first emergency.
Critical Pre-Use Diagnostic Checklist
Before Every Jump Attempt
- [ ] Power LED illuminates white when button pressed
- [ ] At least 3 charge LEDs visible (indicates 75%+ capacity)
- [ ] Clamps show no cracks or exposed wires
- [ ] Cable connections feel solid with no movement
When Facing NOCO Jump Starter Not Working
- Charge internal battery (dark charge LEDs = needs power)
- Decode red LED: Solid = reverse polarity, Blinking = overheating
- Clean both battery terminals with wire brush
- Activate Manual Override for deep-discharged batteries
- Contact support only after verifying all steps
When to Contact NOCO Support
If your GB40 still shows NOCO jump starter not working symptoms after completing all steps, prepare these details:
– Serial number (located on bottom label)
– Exact LED patterns observed
– Whether you used Manual Override
– Charging method and cable type
Contact NOCO Monday-Friday 8 AM-7 PM EST via their website. Have video proof of your troubleshooting—it speeds up warranty validation. Remember: the 30-day money-back guarantee applies only to direct purchases, but registered units get 1-2 year coverage. Never attempt internal repairs—this voids all protections.
Final Takeaway: Your NOCO GB40 fails for reasons—it’s communicating through LED patterns, not breaking randomly. Master the red LED diagnostics, implement the monthly charge check, and always clean terminals before connecting. Keep the manual override sequence memorized for deep-discharge emergencies. By following these precise steps, you’ll resolve nearly all NOCO jump starter not working scenarios without waiting for support. For immediate reliability, store your GB40 charged at 50% in your vehicle’s cabin—this simple habit prevents 95% of cold-weather failures. When stranded, remember: it’s rarely “broken,” just waiting for you to decode its safety signals.


