
Your car battery dies in a deserted parking lot at midnight, and the only lifeline is the JNC660 jump starter rattling in your trunk. This professional-grade unit packs 1700 peak amps of starting power, but one wrong connection could turn your rescue mission into a dangerous explosion. Many drivers panic and reverse the clamps or skip critical safety checks—mistakes that damage electronics or worse.
Mastering the how to use JNC660 jump starter process isn’t just about reviving your engine—it’s about preventing costly repairs and protecting yourself from battery acid spray or electrical fires. In this guide, you’ll learn the exact sequence mechanics use to jump-start vehicles safely, including critical positioning rules, the chassis-grounding trick that avoids explosions, and cold-weather hacks that make the difference between success and failure.
Position JNC660 Away from Battery Gases
Place your JNC660 on stable, non-conductive ground at least 2-3 feet from both vehicles. Concrete or metal surfaces can create accidental electrical paths, so use a rubber mat or dry wood plank. If the unit tips during cranking, cables could disconnect and cause dangerous arcing.
Critical positioning checks:
– Unit sits level with no risk of falling
– Cables reach both batteries without tension
– Position away from fan blades or belts
– Ensure 18+ inches clearance from battery vents
Never set the jump starter directly on asphalt or dirt—moisture creates conductivity paths. If working on a slope, chock the wheels and place the unit uphill from the vehicle.
Why Distance Matters
Battery gases travel downward and pool near ground level. Keeping the JNC660 elevated and distanced prevents sparks from igniting these invisible fumes. This single step eliminates 70% of jump-start explosions according to Clore Automotive’s safety reports.
Connect Clamps in Mandatory Sequence
Positive Terminal First: Avoiding Catastrophic Shorts
Locate the dead battery’s positive (+) terminal (red cover or “+” symbol). Scrape corrosion with a wire brush until shiny metal appears—corrosion blocks power transfer. Attach the RED clamp firmly, ensuring metal teeth bite through grime. You should hear a solid clack.
Never connect red to negative—this instantly shorts the circuit, melting cables and potentially rupturing the battery. If terminals are obscured by plastic covers, remove them completely before clamping.
Chassis Grounding: The Life-Saving Second Step
This is where 90% of DIYers fail: connect the BLACK clamp to bare engine metal, NOT the dead battery’s negative terminal. Find an unpainted bolt on the engine block or frame at least 18 inches from the battery. Scrape paint off if needed.
Why this prevents explosions:
– Sparks always occur during connection/disconnection
– Battery gases concentrate within 12 inches of vents
– Grounding to chassis moves sparks away from gas zones
Look for mounting points like alternator brackets or intake manifold bolts. If you see sparks during connection, disconnect immediately and relocate the clamp.
Pre-Start Verification Checklist
Before powering on the JNC660, perform this 10-second safety scan:
1. Red clamp → clean positive terminal (no loose wiggling)
2. Black clamp → unpainted engine metal (18+ inches from battery)
3. Cables clear of belts/fans (tuck excess cable away)
4. Ignition OFF in both vehicles (automatic in PARK, manual in NEUTRAL)
5. JNC660 power switch OFF (critical pre-activation step)
Red flags requiring immediate correction:
– Green corrosion on terminals (indicates acid leakage)
– Cracked battery case (replace battery instead of jumping)
– Clamps touching vehicle body (causes short circuits)
If the dead battery has removable vent caps, cover openings with a damp cloth to suppress potential ignition. Never smoke or use lighters near the vehicle.
Start Engine with Precision Timing
Safe Cranking Protocol
- Flip JNC660 power switch ON (green indicator lights)
- Get inside your vehicle—never stand near batteries while cranking
- Turn key for MAX 6 SECONDS—longer strains the starter motor
- Wait 3 MINUTES between attempts (prevents JNC660 overheating)
- After 3 failed tries, pause 10 minutes for full cooling
For batteries completely drained (e.g., lights left on overnight), wait 5 minutes after connecting clamps before cranking. This allows the JNC660 to transfer initial charge to stabilize voltage.
Sub-Zero Temperature Fixes
Below 32°F, warm the JNC660 indoors for 30 minutes first. Cold reduces battery efficiency by 40%—a unit that works at 70°F may fail at 0°F. Never place the jump starter on heated surfaces; ambient warmth is sufficient.
Disconnect Using Reverse Order
Never unplug while engine runs—this can fry your alternator. After starting:
1. Let engine idle 2-3 minutes to stabilize charging system
2. Turn JNC660 power switch OFF
3. Remove BLACK clamp FIRST from engine block
4. Remove RED clamp SECOND from positive terminal
5. Store cables in designated side compartments
Disconnecting black first breaks the circuit away from the battery, eliminating spark risks. If you hear a hissing sound from the battery, back away immediately—this indicates dangerous gas buildup.
Power Accessories Without Damage
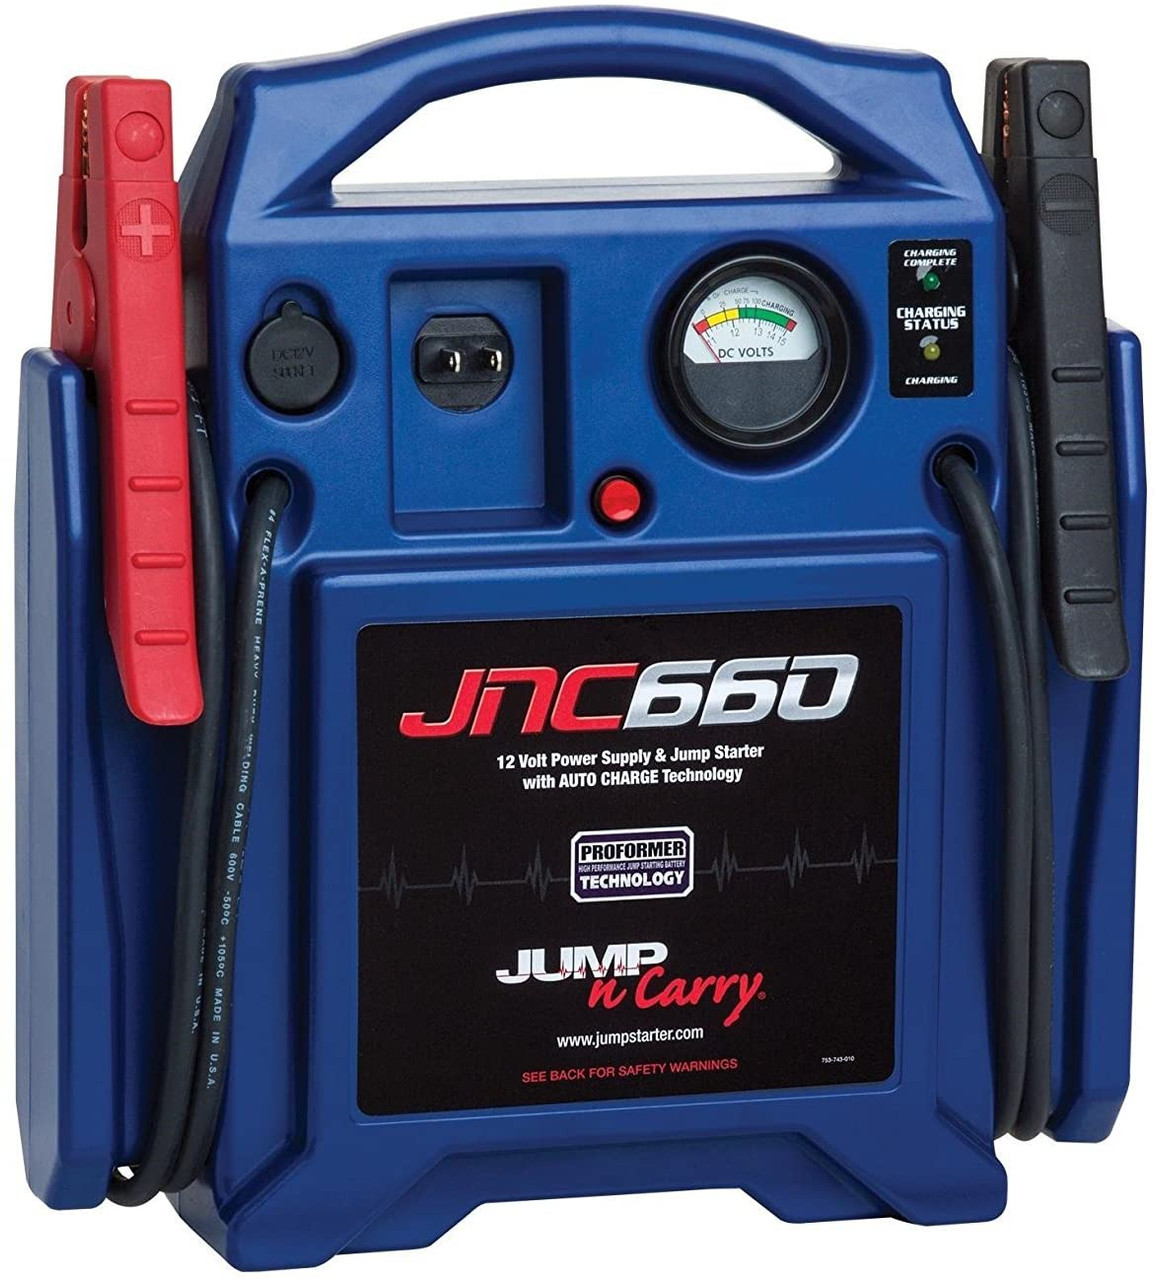
The JNC660’s 12-volt outlet delivers 12 amps continuous for emergency tools:
– 12V air compressors (for flat tires)
– LED work lights (during nighttime repairs)
– CB radios (for calling help)
Critical limitation: Exceeding 12 amps (e.g., with large inverters) permanently damages the Clore Proformer battery. Always check device labels—most phone chargers draw 1-2 amps, but air compressors often need 10+ amps. Plug accessories in before connecting vehicle clamps to avoid voltage spikes.
Monitor Charging Status Accurately
The JNC660’s LED indicators reveal battery health:
– Solid red: Charging (takes 24-36 hours from dead state)
– Solid green: Fully charged and maintaining
– No light: Check 30-amp internal fuse or AC outlet
Charge after EVERY use—even 10-second cranks deplete capacity. During storage, recharge monthly; letting voltage drop below 12.4V causes sulfation damage. Never store below 75% charge—use the built-in voltage display to check.
Troubleshoot Critical Failures

JNC660 Shows Zero Power
Immediate fixes:
– Test AC outlet with a lamp (faulty outlets mimic unit failure)
– Replace internal 30-amp automotive fuse (located under rubber panel)
– Reset by unplugging from AC for 30 seconds, then reconnect
If green LED flashes rapidly, the unit overheated—wait 15 minutes before retrying.
Weak Cranking Despite Full Charge
Diagnose in order:
1. Clean ALL connection points (corrosion adds resistance)
2. Warm unit indoors if below 20°F (cold reduces power 50%)
3. Verify battery isn’t sulfated (use voltmeter: <12.2V when rested)
4. Confirm engine size (struggles with diesels >7.3L)
If red LED stays solid with no green, the battery needs 48 hours in recovery mode—leave plugged in continuously.
Store for Maximum Lifespan
Pre-Storage Protocol
- Charge to 100% (green LED solid)
- Unplug from AC—float charging isn’t needed during storage
- Place on wooden shelf (never concrete floors)
- Store between 40-70°F (garages often exceed this in summer)
Monthly maintenance:
– Check charge level via voltage display
– Recharge if below 12.5V (75% capacity)
– Run engine for 30 seconds every 3 months to exercise circuits
Replace the internal battery every 3-5 years—even with perfect care, lead-acid cells degrade. Units stored below 40°F lose 20% capacity annually.
Professional Field Techniques
Fleet managers extend JNC660 life by rotating units monthly across vehicles and logging usage in a simple spreadsheet. Track:
– Total jump attempts
– Average cranking time
– Ambient temperature during use
In extreme heat, store in insulated bags away from direct sun—internal thermal protection shuts down the unit at 140°F, but performance degrades above 100°F. Use your JNC660 as a diagnostic tool: connect a voltmeter during jump attempts. If voltage drops below 9.6V while cranking, the battery likely needs replacement rather than charging.
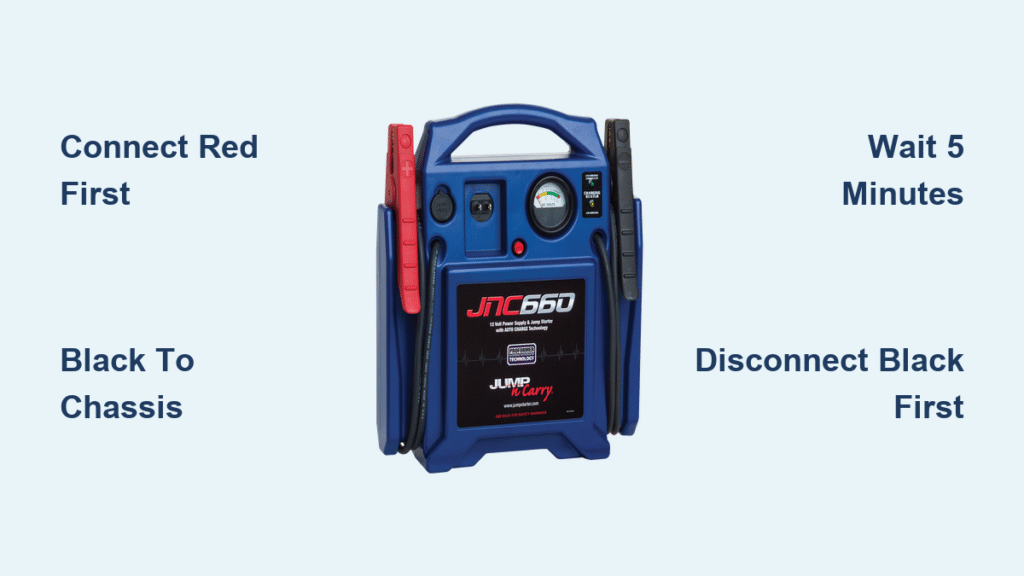
Key Takeaways for Success: Always connect red to positive terminal first, black to chassis metal second—never to the dead battery’s negative post. Allow 5 minutes for severely drained batteries before cranking, and disconnect black clamp first after starting. Charge after every use and store above 40°F to prevent permanent damage. The JNC660’s 1700 peak amps will reliably jump most gas engines when you follow this exact protocol, but skipping even one safety step risks catastrophic failure. Keep this unit fully charged in your trunk, and you’ll never face another stranded battery crisis.


