
You’re late for work, running late for your child’s school event, or stranded in a remote parking lot when your car won’t start. That dreaded clicking sound means your battery’s dead, but instead of waiting for roadside assistance, you reach for your AstroAI Jump Starter—the compact lifesaver that can get you back on the road in minutes. This powerful device eliminates the need for another vehicle or dangerous jumper cables, giving you complete independence from battery emergencies.
Whether you’re a busy parent, frequent traveler, or just someone who values peace of mind, knowing exactly how to use your AstroAI jump starter properly means the difference between a 5-minute fix and hours of frustration. In this guide, you’ll learn the precise connection sequence, how to decode those confusing LED lights, and critical safety steps most people miss—ensuring you’re never stranded by a dead battery again.
Essential Safety Checks Before Jump Starting Your Vehicle
Verify Your AstroAI Has Enough Charge
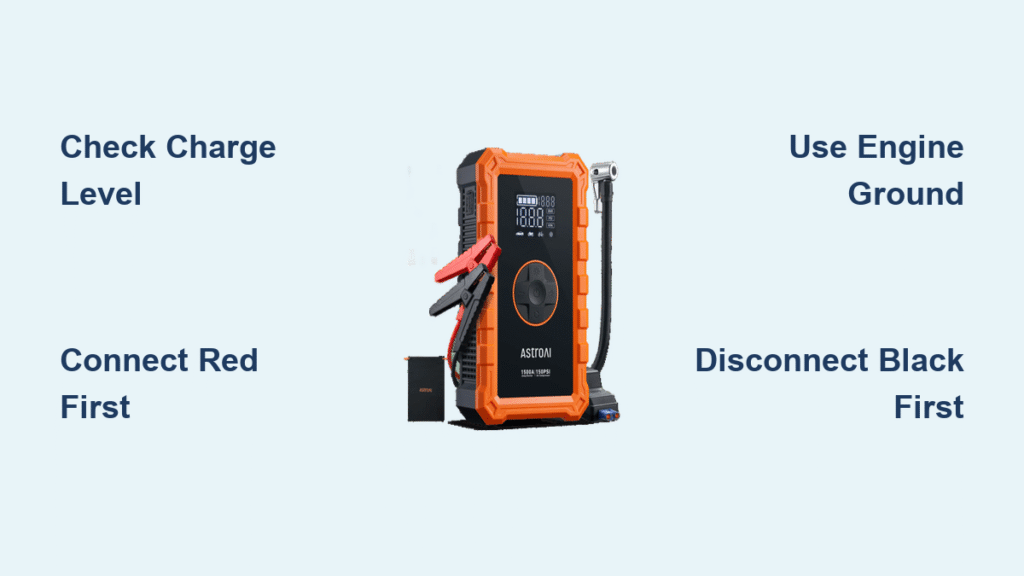
Press the power button once to activate the LED indicators—you need at least three solid blue lights (50% charge) for a reliable jump start. Never attempt to jump-start with only one flashing red light visible, as this indicates critically low power that won’t deliver sufficient amps. If your unit shows no lights, plug it into the wall charger for at least 30 minutes before proceeding.
Inspect Your Jumper Cables for Damage
Examine both red and black clamps for frayed wires, exposed copper, or damaged insulation. Damaged cables cause dangerous sparks and can prevent successful jumps. Check that the clamp jaws open and close smoothly with strong spring tension—weak clamps create poor connections that won’t transfer enough power to start your engine.
Confirm Dry Conditions and Proper Temperature
Never use your AstroAI jump starter in rain, snow, or on wet surfaces—water conducts electricity and increases shock risk. Ensure both your vehicle battery and jump starter are completely dry. The unit operates between -4°F and 140°F, but charging below 32°F permanently damages the lithium-ion cells, so bring it indoors if temperatures are near freezing.
Correct Connection Sequence for Reliable Jump Starts

Power Down Vehicle Systems Completely
Turn off your ignition and disable all electrical accessories—this includes headlights, radio, phone chargers, and cabin lights. These systems drain power that your AstroAI needs to start the engine. For modern vehicles with “always-on” electronics, wait 30 seconds after turning off the ignition to allow systems to fully power down.
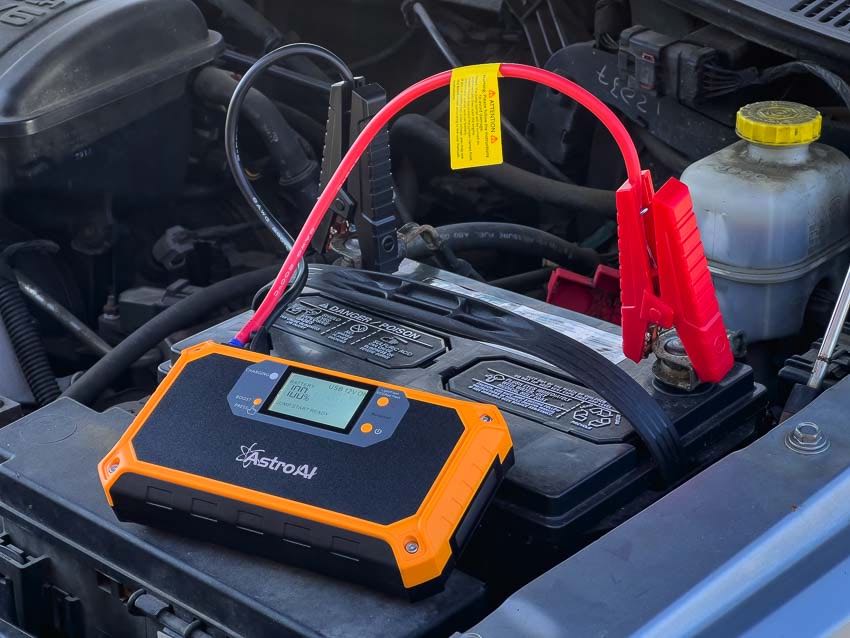
Attach Clamps in the Exact Right Order
- Connect red clamp first to the positive (+) battery terminal (usually covered with a red cap)
- Connect black clamp to engine ground on an unpainted metal surface away from the battery (like a bolt on the engine block)
- Never connect black clamp directly to negative battery terminal—this can cause sparks near hydrogen gas emitted by batteries
Activate Safety Features Before Starting
Press and hold your AstroAI power button for 2-3 seconds until the LED display activates. The smart cables automatically check for reverse polarity—if you see a red light, immediately disconnect and verify clamp placement. A green light confirms proper connection and safety systems are engaged, giving you the all-clear to start your engine.
Reading AstroAI’s LED Light Signals for Success

Decoding Charge Level Indicators
Your AstroAI communicates battery status through simple LED patterns:
– 4 solid blue lights: 75-100% charge (optimal for multiple jumps)
– 3 solid blue lights: 50-75% charge (adequate for one jump)
– 2 solid blue lights: 25-50% charge (recharge soon)
– 1 solid blue light: 10-25% charge (recharge immediately)
– 1 flashing red light: Below 10% (don’t attempt jump-start)
Understanding Safety Warning Lights
The color-coded safety system prevents dangerous mistakes:
– Steady green: Correct connection, ready to start
– Solid red: Reverse polarity detected—check clamp positions
– Flashing red: Overheating protection activated—wait 10-15 minutes
– No light: Cable not properly connected to jump starter
Safe Disconnection After Jump Starting Your Vehicle
Follow Reverse Order for Safe Removal
Always disconnect in the opposite sequence of connection: remove black clamp first from the engine ground, then the red clamp from the positive terminal. This prevents accidental short circuits that could damage your vehicle’s electronics or cause sparks near battery gases.
Allow Cooling Time Before Storage
After successful starting, press the power button to turn off your AstroAI unit and wait 5 minutes for cooling before storing it away. Jump starting generates significant heat—storing while hot reduces battery lifespan and creates fire risk in enclosed spaces like glove compartments.
Recharging Your AstroAI for Maximum Reliability
Optimal Charging Methods and Timing
Use the included 15V/1A wall adapter for fastest charging—full recharge takes 5-6 hours compared to 8-10 hours with the car charger. LED lights flash sequentially during charging and turn solid when complete. For best battery health, recharge every 3-4 months even when not used, as lithium-ion batteries slowly self-discharge over time.
Proper Storage Conditions for Longevity
Store your AstroAI between 32°F-77°F in a dry location—never in extreme heat like a glove compartment during summer. Maintain 50-75% charge during storage; fully depleted or fully charged units degrade faster. Check charge levels monthly and recharge as needed to prevent deep discharge damage that permanently reduces capacity.
Using Your Jump Starter as a Power Bank and Flashlight
Charge Devices During Emergencies
Press the power button once to activate the dual USB ports (5V/2.4A and 5V/2.1A), which can charge your phone 3-5 times from a single jump starter charge. The system automatically shuts off after 30 seconds without a connected device, so press the button again if switching between devices.
Activate Emergency Flashlight Modes
The built-in flashlight has three critical functions:
– Single press: Steady beam for 15-20 hours (perfect for changing a tire)
– Double press: SOS signal (three short, three long, three short flashes)
– Triple press: High-visibility strobe for roadside emergencies
Troubleshooting Common AstroAI Jump Starter Issues
Why Your Vehicle Won’t Start Despite Proper Connection
If your engine still won’t crank after following correct procedures:
– Check power level: Ensure 3+ blue lights before attempting
– Wait before cranking: Let AstroAI connect for 2-3 minutes if battery is severely depleted
– Verify model compatibility: Confirm your AstroAI’s peak amps exceed your vehicle’s requirements
– Look for safety indicators: Red light means improper connection—recheck clamp placement
Fixing Overheating Problems Immediately
Multiple start attempts without cooling periods trigger thermal protection. Wait 10-15 minutes before trying again—this isn’t wasted time but necessary for safety. Move to a shaded area if possible and ensure the unit has space for ventilation. Never cover the jump starter while it’s cooling.
Choosing the Right AstroAI Model for Your Vehicle
AstroAI A1 (1000 Peak Amps) for Compact Cars
The A1 model weighs just 1.2 lbs yet starts gasoline engines up to 7.0L and diesel up to 5.5L, making it ideal for sedans, hybrids, and small SUVs. Its 8000mAh capacity fits easily in glove compartments but provides enough power for 2-3 jump starts on a single charge.
AstroAI A3 (2000 Peak Amps) for Trucks and SUVs

For larger vehicles, the A3 delivers 2000 peak amps to handle gasoline engines up to 8.0L and diesel up to 6.5L. The 18000mAh capacity provides extra power for multiple attempts on cold mornings and doubles as a robust power bank for extended road trips.
Professional Tips for Mechanics and Fleet Managers
Commercial Usage Best Practices
Roadside assistance providers should maintain 4-5 fully charged units in rotation and document each use with vehicle details for warranty claims. When working with customers, explain the safety features—seeing the green “ready” light reduces anxiety during the jump process.
Fleet Maintenance Protocols
Companies with multiple AstroAI units should test all devices monthly and maintain at least 75% charge. Replace units after 500 jump cycles or 3 years maximum, and provide mandatory 15-minute training for all drivers covering proper connection sequence and safety protocols.
Your AstroAI jump starter represents more than convenience—it’s complete roadside independence in a compact package. By following these precise usage guidelines, you’ll avoid common mistakes that leave people stranded despite having the tool. Keep it charged using the wall adapter every 3-4 months, store it properly between uses, and you’ll never again be helpless with a dead battery. The next time your engine won’t turn over, you’ll be the one helping others—because you know exactly how to use your AstroAI jump starter when it matters most.


