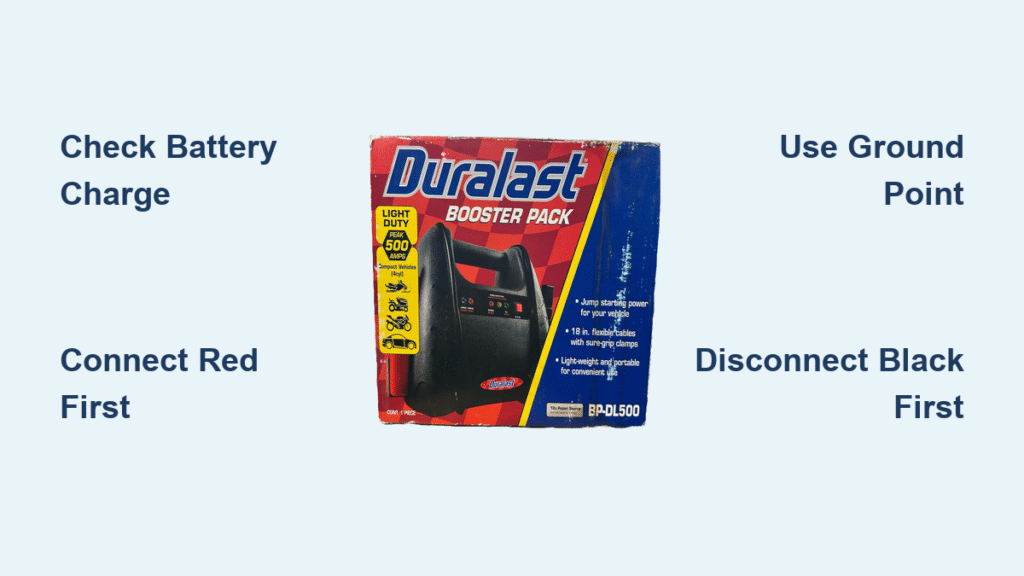
Your car won’t turn over, that dreaded clicking sound fills the air, and you’re stranded with a dead battery. Before you waste hours waiting for roadside assistance, your Duralast jump starter could get you back on the road in minutes. These compact powerhouses deliver instant power to revive drained batteries, but incorrect use risks damaging your vehicle’s electronics or causing dangerous sparks. Mastering how to use Duralast jump starter safely transforms this tool from a garage accessory into a true lifeline.
This guide cuts through confusing instructions to deliver precise, model-agnostic steps you can trust—whether you own the 700-amp version for your sedan or the 1200-amp beast for your diesel truck. You’ll learn the critical connection sequence that prevents explosions, decode LED error signals, and leverage hidden features like emergency lighting. Most importantly, you’ll gain confidence to handle battery emergencies alone, day or night.
Pre-Use Safety Checklist
Skipping these steps risks fire, electrical damage, or battery explosion. Never connect clamps until you’ve completed this verification.
Verify Unit Condition
Press your Duralast’s power button—solid LED illumination confirms adequate charge. If no lights appear, plug in the AC adapter immediately; a fully depleted unit won’t jump-start anything. Run your hands along both cables, checking for cuts or exposed copper that could cause short circuits. Inspect clamp teeth for corrosion; green or white buildup blocks electrical flow. Crucially, remove all metal jewelry—a stray wedding ring touching both clamps could melt instantly from 1000+ amps of current.
Position for Safety
Park the disabled vehicle on level ground, transmission in Park (or Neutral for manuals), with parking brake engaged. Place your Duralast unit on the trunk lid or engine bay—never directly on the battery. Hydrogen gas from lead-acid batteries ignites easily, so maintain 3 feet of clearance from sparks or cigarette butts. If working in a garage, open all doors for ventilation.
Connection Sequence Simplified
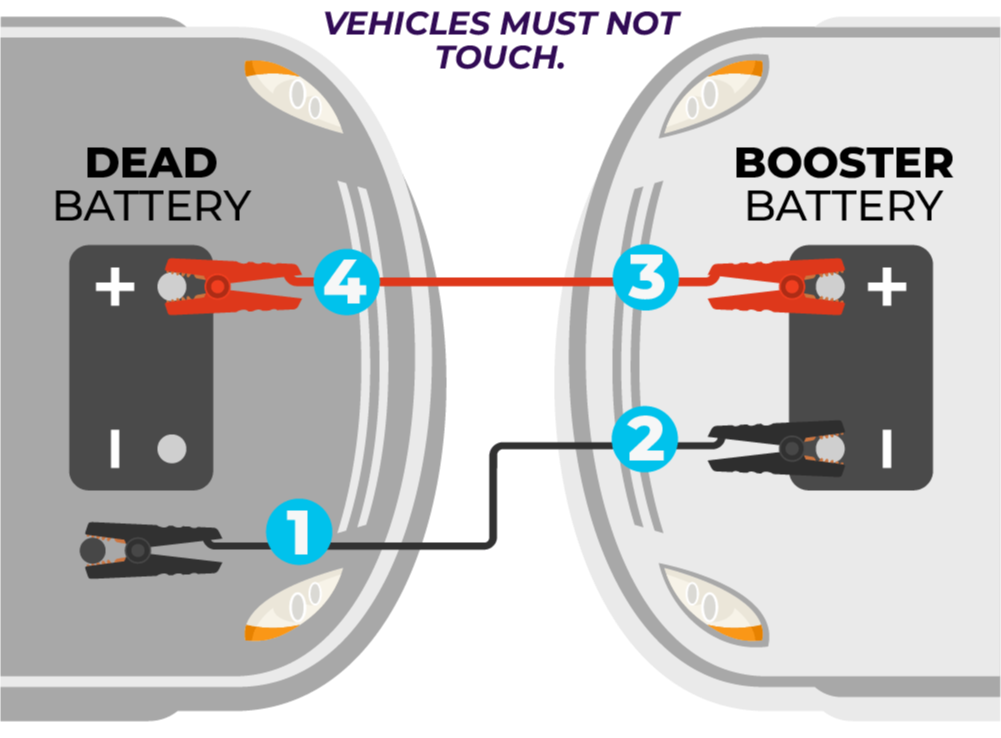
One misplaced clamp can fry your alternator. This sequence isolates sparks from explosive battery gases.
Identify Battery Terminals
Locate your car’s 12V battery—often under the hood but sometimes in the trunk (common in BMWs) or under rear seats (many hybrids). The positive terminal has a red plastic cover marked “+” or “POS,” while the negative (“-“) terminal connects to the car’s metal frame. Peel back the red cover to expose bare metal; never clamp over plastic.
Clamp Connection Order
Attach the red clamp FIRST to the positive battery terminal. Squeeze firmly until you hear a metallic click, then wiggle the clamp sideways—it must bite through corrosion for metal-to-metal contact. Connect the black clamp LAST to bare, unpainted metal on the engine block (like a suspension bolt) 12-18 inches from the battery. Never clip it to the negative battery terminal—this avoids sparks near hydrogen-emitting vents. Test connections by gently tugging both clamps; they shouldn’t budge.
Starting Your Vehicle Safely
Now you’re ready to transfer power. Rushing here risks overheating the starter motor.
Power Transfer Process
Activate your Duralast by pressing its power button until LEDs glow. A solid green light means connections are secure; a red flash signals reversed polarity—immediately disconnect and retry. Turn the ignition key for only 3-5 seconds. If the engine doesn’t catch, wait 2 minutes before retrying—this cooling period prevents Duralast overheating. For push-button starts, press the brake pedal while holding the start button.
Successful Start Protocol
Once the engine fires, let it idle for 3 full minutes before driving. This allows the alternator to stabilize charging—revving prematurely strains the recovering battery. Never disconnect clamps while the engine runs; electrical feedback could damage your Duralast’s circuitry.
Safe Disconnection Method

Removing clamps backward creates dangerous arcs near the battery. Follow this exact sequence.
Power Down Sequence
Press your Duralast’s power button to deactivate it. Remove the black clamp FIRST from the engine ground point. Remove the red clamp SECOND from the positive terminal. Secure both clamps in their molded slots on the unit—never let them dangle where metal could bridge the connection. Only then should you stow the Duralast.
Charging Your Duralast Unit
Neglecting charging turns your lifeline into dead weight. Lithium batteries degrade if stored empty.
Charging Process Details
New units require 24 hours of initial charging. Standard top-ups take 4-6 hours via the included AC adapter. The LED glows solid red while charging and switches to green at 100%. Critical tip: Recharge every 3 months even when unused—lithium batteries self-discharge to dangerous levels within 6 months.
Storage Charge Guidelines
Store your Duralast at 40-60% charge (indicated by 2-3 illuminated LEDs). Check monthly using the power button; recharge if below 50%. Never store at 0%—this permanently cripples battery capacity. Keep it between 32°F-80°F; garages in freezing climates require indoor storage.
Advanced Features Explained
Your Duralast does far more than jump-start cars—these often-overlooked functions save lives during breakdowns.
USB Device Charging
Plug smartphones into the USB ports during emergencies. A fully charged 700-amp model provides 2-4 full phone recharges while retaining jump-start capability. Newer 1200-amp units support USB-C for faster tablet charging. Pro tip: Charge your phone before attempting jump-starts—dim displays complicate nighttime repairs.
Emergency Lighting System
Press and hold the flashlight button for 3 seconds to activate. Cycle through steady beam (for under-hood work), strobe (to alert traffic), and SOS mode (for wilderness emergencies). The LED lasts 10+ hours on full charge. Models with magnetic bases stick to fenders for hands-free lighting—indispensable when working alone at night.
Troubleshooting Common Problems
Don’t panic when issues arise. These fixes resolve 90% of roadside frustrations.
No Power Response
If pressing the power button yields zero LEDs, test the wall outlet with a phone charger. If the outlet works but the Duralast doesn’t, check both ends of the AC adapter for loose connections. Complete power failure means the unit is fully depleted—recharge for 6 hours minimum.
Weak Cranking Performance
In freezing weather, warm the Duralast under your seat for 10 minutes first—cold lithium batteries deliver 40% less power. Clean corroded terminals with a wire brush (sold at auto parts stores for $3). Turn off all accessories—headlights, heaters, and phone chargers drain critical amps.
LED Error Code Decoding
Flashing red LED? Clamps are reversed—disconnect immediately and swap connections. Solid red LED? Poor terminal contact; clean with a baking soda paste. Red/green alternating? Unit overheated—wait 30 minutes before retrying. Never ignore these signals; they prevent catastrophic damage.
Model-Specific Quick Reference

Match your vehicle to the right Duralast—using an undersized unit risks failure.
700-Amp Models
Revives compacts and hybrids with engines up to 4.0L (Toyota Camry, Honda Accord). Weighs just 2.8 lbs with 12,000mAh capacity. Includes dual USB-A ports but no air compressor. Ideal for glovebox storage.
900-Amp Models
Starts gasoline engines up to 5.0L (Ford F-150) and diesels up to 3.0L (RAM 2500). The 3.5-lb unit offers 18,000mAh capacity. Select versions add a built-in air compressor—perfect for SUV owners.
1200-Amp Models
Conquers diesel trucks up to 4.0L (Chevy Silverado 2500) with 24,000mAh power. The 4.2-lb model features a digital charge display and USB-C ports. Essential for RV or boat owners.
Long-Term Care Strategy
Proper maintenance doubles your Duralast’s lifespan from 3 to 6+ years.
Performance Monitoring
Test monthly by checking LED response and cable integrity. Every 6 months, perform a full discharge/recharge cycle—this preserves lithium cell health. In humid climates, store with silica gel packets to prevent terminal corrosion. Never store inverted; gravity stresses internal connections.
Replacement Indicators
Replace your unit when: charge duration drops below 50% of original specs, LEDs flicker erratically, or cables show fraying. Physical damage requires immediate retirement—safety isn’t worth risking. After 500 charge cycles (about 2 years of regular use), expect gradual power loss. Plan replacement before winter for cold-weather reliability.
Your Duralast jump starter becomes a true safety asset only when you know how to use Duralast jump starter correctly. Keep it charged, inspect it quarterly, and practice these steps in your driveway—confidence replaces panic when you’re prepared. Remember: the right connection sequence prevents disasters, USB ports keep you connected during crises, and monthly checks ensure reliability. Don’t wait for a dead battery on a rainy night; master these techniques today and drive with the peace of mind that comes from self-reliance.

