
Your IDEAPLAY jump starter won’t charge when you need it most. That sinking feeling hits as you realize your backup power source has become the problem instead of the solution. Whether you’re stranded with a dead car battery or preparing for an emergency, a non-charging jump starter renders your investment useless.
This guide walks you through practical troubleshooting steps for jump starter charging issues. While specific IDEAPLAY documentation remains unavailable in public sources, these universal charging solutions apply to most portable jump starter designs. You’ll learn to diagnose common problems, apply practical fixes, and prevent future charging failures—without needing brand-specific manuals that simply don’t exist.
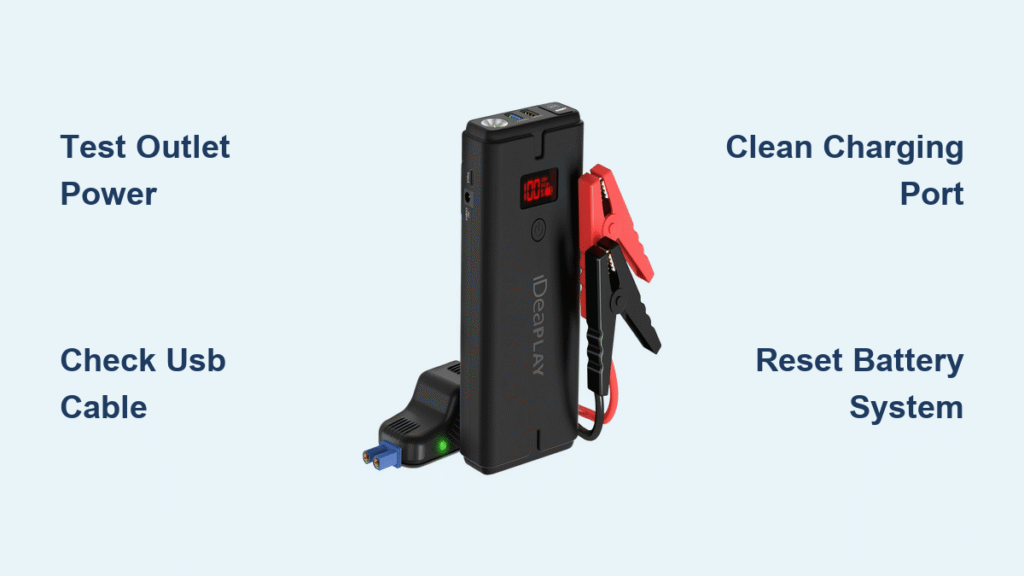
Verify Your Power Source First
Test Wall Outlet Functionality
Start with the basics—your power source might be the culprit. Plug a phone charger or lamp into the same outlet your jump starter uses. No power from the outlet means you’ve found your problem immediately.
Quick outlet test steps:
– Use known working device (phone charger, lamp)
– Try multiple outlets in different rooms
– Check circuit breakers for tripped switches
Portable jump starters often fail to charge due to overlooked power issues. Most models require consistent 5V power, which fluctuates in older buildings. If other devices work but your jump starter won’t charge, the problem likely lies with the charger or cable—not your electrical system.
Inspect USB Cable Condition
Bent pins, frayed wires, or loose connections prevent proper charging. Examine both ends of your USB cable for visible damage. Wiggle the cable gently while connected—intermittent charging indicates internal wire breaks.
Cable red flags to watch for:
– Exposed copper wiring
– Bent or missing connector pins
– Loose connector housing
– Kinks or severe bends in cable
Many users mistakenly assume their jump starter is broken when the issue is actually a damaged cable. Most portable jump starters use standard USB-C or micro-USB connections that work with common phone cables. Try multiple cables before concluding your device has internal damage.
Verify Adapter Output Rating
Portable jump starters typically require 5V/2A minimum from USB adapters. Phone chargers often provide only 1A, leading to extremely slow or failed charging. Check your adapter’s fine print for output specifications.
Adapter compatibility check:
– Look for 5V⎓2A, 5V⎓2.1A, or 9V⎓2A ratings
– Avoid adapters below 2A output
– Try multiple high-quality adapters
Many modern laptops provide sufficient USB power, making them excellent emergency charging sources. If your jump starter shows a charging light but never reaches full capacity, insufficient adapter power is the most likely culprit.
Clean Charging Port Thoroughly

Remove Debris and Corrosion
Dust, lint, and corrosion build up in charging ports over time. Use a wooden toothpick or plastic dental pick to gently remove debris. Metal tools can damage delicate pins inside the port.
Safe cleaning process:
1. Power off jump starter completely
2. Hold device upside down to prevent debris falling deeper
3. Gently scrape port walls with toothpick
4. Use compressed air to blow out loosened particles
5. Inspect with flashlight for remaining debris
This simple maintenance step resolves many “dead” jump starters. The charging port’s small size makes it vulnerable to pocket lint and dust accumulation, especially if stored with keys or other metal objects.
Clean Contact Points
Battery contact points inside charging port accumulate oxidation. Dampen cotton swab with isopropyl alcohol (70% or higher) and gently clean metal contacts. Allow 5 minutes drying time before charging attempts.
Contact cleaning tips:
– Use minimal alcohol—cotton should be damp, not wet
– Avoid touching plastic components with alcohol
– Clean both port contacts and cable connector
– Look for green or white corrosion buildup
Corrosion forms naturally over time, especially in humid environments. Regular port cleaning every few months prevents this common charging failure point. If you notice green or white powder around contacts, oxidation is almost certainly blocking proper charging.
Reset Internal Battery Management
Force Power Cycle
Jump starters contain battery management systems that occasionally lock up. Hold power button 30 seconds with device unplugged to force complete shutdown. This clears electronic glitches preventing charging.
Power cycle steps:
1. Disconnect all cables from jump starter
2. Press and hold power button for 30 seconds
3. Release button and wait 60 seconds
4. Connect charger without pressing any buttons
5. Observe for charging indicator lights
This reset procedure works for most lithium-powered devices. The battery management system sometimes enters protection mode after multiple partial charges or exposure to temperature extremes. A full power cycle often resets these safety features.
Deep Discharge Recovery
Lithium batteries can enter protection mode when over-discharged. Connect low-draw device (USB fan or small LED) to slowly drain remaining power. This sometimes resets protection circuits.
Deep discharge method:
– Connect 5V USB device to drain battery
– Let device run until completely dead (may take hours)
– Leave uncharged for 2-3 hours
– Attempt charging with known-good adapter
This technique helps when your jump starter shows no signs of life. Lithium batteries sometimes “trick” their management systems into thinking they’re dead when they actually have residual charge. Completely draining the remaining power resets the system’s voltage monitoring.
Identify Hardware Failures

Swollen Battery Symptoms
Physical battery expansion indicates catastrophic failure. Remove jump starter from case if possible. Any visible bulging means battery replacement required—charging won’t fix swollen cells.
Battery inspection checklist:
– Case gaps or separation
– Screen lifting from pressure
– Rocking on flat surface
– Chemical smell from vents
Swollen batteries pose serious safety risks and should never be charged. Lithium batteries swell when they’ve been overcharged, exposed to extreme temperatures, or simply reached end-of-life. Discontinue use immediately if you notice swelling.
Burnt Electronics Smell
Electrical burning odor points to internal component failure. If you smell burning plastic or electronics, discontinue all charging attempts immediately. This indicates dangerous internal damage.
Safety protocols for burnt smell:
– Unplug all connections
– Move to well-ventilated area
– Do not attempt further charging
– Consider professional disposal options
This serious issue requires professional attention. Never attempt to open or repair a jump starter showing these symptoms. The risk of fire or chemical exposure outweighs any potential repair savings.
Prevention Strategies

Proper Storage Practices
Store portable jump starters at 40-60% charge level for longevity. Full discharge during storage damages lithium cells. Check charge level monthly and top off as needed.
Storage environment guidelines:
– Cool, dry location away from sunlight
– 50-70°F temperature range ideal
– Avoid car glove boxes (temperature extremes)
– Remove from charger when full
Temperature is the enemy of lithium batteries. Storing your jump starter in a hot car or cold garage significantly reduces its lifespan. The glove compartment—where many people keep jump starters—experiences extreme temperature swings that degrade battery performance.
Regular Maintenance Schedule
Monthly testing prevents surprise failures. Plug in charger for 10 minutes monthly to verify charging function. This identifies problems before emergency situations.
Monthly maintenance routine:
– Quick visual inspection for damage
– 10-minute charge test
– Clean charging port with compressed air
– Check cable and adapter condition
This simple habit ensures your emergency device works when needed. Many jump starter failures occur because the device sits unused for months or years, allowing corrosion to build up and batteries to degrade.
Charge Level Monitoring
Avoid deep discharges whenever possible. Recharge when battery drops below 20%. Lithium batteries last longer with frequent partial charges versus full cycles.
Battery care best practices:
– Recharge after each use
– Don’t wait for complete discharge
– Partial charges better than full cycles
– Unplug when 100% charged
Unlike older battery technologies, lithium batteries perform best with regular top-offs rather than complete discharge cycles. Waiting until your jump starter is completely dead before recharging accelerates battery degradation.
Emergency Workarounds
Borrow Compatible Chargers
USB-C cables from laptops or tablets often provide adequate power. Many portable jump starters accept various 5V sources. Test friend’s cables and adapters for compatibility.
Emergency charging sources:
– Laptop USB ports (may charge slowly)
– Power banks with 5V output
– Other device chargers (5V/2A minimum)
– Airport charging stations
In an emergency, almost any USB power source can provide enough charge for one jump start. Even a slow charge over several hours can restore minimal functionality. Focus on finding any working 5V source rather than the “perfect” charger.
Manual Jump Start Assistance
When your portable jump starter fails completely, traditional jumper cables become necessary. Keep backup cables in vehicle for situations when portable jump starter won’t charge.
Jumper cable backup plan:
– Store quality 8-gauge cables in vehicle
– Learn proper connection sequence
– Identify positive/negative battery terminals
– Practice with experienced helper
This is why smart drivers keep both portable jump starters AND traditional cables. The portable unit offers convenience, while traditional cables provide reliability when electronics fail. Never rely solely on one method for emergency vehicle starts.
Key Takeaway: Jump starter charging failures typically stem from simple issues—faulty cables, dirty ports, or power source problems. Start with basic troubleshooting before assuming hardware failure. When prevention fails, having backup charging methods and traditional jumper cables ensures you’re never truly stranded.
Next Steps: Begin with power source verification, then progress through cleaning and reset procedures. Document your troubleshooting steps to help repair technicians diagnose persistent issues. Most importantly, establish a regular maintenance routine to prevent charging problems before they leave you stranded.


