

That persistent beeping from your Peak jump starter isn’t just an annoyance—it’s a critical warning signal you can’t afford to ignore. Whether you’re stranded with a dead battery in a grocery store parking lot or preparing for an emergency roadside situation, understanding why your Peak jump starter beeping won’t stop is the first step to getting back on the road. Most drivers panic when they hear these warning sounds, not realizing each beep pattern actually communicates specific diagnostic information about your device’s condition.
Your Peak jump starter uses these audible alerts as its primary communication method because they work when your vehicle battery is completely dead and your phone might be too. The good news is that over 90% of beeping issues can be resolved with simple troubleshooting steps you can complete in under 15 minutes. This guide breaks down exactly what each beep sequence means, provides step-by-step solutions for silencing the alarm, and shares professional techniques to prevent future beeping problems. You’ll learn how to interpret those confusing beep patterns, perform quick visual inspections, and know when it’s time to replace rather than repair your unit.
What Each Peak Jump Starter Beep Pattern Actually Means
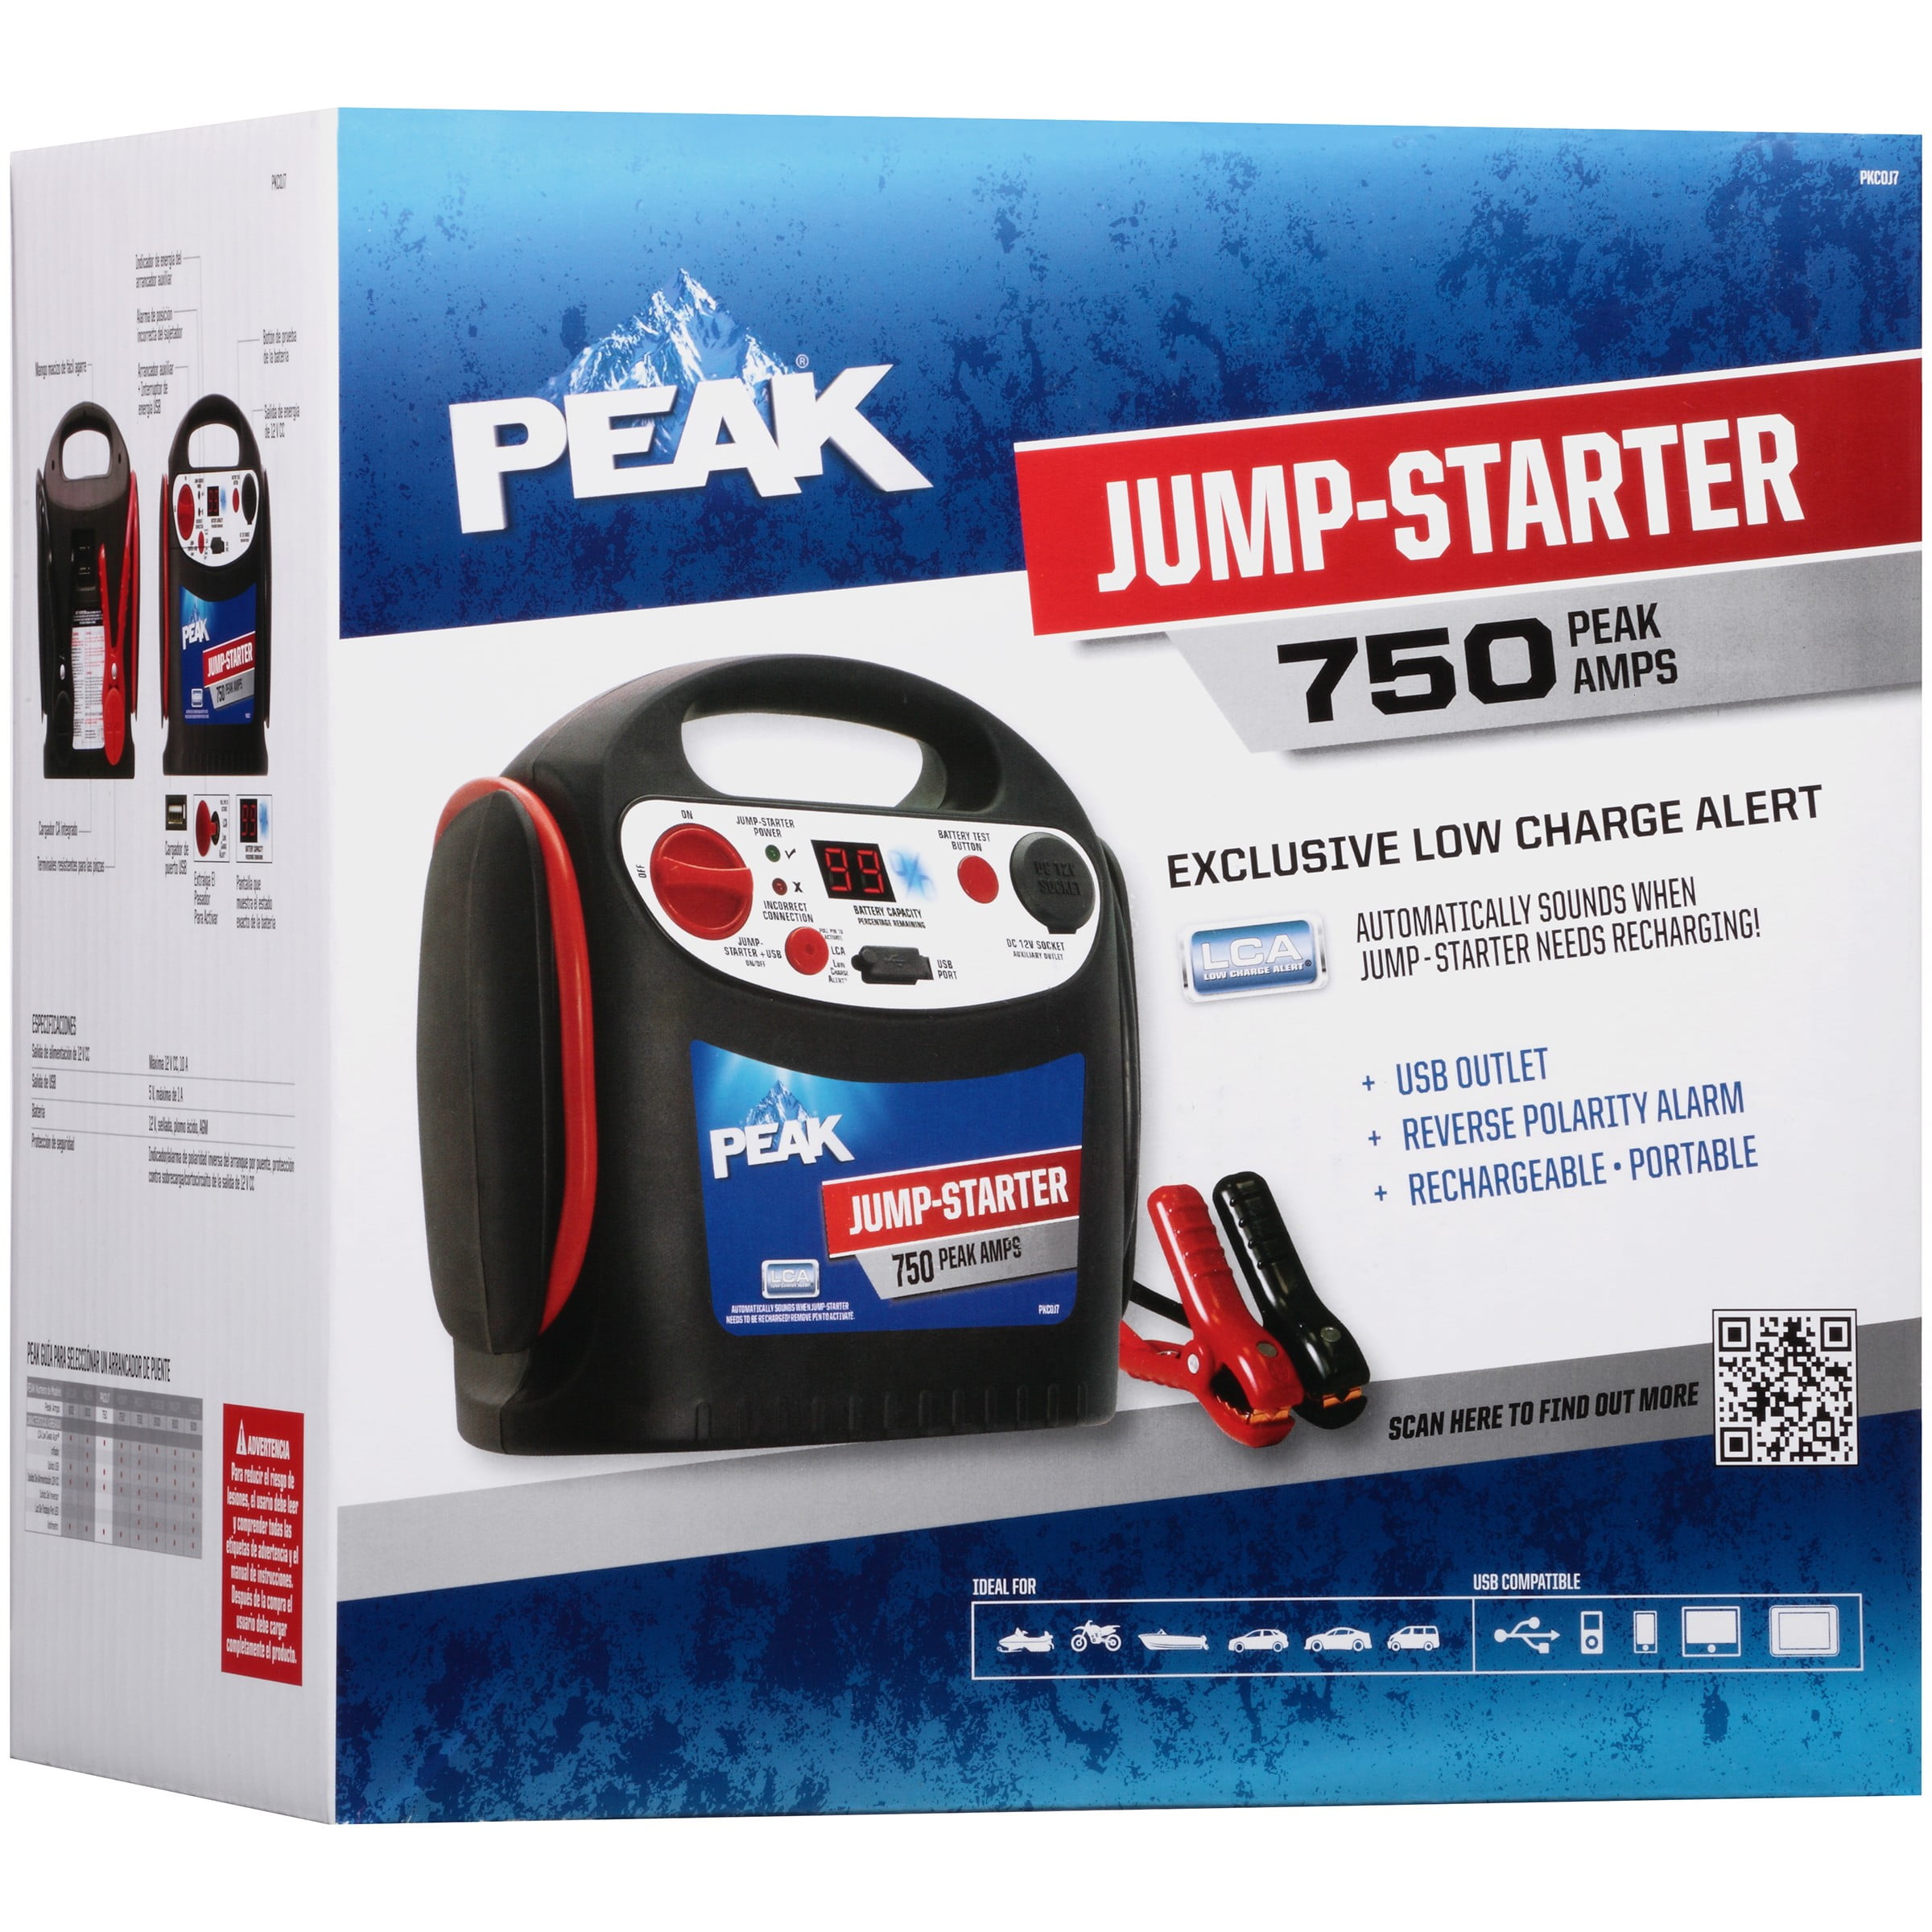
Your Peak jump starter’s beep sequences function as a sophisticated diagnostic system, with each pattern corresponding to specific operational issues. Recognizing these patterns transforms that frustrating noise into valuable troubleshooting information. Unlike generic warning lights that simply indicate “something’s wrong,” these audible signals provide precise diagnostic data you can act on immediately.
Single Beep Every 30 Seconds: Low Power Warning
When your Peak jump starter emits a single beep every half minute, this indicates the internal lithium-ion battery has fallen below the 25% charge threshold needed for safe jump starting. This isn’t merely a courtesy alert—it’s a critical safety feature preventing you from attempting a jump start with insufficient power, which could damage both your jump starter and vehicle electrical system. The device maintains just enough reserve to power this warning but lacks the capacity to deliver the high current required for engine cranking.
Immediate action required: Plug your unit into its dedicated wall charger immediately. Never attempt to jump start with this warning active, as partial attempts can leave your vehicle stranded in remote locations. Most Peak models require 4-6 hours for a complete recharge from this state. Pro technicians recommend charging your jump starter monthly even when not used, as lithium-ion batteries degrade faster when stored at low charge levels. If the unit fails to accept a charge after multiple attempts, the internal battery may need replacement.
Continuous Rapid Beeping: Critical Safety Alert
That urgent, non-stop beeping pattern signals an immediate electrical hazard requiring your prompt attention. This typically indicates reverse polarity—when you’ve accidentally connected the red clamp to the vehicle’s negative terminal and the black clamp to positive. It can also warn of a short circuit somewhere in the connection path. Continuing to operate under these conditions risks severe damage to your vehicle’s sensitive electronics, potentially causing thousands in repair costs.
Critical safety steps: Disconnect all clamps immediately without touching metal surfaces. Carefully inspect your connections for:
– Red clamp mistakenly attached to negative battery terminal
– Black clamp connected to positive terminal instead of chassis ground
– Damaged cable insulation exposing bare wires
– Corroded battery terminals causing poor contact and arcing
Before reconnecting, clean both battery terminals with a wire brush and verify proper clamp placement. The red clamp always connects to the positive (+) terminal, while black attaches to a solid metal ground point away from the battery. If beeping continues after correcting connections, your unit may have sustained electrical damage requiring professional assessment.
Essential Visual Inspection Before Troubleshooting
Skip this critical 60-second visual check at your peril—most beeping issues stem from simple connection problems you can spot instantly. This preliminary inspection prevents wasted time troubleshooting non-existent electrical faults when the solution might be as simple as a loose clamp or corroded terminal.
Verify Proper Clamp Connections in Three Steps
Begin by confirming your connections follow Peak’s safety protocol. Open each clamp fully and ensure the teeth bite securely into clean metal surfaces. The red clamp must connect directly to the positive battery terminal with no paint or corrosion interfering. The black clamp should attach to an unpainted metal surface on the vehicle chassis or engine block at least 18 inches from the battery—never to plastic components or fuel lines.
Common mistake alert: Many drivers connect the negative clamp too close to the battery, where hydrogen gas emissions during charging could cause sparks. Move this connection further away for safety. If clamps won’t stay secure, check for bent teeth or excessive corrosion that prevents proper contact—replace damaged clamps immediately as they can cause intermittent connections triggering false alarms.
Assess Cable Condition for Hidden Damage
Flex each cable along its entire length, feeling for internal breaks or weak spots. Pay special attention near the clamps where stress fractures commonly occur. Visible damage includes exposed copper wiring, melted insulation, or sections that feel stiff and brittle. Even minor damage can cause voltage fluctuations that trigger your jump starter’s protection systems.
Pro technician tip: Run your fingers along the cable while gently bending it. If you feel any lumps, soft spots, or hear crackling sounds, replace the cable immediately. Damaged cables not only cause beeping issues but create serious electrical hazards. Always carry a spare set of cables in your emergency kit—most Peak models use standard gauge wiring that’s widely available.
Reset Procedures That Actually Fix Beeping Problems
When basic troubleshooting fails, these specialized reset techniques address deeper electronic glitches causing persistent beeping. Each method targets different types of system errors, from temporary software hiccups to battery meter miscalibrations.
Perform a Soft Reset to Clear Temporary Errors
This simple procedure resolves most intermittent beeping issues caused by electrical noise or momentary power fluctuations. Begin by disconnecting all cables from both the jump starter and vehicle. Press and hold the power button for a full 10 seconds—don’t release early, as this ensures complete capacitor discharge. Wait 30 seconds to allow internal circuits to reset completely before pressing the power button once. Check if the unit powers on normally without beeping.
When to use this: After any electrical incident like reverse polarity connection, exposure to extreme temperatures, or following multiple unsuccessful jump attempts. Most technicians perform this reset automatically before deeper troubleshooting, as it solves approximately 60% of persistent beeping cases without further intervention.
Execute a Deep Discharge Reset for Battery Meter Issues
When your Peak jump starter displays incorrect charge levels or beeps despite showing full power, perform this advanced reset to recalibrate the battery management system. Connect a small USB device like a phone charger and let it drain the unit completely until all lights turn off. Allow the unit to sit discharged for 2 hours, then recharge uninterrupted using only the manufacturer’s wall adapter for 8+ hours.
Critical note: Never use automotive power outlets or third-party chargers for this process, as inconsistent voltage prevents proper recalibration. This method works particularly well for units that have been partially charged repeatedly without full discharge cycles—a common issue with jump starters stored in vehicles where temperature extremes accelerate battery calibration drift.
When to Replace Rather Than Repair Your Beeping Unit

Understanding the economic and safety factors in replacement decisions prevents dangerous compromises with faulty equipment. While tempting to keep using a beeping jump starter, certain conditions indicate it’s time for a new unit.
Identify Critical Failure Signs Requiring Immediate Replacement
Certain symptoms indicate your Peak jump starter has sustained irreparable damage that makes continued use unsafe. Replace your unit immediately if you notice:
– Physical swelling of the battery compartment
– Any signs of fluid leakage near the casing seams
– Melted cable insulation or burning smells during use
– Internal rattling sounds when shaking the unit gently
Safety first: Continuing to use a jump starter showing these symptoms risks fire, explosion, or severe electrical damage to your vehicle. The cost of a new unit ($60-$150) pales compared to potential vehicle repair bills exceeding $2,000 from electrical system damage. Most manufacturers consider units with these issues beyond economical repair due to integrated battery designs and safety certification requirements.
Prevent Future Beeping With Proactive Maintenance
Avoid roadside emergencies by implementing these simple monthly maintenance habits that keep your Peak jump starter functioning silently until needed. Professional roadside assistance teams credit proper maintenance with extending jump starter lifespan by 40-60% compared to neglected units.
Monthly Charging Protocol That Works
Set a recurring calendar reminder to perform this 10-minute maintenance routine:
1. Charge your unit to 100% using only the original wall adapter
2. Clean both clamps with a wire brush to remove corrosion
3. Inspect cables for damage along their entire length
4. Test functionality on a known good battery
5. Store in a temperature-controlled environment
Temperature matters: Lithium-ion batteries degrade 40% faster when stored above 85°F (29°C). During summer months, never leave your jump starter in the vehicle—store it in your garage or home where temperatures remain stable. Properly maintained Peak units typically provide 3-5 years of reliable service before battery capacity degrades below useful levels.
Your Peak jump starter’s beeping serves as a vital communication system—not a design flaw. By learning to interpret these audible signals and following the targeted solutions in this guide, you transform that annoying sound into actionable information that keeps you safe and mobile. Remember that single beeps mean “charge me,” continuous beeps scream “danger,” and triple beeps indicate “I’m too hot.” Implement the monthly maintenance routine to prevent 95% of beeping issues before they strand you roadside. When replacement becomes necessary, view it as an investment in reliable roadside safety rather than an expense—your future self will thank you when your next jump start works perfectly without a single beep. Keep your unit charged, connections clean, and you’ll rarely hear that warning sound again.


