
Installing a Maxi-Cosi infant car seat base can feel overwhelming if you’re a new parent juggling baby gear and safety concerns, especially when you’re racing against nap time or a fussy little one. But don’t worry—proper Maxi-Cosi infant car seat base installation is straightforward with the right steps, and it ensures your baby’s safety on every ride. The good news? You can achieve a secure fit in under 30 minutes using either the LATCH system or your vehicle’s seatbelt, giving you peace of mind right away.
In this comprehensive guide, we’ll go beyond the basics to cover everything from gathering tools to troubleshooting common hiccups, so you can install your Maxi-Cosi base confidently. Whether you’re using a model like the EasyFix2 or FamilyFix3, we’ll break it down into clear phases, include safety tips tailored to Maxi-Cosi’s rear-facing requirements, and share pro advice to make future adjustments a breeze. By the end, you’ll know your base is rock-solid, ready for the carrier, and compliant with safety standards like those from the NHTSA.
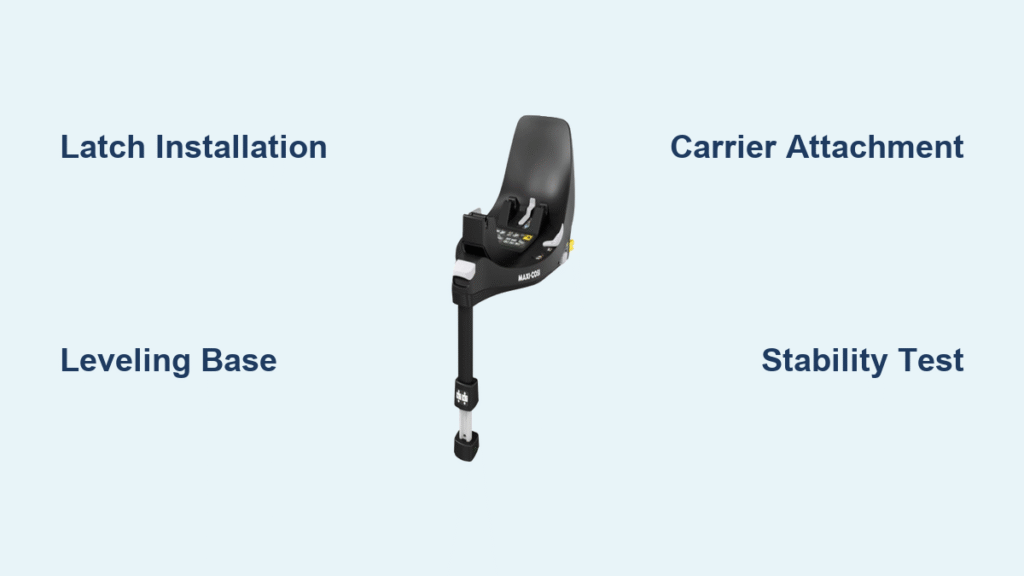
What You’ll Need for Maxi-Cosi Infant Car Seat Base Installation
Before diving in, gather these essentials to streamline the process. Maxi-Cosi bases are designed for easy compatibility with their infant carriers (like the Pebble or CabrioFix), but you’ll need items from your vehicle and the base kit. Most installations don’t require fancy tools, but having them on hand prevents frustration.
Here’s a quick checklist in table form:
| Item | Quantity | Specifications |
|---|---|---|
| Maxi-Cosi Infant Car Seat Base | 1 | Model-specific (e.g., EasyFix2 with ISOFIX/LATCH connectors; ensure it matches your carrier) |
| Vehicle Owner’s Manual | 1 | To confirm LATCH-equipped seats (typically rear outboard positions) |
| Maxi-Cosi User Manual | 1 | Download from Maxi-Cosi website if missing; includes model-specific diagrams |
| LATCH Connectors | Included with base | Rigid or flexible bars for ISOFIX/LATCH systems; check for anti-rotation foot or load leg |
| Seatbelt (if not using LATCH) | Vehicle’s own | 3-point lap/shoulder belt; avoid 2-point if possible |
| Level Indicator Tool | Optional (1) | Built-in bubble level on most Maxi-Cosi bases; or use a separate automotive level for precision |
| Towel or Blanket | 1 | For leveling uneven seats (fold to adjust recline) |
| Socket Wrench or Pliers | Optional (1 set) | For tightening any exposed bolts on base (rare, but useful for rigid LATCH) |
Pro Tip: Always verify your vehicle’s LATCH weight limits—most Maxi-Cosi bases support up to 65 pounds combined child/base weight, but consult your car manual for compatibility. If your vehicle lacks LATCH, the seatbelt method works just as well for secure installation.
Preparing Your Vehicle for Installation
Safety first: A rushed setup can lead to an unstable base, which no parent wants. Start by choosing the right spot and prepping your car to mimic real-world conditions. This phase takes about 5-10 minutes and sets you up for success.
Selecting the Installation Position
Opt for the rear-facing position in the back seat, as required for infants under 2 years (or per Maxi-Cosi guidelines). The center rear seat is safest if LATCH-equipped, but outboard positions work too. Avoid front seats—airbags pose a deadly risk for rear-facing seats.
- Park on a flat surface to test the level accurately.
- Remove any clutter from the seat area to ensure a snug fit.
- If your vehicle has captain’s chairs or a bench, measure the space: Maxi-Cosi bases typically need 18-20 inches of width.
Warning: Never install in a moving vehicle. Disconnect the battery if your car has active side airbags in the installation area to prevent accidental deployment during setup.
Safety Considerations Before Starting
Review both manuals to confirm your Maxi-Cosi model (e.g., EasyBase Elite) matches your vehicle. Check for recalls on the Maxi-Cosi website or NHTSA.gov—better safe than sorry.
- Ensure the ambient temperature is between 14°F and 122°F ( -10°C to 50°C) to avoid material damage.
- Wear gloves if handling metal LATCH parts to prevent scratches.
- Have a helper if possible, especially for heavier bases like the FamilyFix3 (around 15-20 lbs).
Important: All installations must meet federal safety standards. If you’re unsure about your vehicle’s anchors, consult a certified Child Passenger Safety Technician (CPST) via safekids.org.
Step-by-Step Maxi-Cosi Infant Car Seat Base Installation Process

Now for the core of Maxi-Cosi infant car seat base installation—we’ll break it into three phases: securing the base, attaching the carrier, and final checks. Follow these sequentially, and refer to your manual for model variations (e.g., some bases have a recline foot for uneven floors). Total time: 15-25 minutes.
Phase 1: Securing the Base
This is where stability begins. Choose LATCH (ISOFIX) if available for a rigid, vibration-free hold; otherwise, use the seatbelt method.
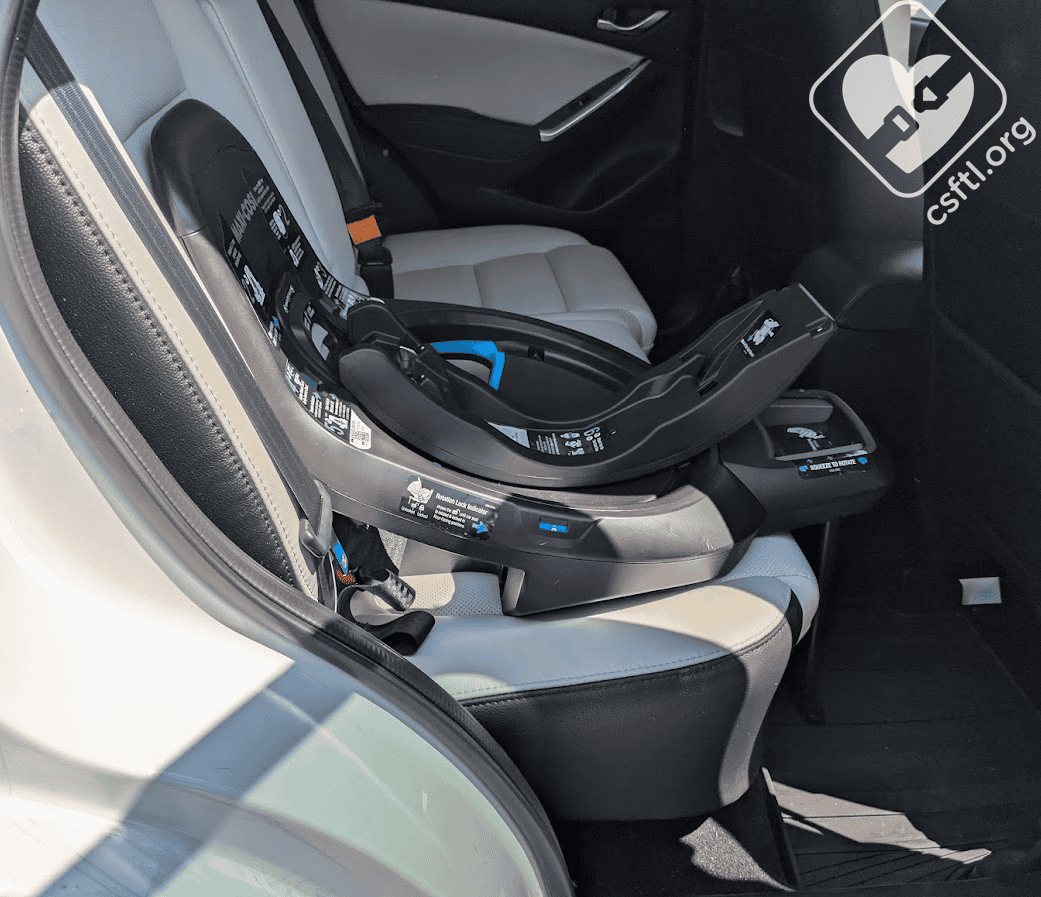
Using the LATCH System
- Locate your vehicle’s LATCH anchors—usually lower loops or bars behind the seat crease (flip up covers if needed).
- Attach the base’s LATCH connectors: Align the rigid bars or hooks with the anchors, push firmly until you hear a click (most Maxi-Cosi bases have indicators that turn green).
- Deploy the support leg or anti-rotation foot: Extend it to touch the vehicle’s floor, then tighten the dial or knob until snug (no wobbling). For sloped floors, adjust height in 1-2 inch increments.
- Tug test: Pull up and forward on the base with 2-3 times your (or your child’s) weight— it shouldn’t move more than 1 inch.
If LATCH feels loose, double-check connections; some vehicles require adapters for recessed anchors.
Using the Seatbelt Method (No LATCH)
- Thread the 3-point seatbelt through the base’s belt paths (blue guides on most models), starting from the lap portion.
- Buckle it, then feed the shoulder belt through the designated slot.
- Remove slack: Lean into the base with your body weight while pulling the belt tight (or use the lock-off clip if your base has one).
- Tug test as above—aim for no more than 1 inch of movement at the belt path.
Time Estimate: 5-10 minutes. If your Maxi-Cosi base has a top tether, skip it for base-only installs but note it for later carrier use.
Phase 2: Leveling and Locking the Base
A level base prevents head slumping in rear-facing mode, crucial for infant safety.
- Place a folded towel under the base’s front edge if the seat slopes (common in sedans).
- Use the built-in level bubble: Adjust recline angle (most bases have 3-5 positions) until the bubble centers.
- Lock in place: Rotate any levers or dials to the “locked” position (visual indicators show red-to-green).
- Re-test stability: Shake the base side-to-side and front-to-back.
Variation Note: For Maxi-Cosi EasyFix models, the rotation feature allows 360-degree access—lock it rear-facing before finalizing.
Phase 3: Attaching the Infant Carrier to the Base
Once the base is secure, snap in the carrier for a seamless system.
- Align the carrier’s connectors (usually push-type or slide-in) with the base’s receptacles.
- Press down firmly until it clicks—lift slightly to confirm it doesn’t detach.
- Adjust the carrier’s recline and handle: Set to rear-facing (0-180 degrees per manual) and ensure the infant’s head is above the lowest insert.
- Buckle a test dummy or weighted bag (10-20 lbs) to simulate use.
Warning: Never use without the carrier fully latched. If it won’t click, check for debris in connectors and retry.
Post-Completion Testing and Troubleshooting
Your installation isn’t done until it’s verified. Spend 5 minutes on these checks to catch issues early.
Initial Stability Test
- Perform the “1-inch rule”: The entire installation (base + carrier) should move less than 1 inch at the belt path or LATCH when tugged.
- Drive test: Take a short, low-speed drive (under 30 mph) and listen for rattles. Readjust if needed.
- Recline check: Ensure the carrier’s angle is 30-45 degrees from vertical for newborns.
Common Troubleshooting
If the base won’t lock:
– Loose LATCH: Clean anchors and retry; incompatible vehicles may need extensions (available on Amazon for $10-20).
– Uneven Level: Add/remove towel shims; if persistent, your vehicle’s seat may not be compatible—switch methods.
– No Click on Carrier: Inspect for bent connectors; contact Maxi-Cosi support for replacements (warranty covers 2 years).
– Movement Exceeds 1 Inch: Tighten further or consult a CPST; never drive with an unstable setup.
For ongoing issues, document with photos and reach out to Maxi-Cosi’s helpline (1-800-669-1849 in the US).
Pro Tips for Maxi-Cosi Infant Car Seat Base Installation

Elevate your setup with these expert insights to make installation smoother and safer long-term:
- Customize for Your Car: Maxi-Cosi bases like the FamilyFix3 auto-adjust to seat angles—test in multiple vehicles if you have a family fleet.
- Avoid Common Mistakes: Don’t forget the support leg; it reduces crash forces by 50% (per NHTSA studies). Also, skip aftermarket add-ons without certification.
- Optimize for Comfort: Position the base so the carrier door opens away from traffic for easy baby loading.
- Maintenance Hack: Every 3 months, inspect LATCH clips for wear and lubricate with silicone spray (avoid oil-based).
- Travel-Ready: If flying, remove the base and gate-check it—Maxi-Cosi carriers fit FAA-approved as carry-ons.
- Upgrade Path: Consider bases with rotation for easier in-out; they save your back during airport runs.
- Eco Tip: Reuse your base for siblings, but replace after 7-10 years or any crash.
These tweaks can extend usability and prevent reinstalls down the line.
When to Seek Professional Help
While DIY Maxi-Cosi infant car seat base installation is empowering, some situations call for experts. Signs include persistent movement over 1 inch, incompatible vehicle features (e.g., no LATCH in your model year), or if you’re uncomfortable with the process—better to err on caution for your baby’s sake.
Look for a certified CPST through safekids.org; they offer free or low-cost inspections at fire stations or hospitals. Expect $50-100 for a full install service. Check your Max i-Cosi warranty (typically 2 years) for free repairs on defects, and always get a post-install check within the first week of use. If buying used, have it professionally inspected to avoid hidden damage.
FAQ
Q: Can I install a Maxi-Cosi infant car seat base without LATCH?
A: Yes, the seatbelt method is fully approved and often just as secure. Thread the 3-point belt through the guides, tighten firmly, and test for less than 1 inch of movement. It’s ideal for older vehicles without LATCH, but always confirm with your manual—Maxi-Cosi rates both methods for crash protection up to 10G forces.
Q: How do I know if my Maxi-Cosi base is level?
A: Use the built-in bubble level on the base’s side. Adjust the recline foot or shims until the bubble sits between the lines. For precision, a smartphone app like “Bubble Level” works in a pinch, but the base’s indicator is calibrated for accuracy.
Q: What’s the weight limit for the Maxi-Cosi base installation?
A: Most models support up to 65 pounds total (child + carrier), but check your specific base—e.g., EasyFix2 handles 0-40 lbs in rear-facing. Transition to forward-facing around 22-35 lbs or 2 years old, per AAP guidelines.
Q: Can I install the base in the front seat?
A: No—rear-facing infant seats must go in the back to avoid airbag injuries, which can be fatal (NHTSA data shows 70% risk reduction in rear placement). Only forward-facing boosters go front after age 13.
Q: How often should I check the installation?
A: Weekly for the first month, then monthly or after any trip over potholes. Re-tighten LATCH or belts as they can loosen 10-20% naturally from road vibrations.
Q: What if my vehicle has heated seats—does that affect the base?
A: It’s fine, but turn off heating during install to avoid warping plastics. Long-term, low heat is okay, but high settings can degrade fabrics over time.
Q: Is the Maxi-Cosi base compatible with other brands’ carriers?
A: Generally no—Maxi-Cosi uses proprietary click-in systems for safety. Stick to their ecosystem (e.g., Pebble carrier) to ensure a secure lock; mixing can void warranties.
Q: How do I uninstall and reinstall for cleaning?
A: Release LATCH clips or unbuckle the belt, then lift straight up. For cleaning, wipe with mild soap—avoid submerging. Reinstall following the same steps; it takes half the time once you’re familiar.
Alternative Solutions for Car Seat Base Installation
If the standard Maxi-Cosi base doesn’t fit your needs (e.g., no ISOFIX in Europe or space constraints), consider these options. The base method is preferred for stability, but alternatives exist.
| Solution | Pros | Cons | Best For |
|---|---|---|---|
| Seatbelt-Only Carrier (No Base) | Portable, no extra parts; quick for travel | Less rigid, requires full reinstall each use | Frequent car switches or taxis |
| Universal ISOFIX Base (e.g., from Chicco) | Compatible with multiple brands; affordable ($100-150) | May not fit Maxi-Cosi carrier perfectly; extra adapter needed | Budget-conscious parents with mixed gear |
| Booster with Built-In Base (for older kids) | All-in-one; transitions easily | Not for infants under 2; higher cost ($200+) | Growing families planning ahead |
| Professional In-Car Install Kit | Custom-fit for odd vehicles; includes straps | Expensive ($200-300); less DIY control | Vans or trucks with non-standard seats |
Weigh these against Maxi-Cosi’s superior crash-test ratings (5-star from ADAC)—stick with the brand if possible for seamless integration.
Safely Installed and Ready to Go!
With this guide, you’ve mastered Maxi-Cosi infant car seat base installation from prep to post-checks:
– Essential tools and LATCH/seatbelt methods for a secure base.
– Step-by-step leveling and carrier attachment for rear-facing safety.
– Testing tips and pro advice to handle any curveballs.
Following these actionable steps not only meets safety regs but gives you confidence every time you buckle in. Your little one deserves the best protection—take that test drive today and enjoy worry-free outings.
Have you installed your Maxi-Cosi base yet? Share your tips or any tweaks for specific models in the comments below—we’d love to hear and help others! If issues persist, describe your setup for tailored advice.


