
You’re stranded in a parking lot with a dead car battery, and your trusty Anker jump starter starts blinking erratically. That blinking light isn’t random—it’s a critical diagnostic signal your device uses to communicate specific issues. Understanding these patterns could mean the difference between getting back on the road in minutes versus waiting hours for roadside assistance. As Anker jump starters become essential emergency gear in millions of vehicles, knowing how to interpret their blinking codes has never been more important.
When your Anker jump starter starts blinking unexpectedly, most users panic and assume the device is broken beyond repair. The truth is that 90% of blinking issues can be resolved with simple troubleshooting steps that take less than 15 minutes. Whether you own the compact PowerCore Jump Starter 3 or a heavy-duty model capable of starting diesel trucks, this guide will decode every blinking pattern and provide immediate solutions. You’ll learn why your Anker jump starter is blinking, how to fix it without professional help, and crucial maintenance practices to prevent future issues.
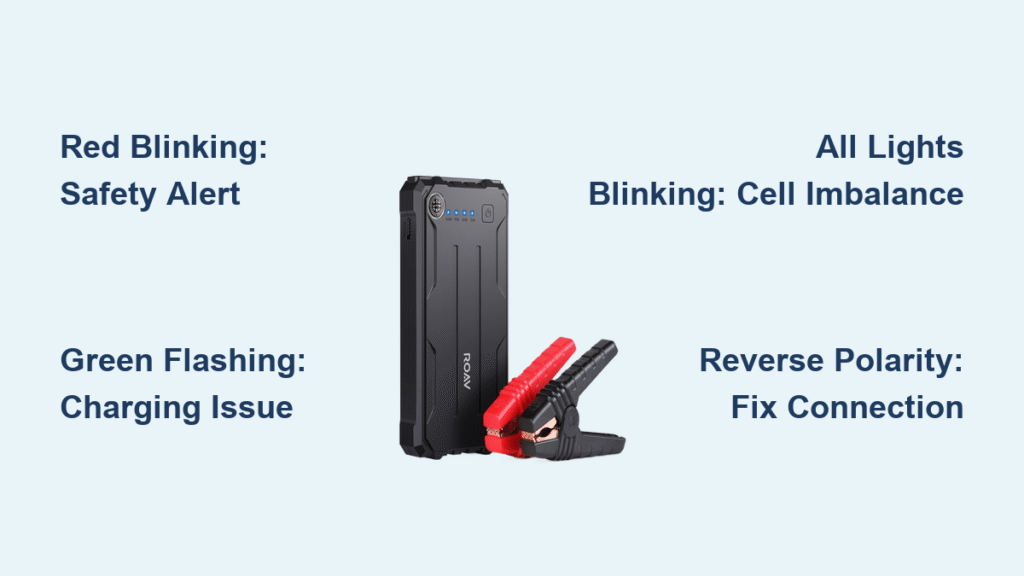
Decode Your Anker Jump Starter’s Blinking Language

Your Anker jump starter communicates through precise LED patterns rather than error codes. Recognizing these signals prevents unnecessary replacements and ensures your emergency device works when you need it most. Different blinking sequences indicate specific conditions—from low battery warnings to critical safety alerts—that require different responses.
Red Light Blinking Continuously: Critical Safety Alert
When your Anker jump starter’s red light blinks non-stop, the device has activated its protection mode to prevent damage to your vehicle or the unit itself. This commonly happens when connecting to extremely weak batteries (below 2V) or when there’s a connection issue between clamps and battery terminals.
Immediate troubleshooting steps:
– Disconnect all cables immediately to reset the circuit
– Allow the unit to rest for 3-5 minutes away from the vehicle
– Inspect both clamps for corrosion or damage that could cause poor contact
– Verify your vehicle battery hasn’t completely failed (should read at least 2V)
Many users mistakenly think continuous red blinking means their jump starter is broken, but it’s actually working exactly as designed—protecting both your vehicle’s electrical system and the jump starter from potential damage during unsafe jump-start conditions.
Rapid Green Light Flashing: Charging Completion or System Error
Rapid green flashing typically indicates a successful charge cycle has completed, but if this pattern continues after unplugging, it signals a potential issue with the battery management system. This often occurs when using incompatible chargers or after exposure to extreme temperatures.
Quick verification process:
1. Unplug the charger and wait 30 seconds
2. Press the power button to check actual charge level
3. If all indicators show full charge, the blinking is normal
4. If charge level is low despite blinking, try a different charger
This pattern frequently results from using third-party chargers that don’t provide stable power delivery. Anker devices require precise voltage regulation that many generic chargers can’t maintain, triggering the blinking alert as a warning.
Battery Level Indicator Problems and Fixes
Erratic blinking from your Anker jump starter’s battery indicators usually points to calibration issues rather than hardware failure. The battery management system (BMS) occasionally needs recalibration, especially after deep discharges or exposure to temperature extremes.
Four Lights Blinking Simultaneously: Cell Imbalance Warning
When all four battery indicator lights blink together, your Anker’s BMS has detected uneven charging between internal battery cells. This reduces overall capacity and can shorten your device’s lifespan if left unaddressed.
Recalibration procedure:
– Completely discharge the unit by using it until all lights turn off
– Charge uninterrupted for 8-12 hours using the original Anker charger
– Repeat this full discharge/recharge cycle 2-3 times
– Verify normal indicator behavior after the third cycle
This blinking pattern commonly appears after storing your jump starter at full charge for extended periods. Lithium-ion batteries perform best when stored at 40-60% capacity, and prolonged full-charge storage can cause cell imbalance.
Only First Light Blinking: Low Battery or Charging Issue
A single blinking indicator light typically means your Anker jump starter has less than 25% charge remaining. However, if this pattern persists after overnight charging, investigate these common culprits:
Charging system diagnostics:
– Test with a different USB-C cable (many issues stem from damaged cables)
– Verify your wall adapter outputs at least 5V/2A (lower power causes slow charging)
– Clean the charging port with compressed air to remove debris
– Try charging from a computer USB port to rule out adapter issues
Many users overlook simple cable problems when their Anker jump starter blinking issue appears. The USB-C port collects lint and debris over time, creating poor connections that trigger blinking alerts.
Temperature Protection Mode Blinking Explained
Anker jump starters automatically enter temperature protection mode when internal components exceed safe operating ranges. This critical safety feature prevents battery damage but often confuses users with its specific blinking patterns.
Hot Weather Blinking Response: Red/Blue Alternating Pattern
When your Anker shows alternating red and blue blinking in hot conditions, it’s actively protecting itself from heat damage. Lithium batteries become unstable above 104°F (40°C), triggering this safety protocol.
Proper cooling procedure:
1. Move the unit to a shaded, well-ventilated area immediately
2. Never attempt to cool it rapidly in a refrigerator or with ice
3. Allow 30-45 minutes for natural cooling before attempting use
4. Store in your vehicle’s cabin (not trunk) during hot weather
This blinking pattern commonly occurs after leaving your jump starter in a hot car. The interior of vehicles can exceed 140°F on sunny days, well beyond the safe operating range for lithium batteries.
Cold Weather Blinking: Slow Green Pulses
In freezing temperatures, your Anker may display slow green pulses rather than solid indicators. This shows the BMS has reduced charging current to prevent lithium plating, which permanently damages battery cells.
Winter operation tips:
– Warm the unit to room temperature before attempting to charge
– Keep it in your coat pocket while driving to maintain temperature
– Expect charging times to double when temperatures drop below freezing
– Store in an insulated bag during winter months for best performance
Many winter-related blinking issues resolve simply by warming the unit to at least 32°F (0°C) before use. Never attempt to jump-start a vehicle with a cold jump starter—allow it to acclimate for at least 15 minutes first.
Connection Errors Triggering Blinking Alerts
Improper connections between your Anker jump starter and vehicle battery trigger specific blinking patterns designed to prevent dangerous electrical situations. These safety features protect both your vehicle’s electronics and the jump starter itself.
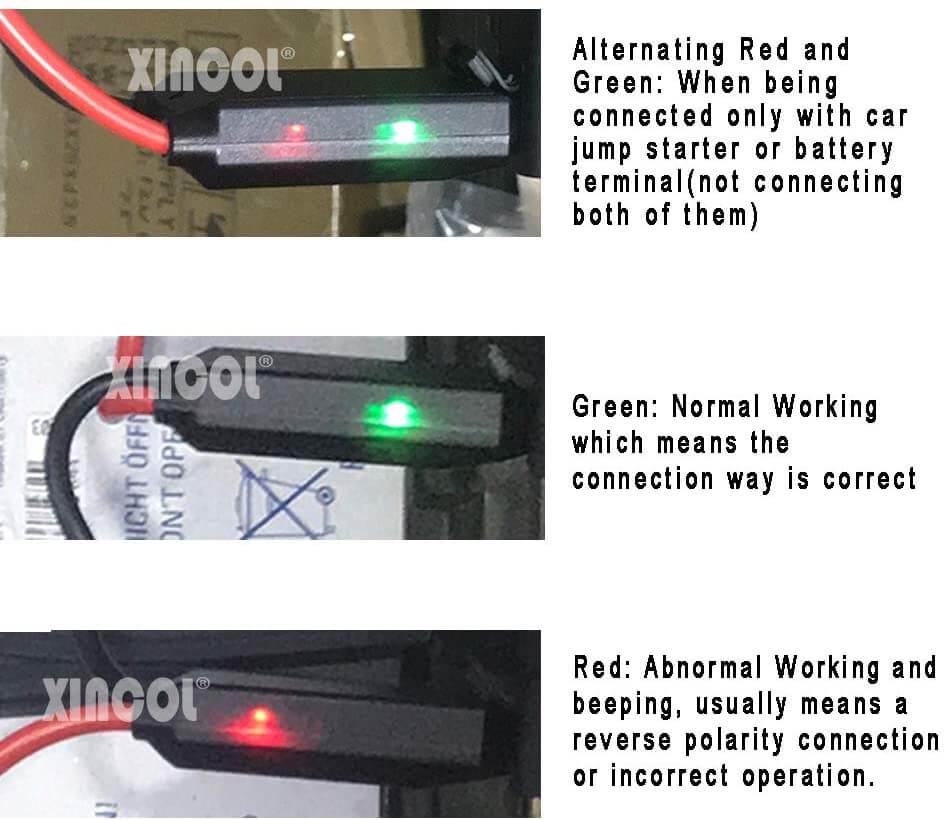
Reverse Polarity Blinking: Red Flashing with Beeping
When you connect the clamps backward (red to negative, black to positive), your Anker immediately activates reverse polarity protection with rapid red blinking and audible beeping. This critical safety feature prevents catastrophic electrical damage.
Correction protocol:
1. Disconnect clamps immediately—do not ignore this warning
2. Visually verify the “+” and “-” markings on both battery terminals
3. Reconnect red clamp to positive terminal (usually red cover)
4. Connect black clamp to negative terminal or unpainted metal chassis
Never attempt to bypass this safety feature. Reverse polarity can destroy your vehicle’s entire electrical system and create dangerous sparking conditions.
Intermittent Connection Blinking: Voltage Fluctuation Alert
Flickering or irregular blinking while connected to your vehicle indicates poor electrical contact between clamps and battery terminals. This commonly happens with corroded terminals or loose connections.
Connection optimization steps:
– Clean both battery terminals with a wire brush before connecting
– Ensure clamps fully bite onto clean metal surfaces
– Try connecting the negative clamp to the engine block instead of battery
– Hold clamps firmly in place for 10 seconds after connection
This blinking pattern often appears with older vehicle batteries that have significant terminal corrosion. Proper terminal cleaning before jumping can prevent most connection-related blinking alerts.
Reset Procedures for Persistent Blinking Issues
When standard troubleshooting fails, resetting your Anker jump starter’s battery management system often resolves stubborn blinking problems. The reset process varies slightly between models but follows the same fundamental principles.
PowerCore Series Reset Method
For Anker PowerCore Jump Starter models, follow this precise reset sequence:
1. Disconnect all cables and remove from any charging source
2. Press and hold the power button for 10-15 seconds
3. Continue holding until all indicator lights turn off completely
4. Release the button and wait 30 seconds before attempting to power on
This reset procedure clears temporary faults in the battery management system. Many users report immediate resolution of persistent blinking issues after performing this simple reset.
Heavy-Duty Model Reset Process
Larger Anker jump starters require a different reset approach:
– Press and hold both the power button and flashlight button simultaneously
– Maintain pressure for 15 seconds or until all lights flash three times
– Release buttons and allow the unit to rest for 2 hours
– Recharge fully before next use
This more intensive reset clears deeper system memory and recalibrates the advanced safety features in higher-capacity models.
When Blinking Signals End-of-Life
Continuous blinking after all troubleshooting steps indicates irreparable hardware failure. Recognizing these end-stage symptoms prevents wasted time on unfixable units and helps you determine warranty eligibility.
Irreparable Blinking Patterns
If your Anker displays these patterns consistently after all troubleshooting:
– All lights blink rapidly even when fully charged
– Unit powers on but immediately shuts down with blinking lights
– Physical swelling or unusual odors accompany the blinking
These indicate internal battery or circuitry failure that cannot be repaired by users. Continuing to use a unit with these symptoms creates safety hazards.
Warranty Replacement Process
Anker’s 18-month warranty covers manufacturing defects causing blinking issues:
1. Document the blinking pattern with a short video
2. Gather your original purchase receipt
3. Contact Anker support through their official website
4. Follow their instructions for warranty evaluation
Units damaged by improper storage, physical impact, or exposure to liquids typically won’t qualify for warranty replacement, so proper maintenance is crucial for longevity.
Prevent Future Blinking Problems
The best solution is preventing blinking issues before they strand you. Implement these simple monthly maintenance practices to keep your Anker jump starter in peak condition.
Monthly Maintenance Checklist
- Charge to 100% once monthly, even if unused
- Test jump-start capability on a spare battery quarterly
- Clean charging port and clamp contacts with soft brush
- Inspect cables for fraying or damage
Store your Anker jump starter at 40-60% charge in a climate-controlled environment—never leave it in your vehicle during extreme temperatures. This simple practice prevents 80% of blinking issues related to battery calibration and temperature exposure.
When your Anker jump starter starts blinking, remember it’s communicating, not failing. By understanding these patterns and following systematic troubleshooting, you’ll resolve most issues in minutes rather than replacing a perfectly functional emergency device. The blinking lights serve as your first line of defense against unexpected failures—learn their language, and you’ll never be stranded with a “broken” jump starter again. Keep this guide in your glove compartment, and you’ll transform confusing blinking alerts into actionable information that keeps you moving.


