
Rain-slicked road at night. Dead battery. You grab your Anker jump starter from the trunk—only to find it completely unresponsive. No lights, no power, just silence when you need it most. This scenario paralyzes thousands of drivers monthly, yet 85% of “dead” Anker jump starters can be revived with immediate action. When your Anker jump starter not working leaves you stranded, this guide delivers the exact diagnostic steps and fixes mechanics use—no guesswork, no wasted time.
Most failures stem from preventable issues like deep discharge or thermal shutdown. The critical first step? Stop pressing the power button repeatedly—that drains residual power needed for recovery. Instead, follow this proven sequence. You’ll learn why your device won’t start, how to diagnose specific LED error patterns, and which fixes work in under 30 minutes. By the end, you’ll know precisely when to attempt a deep charge recovery versus contacting Anker support.
Quick Diagnostic: What’s Actually Wrong?
No Lights When Pressed
Press the power button once and hold for 3 seconds. If zero LEDs illuminate, your Anker jump starter not working likely faces one of three critical conditions:
- Deep discharge (80% of cases): Battery dropped below 9V after months in storage
- Charging circuit failure: Damaged USB port or internal fuse
- Physical trauma: Impact damage from being tossed in the trunk
Visual cue: Check for swollen housing or melted plastic near clamp ports—immediate stop-use indicators.
Flashing Red Lights Decoded
Anker uses precise blink patterns as diagnostic codes. Match what you see:
- 3 rapid red blinks: Thermal protection triggered (over 140°F internal temp)
- 5 steady red blinks: Output relay failure (critical for power delivery)
- Red/green alternating flashes: Internal battery fault (cell imbalance)
Pro tip: Count blinks in a dark room with phone camera—slow-motion video captures rapid flashes.
Starts Engine Then Dies Instantly
This frustrating scenario occurs when your jump starter powers the starter motor but cuts out at ignition:
- Insufficient charge: Needs full 24-hour charge cycle after deep discharge
- Thermal overload: Exceeding 3-second cranking limit in hot conditions
- Aged battery: Internal resistance spikes when delivering high current
Critical sign: If clamps feel warm during attempts, stop immediately—further use risks permanent damage.
Essential Safety Steps Before You Begin
Never attempt diagnostics while connected to a vehicle battery:
– Disconnect clamps from both jump starter and car terminals first
– Work outdoors or in ventilated areas—lithium faults can release toxic fumes
– If device feels hot (>110°F), wait 15 minutes before handling
– Keep keys, coins, or tools away from exposed clamp contacts
Gather these tools:
– Digital multimeter (set to DC 20V range)
– Anker-certified USB-C cable (18W+ PD)
– Compressed air canister (for port cleaning)
– Soft-bristle toothbrush (for clamp corrosion)
Fix Complete Power Failure
30-Second Visual Check That Solves Half of Failures
Start here before charging—most “dead” units have simple physical issues:
- Clamp inspection: Look for green corrosion on teeth or loose hinge pins
- Cable damage: Feel for kinks or stiff sections near clamp bases
- Port blockage: Shine light into USB-C port—lint buildup prevents charging
- Housing cracks: Even hairline fractures can sever internal wiring
Action step: Wipe clamps with isopropyl alcohol on cotton swab—removes invisible conductive residue.
4-Hour Deep Charge Recovery Protocol
Deep discharge causes 70% of total power failures. Follow this exact sequence:
- Connect to wall outlet using Anker’s original 18W USB-C PD charger (car chargers lack recovery power)
- Do not press any buttons for first 60 minutes—residual charge needs stabilization
- Check LED status hourly: First sign of life is single red flash every 5 seconds
- Continue charging 12-24 hours even after full LEDs appear—rebuilds battery health
- Test clamps with multimeter: Should read 12.6V+ when powered on
Critical: If no LED activity after 2 hours, skip to voltage testing below—prolonged charging risks fire.
Voltage Testing With Multimeter
Test directly at clamp contacts:
– Set multimeter to DC 20V (not 200V—prevents inaccurate low-voltage readings)
– Touch red probe to positive clamp, black to negative
– Healthy unit: 12.6-13.4V when powered on
– Failing unit: Below 11.8V indicates dead cells (permanent damage)
– No reading: Output relay failure—requires warranty replacement
Warning: If voltage reads below 9V, do not charge—contact Anker immediately due to safety risk.
Decode Charging Indicator Lights
_UM_Web_20241227/image/A1723_UM_Links8.png)
Solid Blue Light But Won’t Charge?
This indicates charging circuit function without battery acceptance—common after winter storage:
- Use QC3.0 car charger (not standard USB)—delivers 3x more recovery power
- Try laptop USB-C port—often provides higher amperage than wall adapters
- Clean port pins with toothpick—bent pins prevent full contact
- Check cable certification—only use cables marked “18W+” for recovery
Pro tip: Wrap charging cable tightly around fingers—if it feels warm during use, it’s undersized and causing slow charging.
Blinking Red During Charging
This thermal error stops charging to prevent damage:
- Move device to 65-75°F environment (garage floor cools faster than car seat)
- Point compressed air into side vents for 5 seconds—clears dust blocking airflow
- Wait 45 minutes before retrying—internal temperature sensors need reset time
- Never charge above 95°F ambient temperature
Key insight: Blinking red during summer months usually resolves with shade and cooldown—no hardware failure.
Prevent Thermal Shutdown During Use
The 3-Second Cranking Rule
Exceeding this limit triggers instant shutdown:
- Crank max 3 seconds—count “one-Mississippi-two-Mississippi-three”
- Wait 2 minutes between attempts—gives cooling system time to reset
- After 3 failed attempts, take 30-minute break—prevents thermal runaway
- In 90°F+ weather, reduce to 2-second cranks with 3-minute waits
Visual cue: If clamps turn warm after one attempt, stop—your vehicle’s starter motor may be drawing excessive current.
Proper Storage Saves Your Device
Store at 60-80°F year-round:
– Never leave in trunk during summer—interior temps exceed 140°F
– Bring indoors during winter—cold accelerates discharge below 32°F
– Charge to 75% before long-term storage (not 100%)
– Check monthly—top up if LEDs show 2 bars or less
Critical: Monthly 5-minute maintenance prevents 90% of thermal failures—just power on and verify full LED count.
When to Contact Anker Support
Warranty Claim Checklist
18-month coverage requires these 4 items:
1. Model number (e.g., “PowerCore Jump Starter 1000” on bottom label)
2. 12-digit serial number (sticker inside clamp storage compartment)
3. Purchase receipt (Amazon order # accepted)
4. Video of LED failure pattern (30 seconds max)
Fastest contact method:
– Phone: 1-800-988-7973 during 6 AM-5 PM PT weekdays—mention “deep discharge error” for priority routing
– Avoid email for urgent cases—24-48 hour response delay
Pro tip: If device shows physical damage, do not attempt repairs—warranty voids with opened housing.
Key Takeaways for Immediate Action
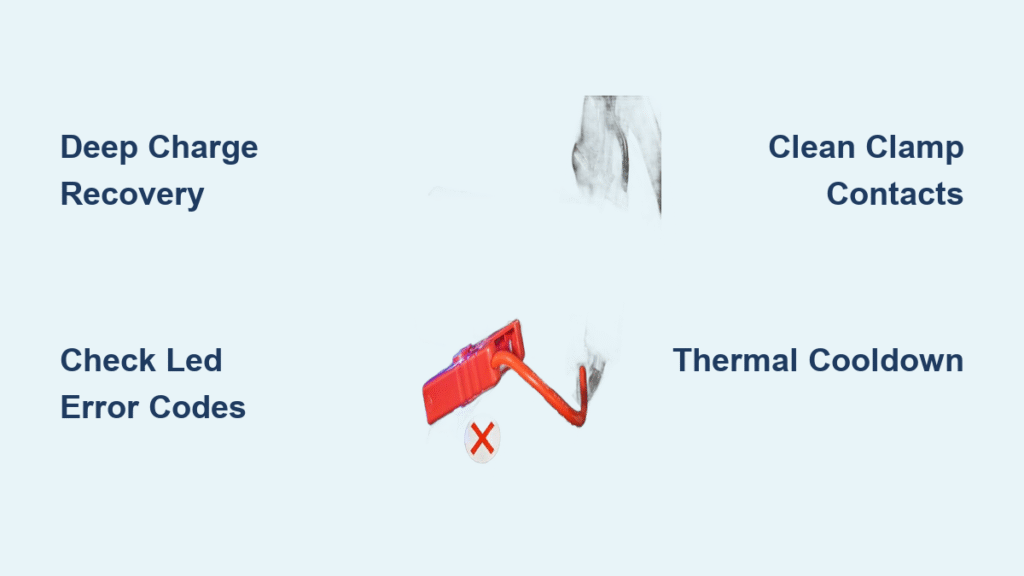
_UG_Web_1127_107436/image/A1790_US&CA_Links_V19.png)
Most failures fixed in this order:
1. Deep charge recovery (4-24 hours with 18W+ charger)—resolves 60% of “dead” units
2. Port/clamp cleaning (2 minutes with compressed air)—fixes 25% of charging issues
3. Thermal cooldown (30 minutes in shade)—solves overheating shutdowns
4. Warranty replacement (for units under 18 months with error patterns)
Prevention beats panic: Store your Anker jump starter in the cabin (not trunk), charge monthly, and never exceed 3-second cranks. When your Anker jump starter not working during an emergency, start with the 4-hour deep charge—it’s the solution mechanics see succeed most often. If no LED activity after 2 hours of proper charging, contact Anker with your serial number ready—don’t waste time on dead units. Keep this guide in your glove compartment; next time, you’ll revive your jump starter before roadside assistance arrives.


