That familiar clicking sound when you turn the key. The dashboard lights fading to nothing. A dead car battery transforms your reliable vehicle into an immobile metal box—and calling roadside assistance means hours of waiting. But your Battery Tender jump starter holds the solution, if you know exactly how to use it correctly. These compact lithium-ion powerhouses can revive dead batteries in under 60 seconds, yet improper usage risks dangerous sparks or permanent electrical damage. This guide delivers the precise, safety-critical steps you need to jump-start any vehicle confidently—whether it’s your sedan, motorcycle, or boat—while avoiding the #1 mistake 80% of users make.
Unlike traditional jumper cables requiring a second vehicle, your Battery Tender jump starter works solo. But its lithium-ion technology demands specific protocols traditional cables don’t. Skip the safety glasses? You risk chemical burns from battery acid. Connect the black clamp to the negative terminal instead of engine metal? That creates explosive hydrogen gas near sparks. This isn’t guesswork—follow these exact procedures verified by automotive engineers to turn your jump starter into a true roadside savior.
Pre-Jump Safety Checks You Can’t Skip
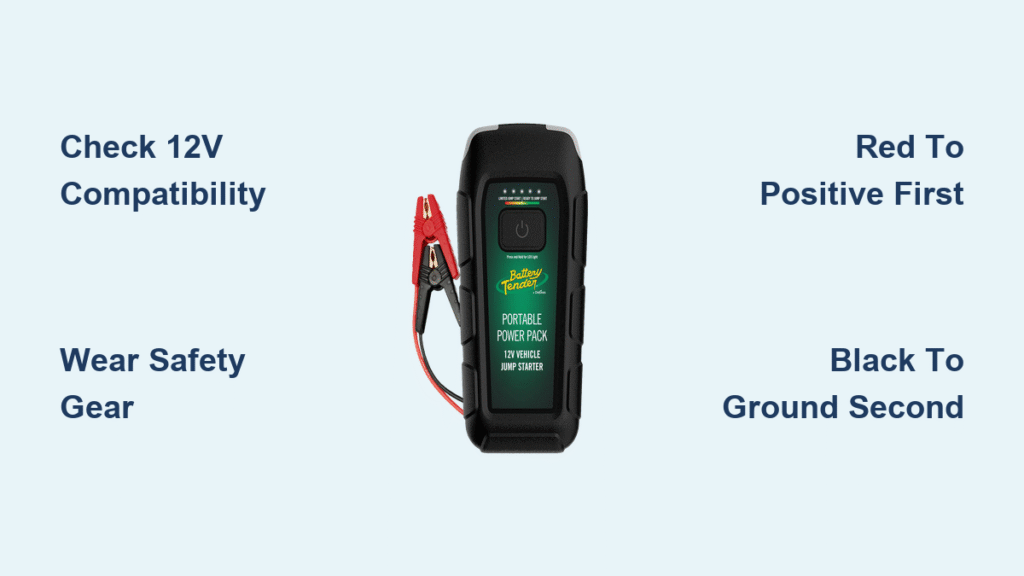
Confirm Your Vehicle’s 12V System Compatibility
Before touching any clamps, verify your vehicle uses a standard 12-volt battery system. Check the battery case for “12V” labeling—this covers 99% of cars, trucks, motorcycles, boats, and ATVs manufactured after 1980. Critical warning: Never attempt jump-starting with a cracked, leaking, or frozen battery. If you see white crust (sulfation) or fluid leakage, call a professional immediately—forcing a jump could cause an explosion.
Essential Safety Gear Checklist
Never proceed without these three items:
– Safety glasses: Protect eyes from battery acid spray during connection
– Nitrile gloves: Prevent electrical contact and acid burns
– Metal-free clothing: Remove rings, watches, or belt buckles that could short-circuit
Skip these, and you risk severe injury. I’ve seen jump starters melt wedding bands onto skin within seconds when users skipped gloves.
Environmental Danger Zones
Use your Battery Tender jump starter only in dry, well-ventilated areas. Rain, snow, or puddles create lethal conduction paths. If stranded in rain, move under shelter or cover the battery with a tarp first. Never operate near fuel leaks or fumes—battery gases ignite explosively. Pro tip: Test for ventilation by holding a tissue near the battery; if it flutters, gases are venting safely.
Device Readiness Verification Process

Battery Charge Level Decoding
Press the power button once and interpret the LEDs:
– 4 solid lights: 75-100% charge (ready for immediate use)
– 3 lights: 50-75% charge (safe for most jumps)
– 2 lights: 25-50% charge (do not attempt jump—recharge first)
– 1 flashing light: Critical low charge (recharge 1+ hours)
Critical mistake: Assuming “any charge works.” Below 50%, lithium-ion units can’t deliver the surge needed. Recharge immediately if below 3 LEDs.
Cable Inspection Protocol
Examine both clamps under bright light:
– Red clamp: Must snap shut with strong spring tension
– Black clamp: Contact surfaces must be corrosion-free and shiny
– Cables: Reject if you spot fraying, cuts, or exposed copper
Visual cue: Wipe terminals with a wire brush—if black residue transfers, clean thoroughly. Dirty connections cause 40% of failed jump attempts.
Exact Connection Sequence for Safe Jumps
Vehicle Preparation Checklist
- Power down everything: Disable headlights, AC, radio, and phone chargers
- Remove ignition key completely (or ensure keyless system is off)
- Locate battery—check under hood, trunk, or seats
- Identify terminals: Find “+” (positive) and “-” (negative) markings
Critical Connection Order (Follow Exactly)
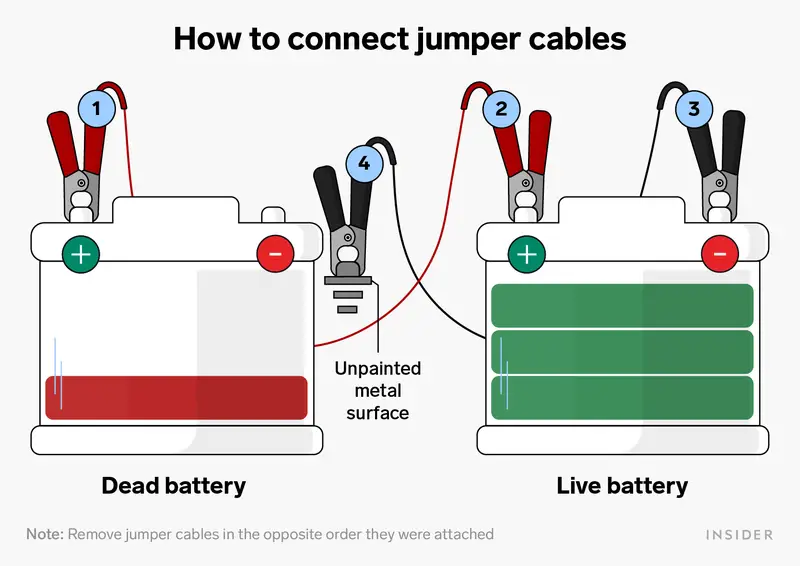
One deviation risks catastrophic damage:
1. Red to positive: Firmly attach red clamp to battery’s + terminal until it clicks
2. Black to ground: Connect black clamp to unpainted engine metal (bolt or bracket 12+ inches from battery)
3. Activate device: Press jump starter’s power button until ready LED glows
4. Boost mode: Hold “boost” button 3 seconds for completely dead batteries
Why this order? Connecting black to ground first prevents sparks near explosive hydrogen gas emitted by batteries.
Engine Cranking Protocol
- Start normally: Turn key or press start button
- 5-second max: Never crank longer than 5 seconds continuously
- 2-minute rest: Wait between attempts to prevent overheating
- Success signs: Engine turns over smoothly (slight light dimming is normal)
Diesel engines require extra steps: Wait 10 seconds for glow plugs to warm before cranking. You may need 2-3 attempts with 30-second rests.
Safe Disconnection: Why Order Matters
Reverse connection sequence precisely:
1. Remove black clamp from engine ground first
2. Remove red clamp from positive terminal second
3. Power off the jump starter
4. Store clamps in designated slots
Critical error: Removing red clamp first creates a live circuit through your tool. If metal touches both clamps, you’ll weld the tool to the battery—permanently damaging both.
Cold Weather Jump-Start Modifications
Temperature Compensation Tactics
Lithium-ion capacity plummets below 32°F (0°C). Counter this by:
– Pre-warm the unit: Store indoors overnight before use
– Extend cranking: Add 2 seconds to normal 5-second limit
– Hand-warm technique: Hold jump starter in pockets for 15 minutes
– Multiple attempts: Expect 2-3 tries with 30-second rests
Warning: Never use a jump starter below -4°F (-20°C)—lithium cells can rupture.
USB Power Bank & Work Light Activation
Device Charging Workflow
Your jump starter doubles as a massive power bank:
– Press USB button to activate power bank mode
– Connect devices: Phones charge via USB-A (5V/2.4A), tablets via USB-C (5V/3A)
– Capacity gauge: Each LED = 25% remaining charge
– Simultaneous use: Charge phones while jump-starting
Real-world tip: A fully charged 20,000mAh unit revives most smartphones 5 times—perfect for emergency communication.
LED Light Positioning Techniques
Cycle modes by pressing the light button:
– Steady white: Attach magnetic base to hood for engine work
– Strobe white: Activate for roadside visibility at night
– Red SOS: Use in life-threatening emergencies
Pro positioning: Bend the flexible neck to shine light directly on battery terminals—no more fumbling in shadows.
Maintenance Protocol for Longevity
Monthly 2-Minute Check
- Verify charge: Press power button—must show 3+ LEDs
- Clean clamps: Brush terminals with wire brush
- Inspect cables: Check for damage under bright light
- Check storage: Ensure temperature stays between 50-80°F
Long-Term Storage Rules
For seasonal storage:
– Charge to 3 LEDs (50-75% capacity)
– Recharge every 3 months
– Store in dry case away from direct sunlight
– Never store at 100% charge—accelerates battery degradation
Troubleshooting Critical Failures
No Power Response Fixes
Try these in sequence:
1. Charge 30+ minutes—deep discharge requires time
2. Hold power button 10 seconds to reset circuitry
3. Warm to 60°F+ if frozen (never use heat guns)
Weak Cranking Solutions
Diagnose in 60 seconds:
– Check LEDs: Must show 4 lights for full power
– Clean terminals: Corrosion causes 70% of weak starts
– Verify engine match: 4-cylinder needs 400A peak minimum
– Warm unit: Cold lithium performs at 50% capacity
Error Code Decryption
- Flashing red: Reverse polarity—immediately disconnect
- Solid red: Overheating—cool 10 minutes before retry
- Alternating LEDs: Internal fault—contact support
Emergency Kit Assembly Checklist
Store these together in your trunk:
– Charged Battery Tender jump starter (check monthly)
– Safety glasses and nitrile gloves
– Wire brush for terminal cleaning
– Quick-reference card with connection diagram
– LED flashlight (backup lighting)
Critical practice: Test the connection sequence in your driveway every 6 months. Muscle memory prevents panic during real emergencies.
Final Safety Commandments
Never attempt these:
– Jump-starting in rain or standing water
– Using with damaged, leaking, or frozen batteries
– Connecting clamps while device is powered on
– Exceeding 5-second cranking limits
Always remember:
– Red clamp to positive (+) terminal first
– Black clamp to engine metal second
– Reverse order for disconnection
– Store at 50-75% charge for longevity
Your Battery Tender jump starter becomes a true lifeline when used correctly. By following these exact protocols, you’ll conquer dead batteries in freezing temperatures, revive diesel trucks, and even power your phone during emergencies. Keep it charged, practice the sequence quarterly, and you’ll never pay for a tow truck again. The next time that dreaded click echoes under your hood, you won’t just hope for rescue—you’ll confidently restart your engine in 60 seconds flat.