
As a new parent, nothing strikes fear quite like the uncertainty of buckling your infant car seat correctly—especially when you’re rushing to get out the door and your little one is fussing in the background. We’ve all been there, fumbling with straps and wondering if it’s secure enough to keep your baby safe during the drive. The good news is that learning how to buckle an infant car seat properly is straightforward with the right steps, and it can prevent common mistakes that lead to improper installation. In fact, a quick check of the seat’s level indicator and harness fit can give you immediate peace of mind before you even hit the road.
In this comprehensive guide, we’ll go beyond the basics to cover everything you need to know for a secure setup. From gathering the essential tools to detailed step-by-step instructions, safety tips tailored for infants, and troubleshooting common issues, you’ll walk away confident in your ability to protect your child. By the end, you’ll not only master buckling your infant car seat but also understand how to maintain that safety over time, ensuring every trip is worry-free.
What You’ll Need to Buckle Your Infant Car Seat

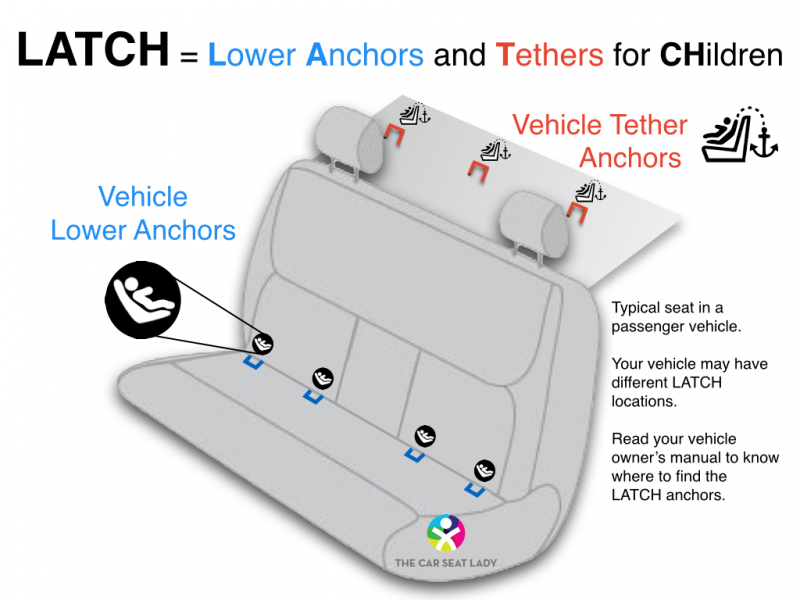
Before you start, having the right tools and materials on hand makes the process smoother and safer. Infant car seats are designed for rear-facing installation only, typically for babies from birth up to about 30-35 pounds or 32 inches, depending on the model (always check your specific seat’s manual). You’ll need your car’s LATCH system (Lower Anchors and Tethers for Children) or seat belt for securing the base, and the harness for buckling the baby in.
Here’s a handy table of essentials:
| Item | Quantity | Specifications |
|---|---|---|
| Infant Car Seat | 1 | Rear-facing model (e.g., Graco SnugRide, Chicco KeyFit, or Peg Perego Primo Viaggio); ensure it meets federal safety standards (look for the label) |
| Car’s Owner Manual | 1 | Specific to your vehicle model for LATCH or seat belt compatibility |
| Car Seat Manual | 1 | Manufacturer’s guide for your exact seat model—read it first! |
| Level Indicator Tool | 1 (built-in) | Most seats have one; if not, use a separate bubble level app or tool |
| Blanket or Towel | 1 | For leveling on sloped seats; rolled for rear-facing angle (45 degrees) |
| Harness Straps Adjuster | 1 (built-in) | For tightening; some seats have a central buckle release |
| Optional: Locking Clip | 1 | For seat belt installations in vehicles without LATCH; included with many seats |
Important: Never use a car seat that’s expired (check the manufacturing date on the label—most last 6-10 years), damaged, or recalled. Visit the National Highway Traffic Safety Administration (NHTSA) website to check recalls by entering your seat’s model number.
Preparation Steps and Safety Considerations
Proper preparation is key to safely buckling your infant car seat, as even a slight error can compromise protection in a crash. Start by parking your vehicle on a level surface in a well-lit area, like your garage or driveway, to avoid rushing in a parking lot. Turn off the engine and engage the parking brake to prevent any accidental movement.
Safety first: Always place the car seat in the back seat, ideally behind the passenger side for easy access. For infants, rear-facing is non-negotiable—it’s up to five times safer than forward-facing, according to the American Academy of Pediatrics (AAP). Avoid the front seat due to airbag risks. If you have multiple children, install the infant seat first to ensure it gets the safest position.
Key considerations:
– Vehicle Compatibility: Not all cars have LATCH anchors in every seat; consult your owner’s manual. If using the seat belt, ensure it’s a lap-shoulder belt (not lap-only).
– Baby’s Age and Size: Only buckle your infant when they’re in the seat—never leave them unattended. Ensure they weigh at least 4-5 pounds and fit within the seat’s limits.
– Weather Factors: In hot weather, shade the car and check for hot surfaces. In cold, use an approved car seat cover or blanket over the harness (not under it).
– Warning: If your child has special needs or you’re unsure about compatibility, consult a certified Child Passenger Safety Technician (CPST) via Safe Kids Worldwide.
Allow 15-20 minutes for preparation to avoid stress-induced errors.
Step-by-Step Guide to Buckling Your Infant Car Seat
Buckling an infant car seat involves two main parts: securing the seat to the vehicle (installation) and harnessing the baby (buckling). We’ll break this into phases for clarity. This process typically takes 10-15 minutes once you’re familiar, but practice a few times with a stuffed animal first.
Phase 1: Installing the Car Seat Base
The base must be rock-solid—aim for less than 1 inch of movement at the belt path.
-
Position the Seat: Place the car seat rear-facing in the back seat. If the vehicle’s seat is sloped, roll a towel or pool noodle under the front edge to achieve a 30-45 degree recline (use the built-in level indicator to confirm).
-
Locate Anchors: For LATCH installation, find the lower anchors (metal bars) in the seat crease or bight. Thread the LATCH straps through the seat’s attachment points.
-
Attach and Tighten: Clip the LATCH connectors to the anchors. Pull the straps firmly until the seat is snug—wiggle it; it shouldn’t move more than 1 inch side-to-side or front-to-back at the belt path. If using seat belt: Thread the belt through the seat’s path, buckle it, and use the locking clip if provided to prevent slack. Tighten by pulling the shoulder belt all the way out, then feed it back slowly.
-
Secure the Top Tether (If Applicable): For some models, attach the tether to the vehicle’s anchor point behind the seat and tighten.
Pro Tip: Thread the LATCH straps the same way every time for muscle memory.
Phase 2: Buckling Your Infant In
With the base installed, focus on the harness— it should fit like a HUG: Hugs the child, is snug (no pinchable slack), and Unbuckles easily.
-
Prepare the Harness: Open the chest clip (the plastic piece across the chest) and unbuckle the lower buckle (between the legs). Loosen the straps by pulling the adjustment strap at the front (usually red or marked).
-
Seat the Baby: Gently place your infant in the seat, feet toward the front (rear-facing). Position them centered, with their bottom touching the seat bottom and back against the shell.
-
Route the Straps: Feed the shoulder straps over the baby’s shoulders and through the slots. Ensure the straps are at or below the shoulders for rear-facing (not above, as that reduces head protection).
-
Fasten the Buckle: Insert the buckle tongues into the lower buckle until you hear a click. Connect the chest clip at armpit level—never lower.
-
Tighten the Harness: Pull the front adjustment strap to remove all slack. Pinch the strap over the collarbone; you shouldn’t be able to pinch any fabric. The harness should lie flat without gaps.
-
Adjust the Chest Clip and Recline: Slide the chest clip to armpit height. Recheck the level indicator and re-tighten if needed.
Time Estimate: 5 minutes per buckling once practiced.
Warning: Dress your baby in thin layers—bulk like winter coats can compress in a crash, loosening the fit. Add blankets over the harness after buckling.
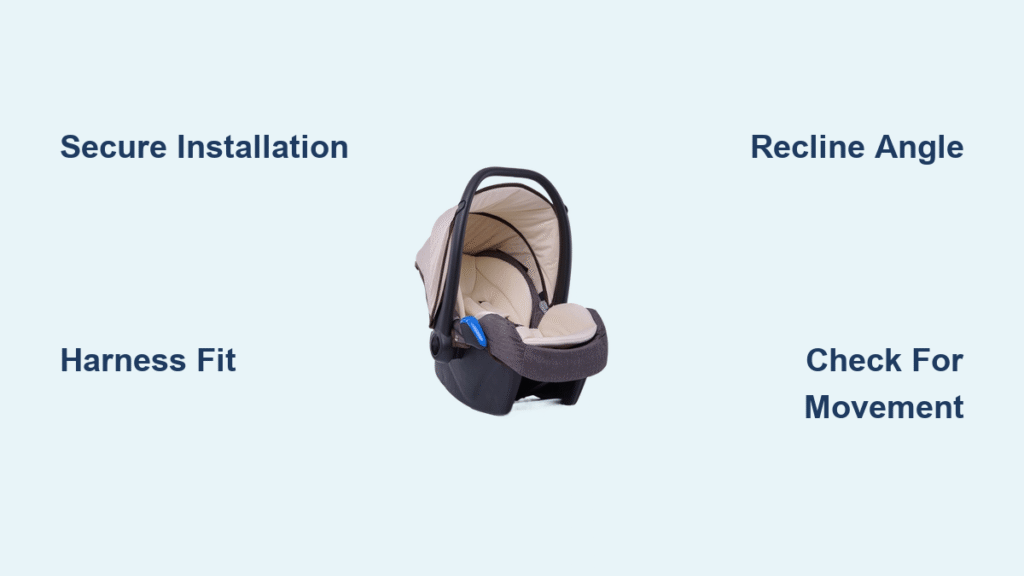
Phase 3: Final Checks
Before driving:
– Tug the harness straps and buckle—everything should stay put.
– Ensure no loose items in the car that could become projectiles.
– If using accessories like mirrors or head supports, confirm they’re crash-tested and installed per manual.
Testing and Troubleshooting After Installation

Once buckled, test the setup to ensure safety. Start the car and drive a short distance (under 1 mile) on a familiar route. Check for movement: The seat shouldn’t shift, and your baby should seem comfortable without slouching.
Common issues and fixes:
– Seat Moves More Than 1 Inch: Reinstall—likely loose LATCH or belt. Try the other installation method (LATCH vs. belt).
– Harness Too Loose/Tight: Readjust straps; if straps won’t tighten, check for twists or improper routing.
– Baby Slips Down: Raise the recline angle or add a rolled towel behind the head (not under the harness).
– Clicking or Rattling Noises: Inspect for loose parts; tighten all connections.
– Uneven Level: Adjust the towel roll or move to a flatter seat position.
If tests fail, remove and restart. For persistent problems, like incompatible vehicle fit, note the error and seek help. The NHTSA recommends at least two practice installations.
Pro Tips for Safe Car Seat Use
To elevate your skills beyond the basics:
– Practice Off-Vehicle: Use a shopping cart or stroller to simulate buckling without car constraints.
– Avoid Common Mistakes: Don’t use aftermarket products like strap covers—they can interfere with fit. Never hold the baby in the seat during a trip (it’s illegal and unsafe).
– Optimize for Comfort: For longer drives, stop every 2 hours to check harness fit and baby’s temperature.
– Maintenance Routine: Inspect monthly for wear, clean with mild soap (no bleach), and register your seat with the manufacturer for recall alerts.
– Travel Smart: When flying, install the seat on the plane if it’s FAA-approved; gate-check strollers.
– Size Transitions: Monitor growth—switch to a convertible seat around 1 year or when limits are reached, but keep rear-facing as long as possible (up to 2 years per AAP).
– Tech Aids: Use apps like “Car Seat Check” from NHTSA for reminders, but always verify manually.
These tips can reduce installation errors by up to 70%, based on CPST training data.
When to Seek Professional Help
While DIY is empowering, some situations call for experts. Seek professional help if:
– Your vehicle lacks clear LATCH points or the seat doesn’t fit securely after two attempts.
– You’re dealing with a pre-owned seat (inspect for hidden damage).
– The baby has medical conditions affecting fit, like low muscle tone.
– Post-accident: Even minor crashes require seat replacement.
Look for a certified CPST through safekids.org—inspections are often free at fire stations or hospitals. Expect $50-100 for paid consultations. Check your car seat’s warranty (usually 1-2 years) for coverage on defects, and keep receipts.
FAQ
Q: How often should I check the car seat installation?
A: Check before every use, especially after loading/unloading. Full reinstallation every 6 months or after any vehicle maintenance is recommended by the AAP to account for wear.
Q: Can I use the car seat in a taxi or rideshare?
A: Yes, but taxis often lack LATCH, so use the seat belt method. For rideshares like Uber, bring your own seat—drivers aren’t required to provide them. Install rear-facing if possible.
Q: What’s the difference between LATCH and seat belt installation?
A: LATCH uses built-in anchors for quicker, more secure fits in compatible vehicles (most post-2002 models). Seat belts are a reliable alternative but may take longer to tighten properly. Both are equally safe when done right.
Q: My infant arches their back—how do I buckle them safely?
A: This is common in newborns. Place a small rolled receiving blanket behind their back (not under harness) for support. If it persists, consult your pediatrician to rule out reflux.
Q: How do I know if the harness is snug enough?
A: The “pinch test”: Try pinching the strap above the collarbone. No slack means it’s snug. For infants, ensure the chest clip is level with armpits to prevent slipping.
Q: What if my car seat doesn’t have a level indicator?
A: Use your phone’s level app against the side of the seat shell. Aim for 30-45 degrees rear-facing—too upright risks head flop, too reclined reduces legroom.
Q: Can I install the car seat without the base?
A: Yes, for short trips or travel, using the vehicle’s seat belt directly through the shell. But the base is safer and easier for frequent use.
Ensure Your Baby’s Safety on Every Ride
You’ve now got a complete roadmap for how to buckle an infant car seat safely, from tools and prep to testing and pro tips:
– Essential materials for a secure setup
– Step-by-step installation and buckling phases
– Troubleshooting for real-world hiccups
– Expert advice to avoid pitfalls
Following this guide empowers you to create a protective cocoon for your little one, potentially saving lives in the event of a collision—NHTSA data shows proper installation reduces injury risk by 70-80%. Take action today: Grab your manuals, practice in a safe spot, and make safety checks a habit.
Have you mastered buckling your infant car seat, or run into a tricky issue? Share your tips or questions in the comments below—we’re here to help other parents! With consistent practice, you’ll drive with total confidence.


