

Your Graco car seat has served you well through the rear-facing and harness stages, but now your child has outgrown the harness system. Don’t panic—converting your Graco car seat to booster mode is straightforward when you follow the correct steps for your specific model. This guide gives you the exact process to transform your Graco seat safely and correctly, ensuring your growing child continues to ride securely.
Most parents struggle with the harness removal process or worry about proper seat belt positioning after conversion. By the end of this guide, you’ll confidently convert your Graco seat while maintaining maximum safety for your child who’s ready for booster mode.
Confirm Your Child Meets Graco Booster Requirements
Before touching any straps, verify your child satisfies Graco’s strict booster mode criteria. Using a booster before your child meets these requirements creates dangerous gaps in protection during sudden stops or collisions.
Your child must meet all these specifications:
– Weight minimum: Exactly 30 pounds (no exceptions)
– Height range: Between 38-57 inches for high-back booster mode
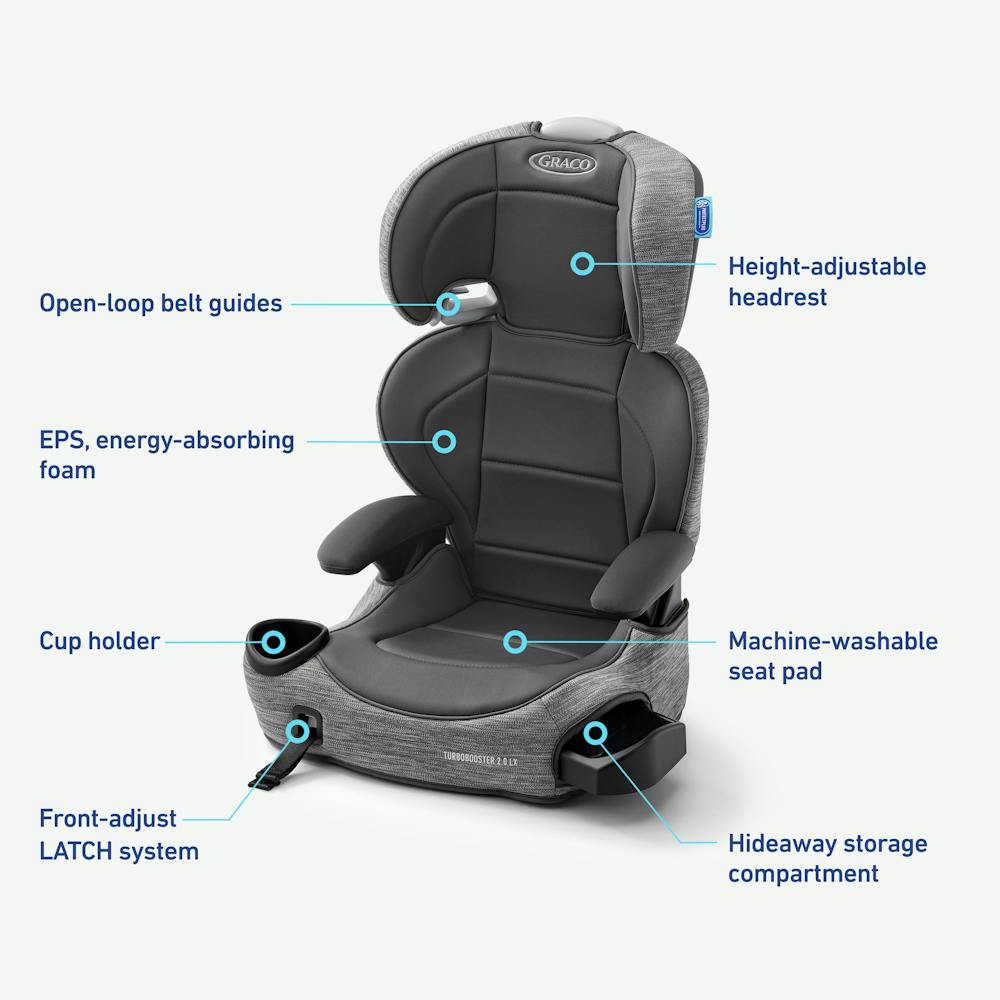
– Shoulder position: Must reach the lowest belt guide when seated properly
– Age requirement: At least 4 years old with the maturity to sit upright
Behavior matters as much as measurements:
– Your child must sit properly positioned throughout the entire ride
– They shouldn’t slouch, lean, or move the seat belt out of position
– They need to understand how to keep the lap belt across their upper thighs
Locate Your Exact Graco Model Before Starting
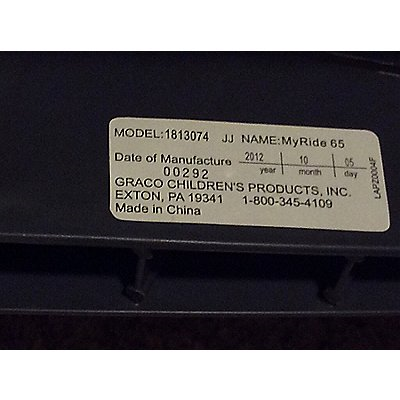
Different Graco models require unique conversion steps—using the wrong procedure could compromise safety. Check the label on your seat’s side or base for your specific model number before proceeding.
Graco 4Ever DLX: Four-Stage Transformation
This popular model transitions through four stages with specific booster conversion steps:
- Remove harness straps from the metal splitter plate at the seat back
- Store all harness components in the under-seat compartment
- Route your vehicle’s seat belt through the red headrest guides
- Adjust headrest height so the shoulder belt crosses mid-chest
Pro Tip: The 4Ever DLX supports children up to 120 pounds in high-back booster mode and 100 pounds in backless mode—always verify your child’s weight against these limits.
Graco Nautilus 65: Front-Release Conversion System
The Nautilus 65 features a unique front-release harness system that simplifies conversion:
- Locate and depress the release lever at the seat front
- Pull harness straps forward until completely loose
- Remove crotch buckle by pressing side release tabs
- Store all components beneath the seat pad for future use
Warning: Never leave harness components accessible to children after conversion—they might improperly reattach them, creating dangerous slack during rides.
Remove Harness Components Safely and Completely
Step 1: Prepare Your Workspace
Place your Graco seat on a stable surface with bright lighting before starting. Remove any aftermarket accessories or seat protectors that might interfere with the conversion process. You won’t need tools—Graco designed all conversion steps to be tool-free.
Step 2: Detach Harness Straps Properly
For 4Ever DLX and similar models:
– Flip the seat to access the back panel
– Locate the metal splitter plate where straps connect
– Press release buttons while pulling straps free
– Remove chest clip and buckle tongue completely
For Nautilus 65 models:
– Find the release lever at the seat front
– Depress lever while pulling straps forward
– Continue pulling until harness is completely loose
– Verify all straps are detached from anchor points
Step 3: Extract and Store Buckle Assembly
Press the side release tabs on the crotch buckle while maintaining steady pressure. Pull the entire buckle assembly through the seat slot—if you encounter resistance, gently wiggle while keeping pressure on the release tabs. Coil harness straps and secure them with a rubber band before placing all components in the designated storage compartment.
Critical Safety Note: Never store harness components loose in your vehicle—keep them secured in the seat’s storage area to prevent interference with proper booster operation.
Configure High-Back Booster Mode Correctly
Adjust Headrest to Shoulder Level
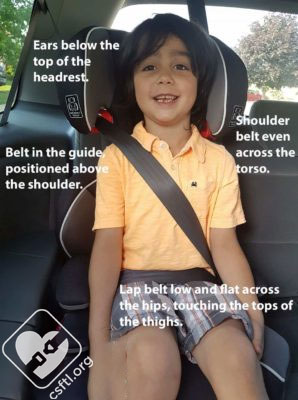
Raise the headrest until it aligns with your child’s shoulders—not above or below. The vehicle shoulder belt should cross mid-chest and mid-shoulder, never the neck or face. Most Graco models use a red adjustment handle or button for quick height changes.
Visual Cue: When properly positioned, you should be able to fit two fingers between the top of your child’s shoulders and the bottom of the headrest.
Position Vehicle Seat Belt Precisely
Place the booster on your vehicle seat with the back firmly against the seat back. Route the lap belt under armrests (if present) and across your child’s upper thighs—never the abdomen. Thread the shoulder belt through the headrest guide, ensuring it lies completely flat without twists or kinks.
Common Mistake: Many parents route the shoulder belt behind the headrest instead of through the guide—this creates dangerous slack and improper positioning during impact.
Convert to Backless Booster Mode When Appropriate
Verify Additional Height Requirements
Your child must measure at least 43 inches tall before using backless mode. The vehicle headrest must properly support your child’s head—ears should not exceed the seat back height. If your vehicle lacks adequate head support, continue using high-back mode.
Safely Remove Back Support
Locate the red release buttons or levers where the back connects to the base. Press both simultaneously while lifting the back portion straight up and away. Store the back in your vehicle’s cargo area—it’s essential if you need to convert back for younger siblings.
Stability Check: Place the base on your vehicle seat—it should sit completely flat without rocking. If wobbling occurs on leather seats, use a manufacturer-approved grip pad or return to high-back mode.
Troubleshoot Common Conversion Problems Immediately
Fix Shoulder Belt Positioning Issues
Problem: Shoulder belt crosses your child’s neck or face
– Solution: Raise the headrest height in high-back mode
– Alternative: Switch from backless to high-back configuration if needed
Problem: Lap belt rides up on the abdomen
– Solution: Ensure your child sits completely back against the booster
– Check: Reposition the booster on the vehicle seat for better stability
Address Stability Challenges
Problem: Booster slides on leather seats
– Solution: Use an approved grip pad designed for your specific Graco model
– Quick Fix: Switch to high-back mode for significantly better stability
Problem: Vehicle seat belt doesn’t retract properly
– Solution: Check for twisted belt in guides and ensure smooth routing
– Verification: Run your hand along the entire belt path to detect kinks
Maintain Your Converted Booster for Ongoing Safety
Weekly Safety Inspections
- Check belt positioning before every ride
- Verify headrest height as your child grows
- Test booster stability by pulling at the belt path
- Ensure no more than 1 inch of movement side-to-side
Monthly Maintenance Tasks
- Adjust headrest height as needed for proper belt positioning
- Inspect for wear, fraying, or damage to the seat shell
- Clean belt guides with a soft brush to ensure smooth operation
- Vacuum storage compartments to prevent debris buildup
Pro Tip: Set calendar reminders for monthly inspections—safety checks often get overlooked as conversion becomes routine.
Final Safety Verification Before Every Ride
Before driving with your converted Graco booster, complete this quick safety check:
- Lap belt: Flat across upper thighs, not the abdomen
- Shoulder belt: Crosses mid-chest and shoulder midpoint
- Belt slack: Minimal slack while maintaining proper position
- Child posture: Sitting back against booster with knees bending naturally
Critical Reminder: Continue using the booster until your child passes the 5-step test for adult seat belt fit—typically between ages 10-12. Never rush this transition for convenience.
Your Graco car seat now provides safe, comfortable booster seating for your growing child. Double-check belt fit before every ride, adjust the headrest as your child grows, and keep all conversion components stored safely in case you need to convert back for younger siblings.
For model-specific questions or video guides, contact Graco directly at 1-800-345-4109 or visit Instructions.gracobaby.com. Properly converted, your Graco booster will keep your child safe through their next stage of car seat development.


