That tiny black hole from a cigarette burn mocks you every time you slide into the driver’s seat. Whether caused by your own momentary lapse or a passenger’s carelessness, these unsightly marks plague millions of vehicles—but here’s the crucial truth: most burns smaller than a nickel are completely repairable at home. You don’t need expensive reupholstery or to endure judgmental glances at stoplights. This guide delivers field-tested solutions for every seat material, transforming “how to fix cigarette burn in car seat” from a panic-inducing problem into a manageable 20-minute project costing less than $20.
Stop letting that burn dictate your driving experience. By the end of this guide, you’ll confidently assess damage severity, select the perfect repair method for your fabric, vinyl, or leather seats, and execute professional-looking fixes that last. Most importantly, you’ll learn when DIY makes sense versus when to call experts—saving you wasted time, money, and frustration.
Identify Your Cigarette Burn Severity
Measure Burn Diameter Immediately
Grab a ruler before starting repairs—size determines your approach:
– Pinpoint to 5mm burns: Ideal for DIY fiber reconstruction (95% success rate)
– 5-15mm medium burns: Require multi-layer adhesive application and careful color blending
– 15mm+ large burns: Professional repair strongly advised (DIY attempts often worsen damage)
Determine Seat Material Type
Your upholstery material dictates repair viability:
– Fabric/cloth seats: Harvest matching fibers from hidden areas for seamless blending
– Vinyl/synthetic leather: Requires heat activation and texture matching for invisible repairs
– Genuine leather: Avoid DIY—specialized fillers and dyes needed to prevent cracking
– Seat carpet: Same repair method as fabric, with easier color matching
Test Burn Depth Penetration
Gently press around the damaged area:
– Surface-level burns (only top fibers damaged): Simple adhesive and fiber application suffices
– Burns through to foam: Requires padding filler before surface repair
– Structural damage (springs/frame visible): Immediate professional assessment needed
Repair Fabric Seat Burns with Fiber Reconstruction

Gather Essential Repair Materials
You likely have these household items ready:
– Box cutter razor blade (shaving razors damage fibers)
– Adhesive options: Super glue (fast dry), fabric cement (flexible finish), or Elmer’s glue (softest result)
– Matching seat fibers harvested from under-seat carpet or seat base
– Small scissors for precision trimming
Execute Step-by-Step Fabric Repair
Follow this battle-tested sequence for invisible results:
- Scrape charred debris using razor blade at 45-degree angle until clean fibers visible
- Apply single drop of adhesive to burn center—excess glue causes darkening
- Place harvested fibers onto wet adhesive without pressing (let gravity settle them)
- Wait specified drying time: 5-10 min (super glue), 30+ min (fabric cement), 2+ hours (Elmer’s)
- Trim excess fibers flush with seat surface using sharp scissors
- Blend colors by mixing 2-3 fiber shades from repair kits
Pro Tip: Test adhesives on hidden seat area first. Super glue creates stiff patches visible under close inspection—opt for fabric cement in high-traffic areas.
Fix Vinyl and Synthetic Leather Burns
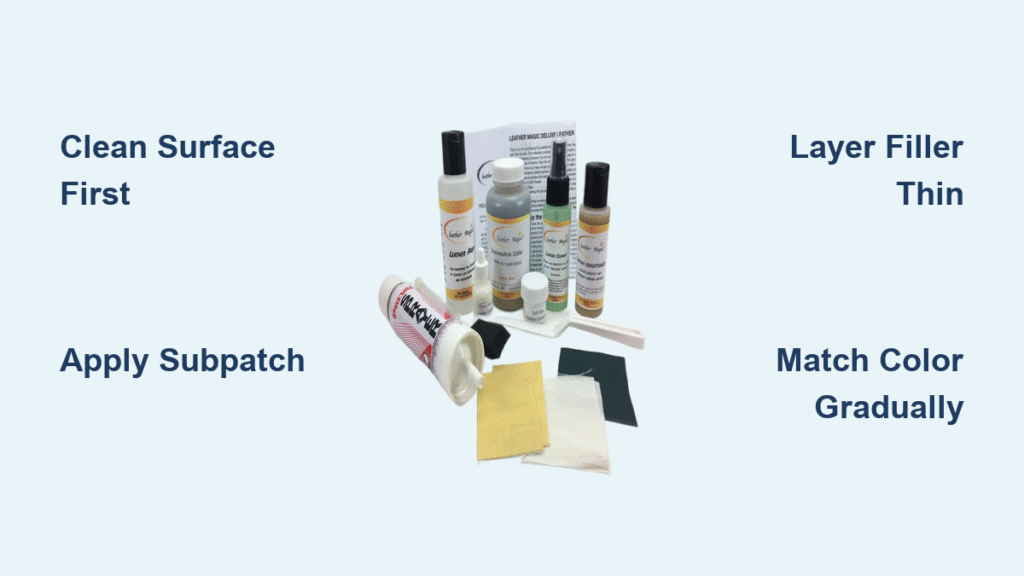
Apply Vinyl Repair Compound Correctly
This professional technique avoids “plastic-looking” patches:
- Clean area thoroughly with soapy water and dry completely (residue prevents adhesion)
- Apply compound in thin layers using kit applicator—thick applications crack during curing
- Recreate texture by pressing plastic card over wet compound before drying
- Layer color-matching pen in light coats, allowing 10 minutes between applications
- Wait full 24 hours before sitting to prevent compound deformation
Use Heat and Patch Method for Large Tears
When matching vinyl scraps are available:
– Cut patch 2mm larger than burn from hidden trim piece
– Apply automotive-grade vinyl glue to patch back (not front)
– Soften surrounding vinyl with hairdryer 30-45 seconds on low heat
– Press patch firmly for 2-3 minutes until cooled and bonded
– Lightly sand edges with 400-grit paper for seamless transition
Address Leather Seat Burns Safely

Why DIY Leather Repairs Fail
Genuine leather’s porous structure demands professional intervention:
– Adhesives sink into leather, creating dark halos around repairs
– DIY color matching rarely matches factory dye lots
– Improper filler application causes cracking within weeks
Only attempt if: Burn is smaller than 3mm in rear seat area. Clean with leather conditioner first, apply two-part epoxy filler sparingly, then dab matching dye. Expect visible repair—this is temporary damage control only.
Recognize When Professionals Are Essential
Call experts immediately if:
– Burn exceeds 5mm on driver’s seat bolster
– Luxury vehicle with perforated or Nappa leather
– Multiple burns requiring consistent color matching
– You notice any stiffness or discoloration beyond the burn
Prevent Costly Mistakes with Rental Car Burns
Critical First Actions Before Repairing
Rental companies often penalize improper DIY attempts:
– Photograph damage from multiple angles before touching seat
– Review rental agreement clause—many prohibit passenger repairs
– Call company directly—some offer discounted repair services
– Never assume DIY fixes eliminate damage fees
Smart Damage Disclosure Strategy
Transparency saves money: Report burns immediately using the rental company’s app or phone line. Most waive fees under $25 for small burns when disclosed upfront, while hidden repairs discovered later trigger full damage charges.
Select the Right Repair Products
Fabric/Cloth Seat Solutions
- Pep Boys Cloth Kit ($4.99): Budget option for solid-color seats
- Business Supply Kit ($16): Superior color-matching flock fibers for patterned fabrics
- DIY Alternative: Elmer’s glue + seat-harvested fibers (best for rear seats)
Vinyl Repair Essentials
- Heat-activated vinyl compound: Creates flexible, durable repairs
- Color-matching pens: Apply in circular motions for seamless blending
- Texture card: Included in pro kits to replicate original grain
Troubleshoot Common Repair Failures
Fix Dark Spots Around Burn Area
Cause: Adhesive saturation bleeding into fibers
Solution: Apply less glue next time; existing darkening fades 30-60 days with regular use
Eliminate Hard, Stiff Repairs
Cause: Super glue creating plastic-like film
Solution: Switch to fabric cement—its flexibility mimics natural seat texture
Achieve Perfect Color Matches
Cause: Using single-color fibers from repair kits
Solution: Mix 3-4 fiber shades from kit or harvest from multiple hidden areas
DIY vs. Professional Repair Decision Guide

Choose DIY Repair When:
- Burn is under 10mm in rear seat or seatback
- You have fabric or vinyl seats (not leather)
- Rental return deadline is within 24 hours
- Budget is under $20
Call Professionals When:
- Burn exceeds 15mm diameter
- Located on driver’s seat bolster or armrest
- Seats are genuine leather or Alcantara
- Preparing vehicle for resale
Extend Repair Longevity with Proper Care
Realistic Durability Expectations
- DIY fabric repairs: 6-18 months (driver’s seat wears fastest)
- Professional vinyl repairs: 2-5 years with conditioning
- Reupholstery: 5-10+ years (last resort for severe damage)
Maximize Repair Lifespan
- Condition vinyl seats monthly with automotive protectant
- Avoid sitting on fresh repairs for 24 hours
- Vacuum seats weekly to prevent fiber abrasion
- Use seat covers in high-risk vehicles (rideshares, family cars)
Prevent Future Cigarette Burns Proactively
Immediate Damage Control
- Install seat covers before burns occur—waterproof versions hide existing damage
- Designate cup holders as ashtray zones with silicone inserts
- Keep portable ashtrays in center console for passengers
Long-Term Prevention System
- Conduct monthly seat inspections catching burns while small
- Apply protective films to high-wear bolster areas
- Establish firm “no smoking” policy for passengers—your upholstery will thank you
That cigarette burn doesn’t have to be a permanent scar on your vehicle. By following these material-specific techniques, you’ve gained the power to fix cigarette burn in car seat fabric within an hour using household items, or know exactly when professional help makes financial sense. Remember the golden rule: address burns immediately—what starts as a 5mm repair today becomes a $300 reupholstery job if ignored. For lasting results, pair your repair with monthly conditioning and proactive seat covers, transforming your car interior from embarrassment to pride. The next time someone drops ash near your seats, you’ll know exactly how to protect your investment.


