
That jolt when your coffee cup tips in the car is instantly recognizable—the sickening splash, the frantic grab for napkins, and the sinking realization that sticky brown liquid is seeping into your seat. Whether it’s a fresh spill or a stubborn week-old stain, coffee leaves behind more than just discoloration; it traps odors in foam layers that regular cleaning can’t reach. If you don’t act quickly, tannins in coffee set permanently, creating a ring that air fresheners only mask. But here’s the good news: with targeted techniques matching your seat material, you can fully restore both fabric and leather seats. This guide delivers field-tested methods used by professional detailers, including exact ratios, timing, and critical safety steps most DIY guides skip.
Ignoring coffee stains risks long-term damage. Moisture trapped in foam cushions breeds mildew within 48 hours, while dairy-based drinks accelerate odor formation through bacterial growth. Worse, improper cleaning can corrode seat heaters or fade upholstery. Yet 92% of stains become permanent because owners rub spills (pushing coffee deeper) or use bleach-based cleaners that destroy dyes. Don’t panic—you’re about to learn how to get coffee out of car seat safely, even on perforated leather with integrated electronics. Every solution here uses affordable household items or auto-specific products, with clear warnings for high-risk scenarios.
Blot Fresh Spills Before They Set (0-5 Minute Window)
Press, Don’t Rub for Maximum Liquid Removal
Immediate action determines whether you’ll face a permanent stain. Grab a microfiber cloth (never paper towels—they leave lint) and press straight down with firm, even pressure. Rotate to dry sections every 2-3 seconds until no more brown transfers. Rubbing spreads coffee laterally into fibers and forces liquid into foam layers below. For large spills, place folded towels over the area and step on them gently—your body weight lifts more liquid than hand pressure alone.
Contain Damage Based on Seat Material
Fabric seats: After blotting, sprinkle table salt or baking soda over the damp spot. These powders draw moisture upward through capillary action, preventing ring formation as the stain dries. Let sit 3 minutes before vacuuming.
Leather/vinyl: Skip powders—they scratch surfaces. Instead, lay a dry towel over the spot and press palm-down for 30 seconds to wick liquid without abrasion.
Critical Safety Step for Heated Seats
Never activate seat heaters until the area is bone-dry. Moisture contacting electrical elements corrodes wiring within hours, causing costly repairs. Test dryness by pressing a dry cloth against perforations—if it stays clean after 10 seconds, it’s safe.
Clean Fabric Seats Without Fading Colors
Mix the Exact Vinegar Solution Professionals Use
Combine in a spray bottle:
– 1 part white vinegar (neutralizes tannins)
– 2 parts distilled water (prevents mineral spots)
– 2 drops clear dish soap (emulsifies oils)
Swirl gently—shaking creates foam that traps residue. Always test pH with strips; solutions below 4.5 damage dyes. Adjust with extra water if needed.
Apply in 6 Precision Steps
- Test hidden area: Spray seat crease; wait 5 minutes for color bleed
- Mist lightly: 10-15 pumps max for a coffee-cup-sized stain
- Wait 7 minutes: Lets solution penetrate foam without oversaturating
- Brush cross-hatch: Use soft detailing brush in ↗↖ pattern (never circles)
- Extract: Press fresh microfiber until clean
- Rinse: Light water mist, blot once—skip this step and soap residue stiffens fabric
Erase Old Stains with Baking Soda Paste
For dried-in stains: Mix baking soda and water 3:1 into toothpaste consistency. Spread 2mm thick, cover with plastic wrap, and wait 1 hour (overnight for severe cases). Vacuum residue, then repeat vinegar cleaning. Pro tip: For milk-based spills, substitute enzyme cleaner (Folex) and cover with damp towel 30 minutes before extraction.
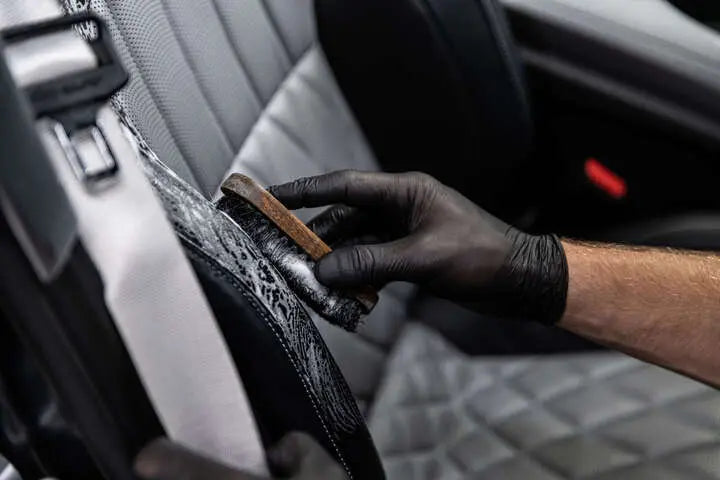
Treat Leather Seats Without Cracking Surfaces
Use pH-Balanced Cleaner to Preserve Finish
Skip vinegar on aniline leather—use distilled water and pH-neutral leather soap (Lexol) instead. For finished leather:
– 1 part distilled water
– 1 part white vinegar
Dampen microfiber corner—not soaked—and wipe parallel to stitching lines. Circular motions abrade protective coatings.
Perforated Leather Requires Foam Treatment
Coffee seeps through holes into foam cushions. After surface cleaning:
1. Inject 20ml enzyme cleaner through perforations using syringe
2. Hold wet-vac wand 1 inch above holes for 60 seconds
3. Air-dry 45 minutes before conditioning
Never use heat guns—leather cracks at 120°F.
Condition Immediately After Drying
Apply leather conditioner within 10 minutes of drying. Massage in circular motions along grain lines. Skipping this step causes shrinkage as natural oils evaporate.
Eliminate Lingering Odors in 24 Hours
Deploy Odor-Killing Tactics by Timeline
| Time Available | Best Method | Critical Detail |
|---|---|---|
| Under 1 hour | Ventilation | Run A/C on max fresh-air mode 20 min with all windows open |
| Overnight | Baking soda | Sprinkle generously, vacuum after 8+ hours (reapply if damp) |
| 24+ hours | Ozone generator | Rent from auto store; run 2 hours with windows closed, then ventilate 30 min |
Avoid these odor traps:
– ❌ Coffee-scented air fresheners (mask smells but don’t remove bacteria)
– ❌ Bleach-based cleaners (react with coffee tannins to create worse odors)
– ❌ Direct sunlight drying (fades leather, sets fabric stains)
Handle Deep Foam Saturation Safely
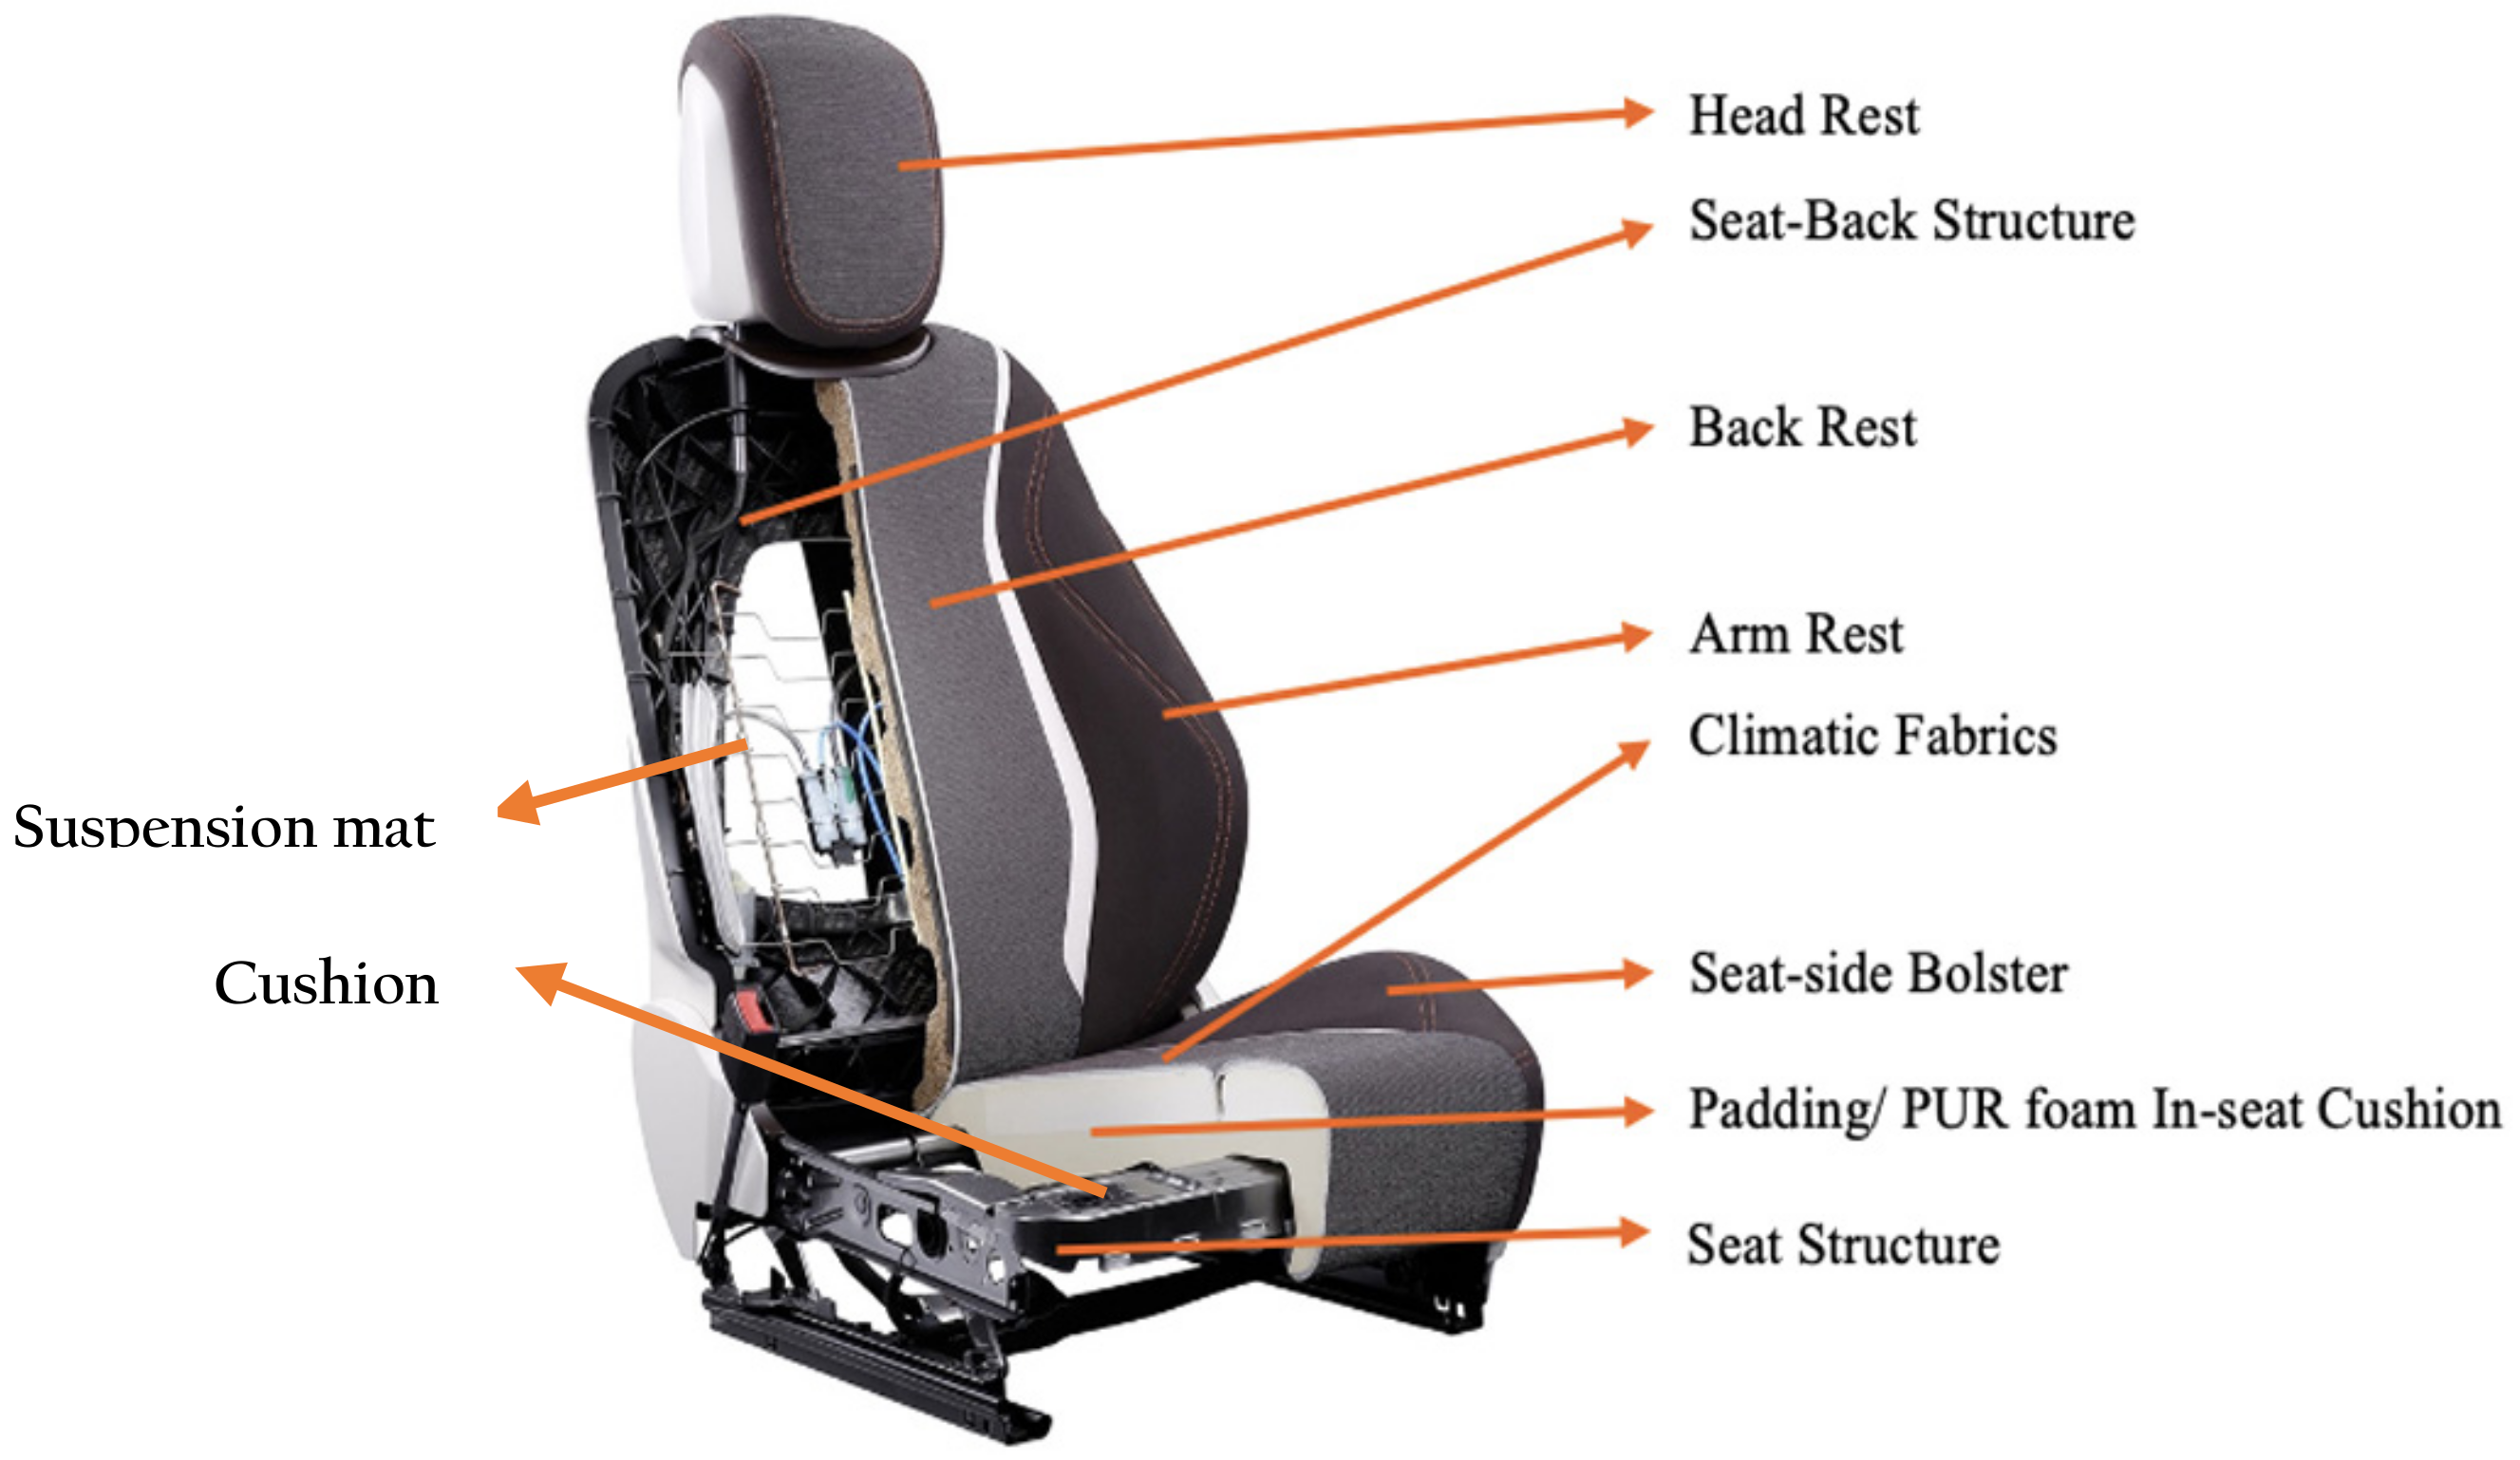
Remove Cloth Seats for Full Extraction
For seats soaked beyond surface level:
1. Unbolt 4 seat bolts (14mm socket)
2. Disconnect wiring harness (yellow airbag plugs)
3. Elevate seat on sawhorses
4. Flood-and-extract: Pour 1 cup lukewarm water over stain, immediately vacuum excess. Repeat until runoff runs clear.
Warning: Never soak heated seats—water contact with elements causes electrical shorts.
Leather Seat Foam Fixes Without Removal
Since leather can’t be detached:
– Inject enzyme cleaner through perforations
– Cover with damp towel 30 minutes
– Extract with wet-vac on low suction
– Follow with ozone treatment if odor persists
DIY vs Professional Help Decision Guide

Handle Yourself If…
- Stain is fresh (<24 hours)
- No electronics in seat (check for perforations/heater symbols)
- Only surface-level discoloration visible
Call a Pro When…
- Heated/cooled perforated leather seats
- Odor returns after 2 DIY attempts
- Entire cup absorbed into foam
Cost reality: DIY costs $15 (supplies). Professional extraction runs $75-$150. Seat foam replacement hits $400.
Build Your In-Car Spill Response Kit
Essentials to Store Under Passenger Seat
- 2 microfiber towels (waffle-weave for blotting, plush for polishing)
- Pre-mixed 8oz spray bottle (vinegar solution ratios from Section 2)
- ¼ cup baking soda in zip-lock bag (for fabric emergencies)
- Leather conditioner wipe (if applicable—check yearly)
Prevent Future Disasters
- Install cup-holder stabilizers ($8 on Amazon)
- Use Contigo Autoseal mugs (leak-proof at 15psi)
- Vacuum seats monthly to remove tannin buildup
Fix Common Mistakes in 10 Minutes
Brown Ring After Drying?
Reapply vinegar solution, blot aggressively, and dry under oscillating fan 20 minutes. Rings form when coffee migrates outward during drying—this reverses the process.
Stiff Fabric from Soap Residue?
Mist area with distilled water, blot 5x, then tumble-dry seat cover on low with dry towel 15 minutes.
White Film on Leather?
Wipe with 50/50 water/vinegar mix, then condition immediately. Hard-water minerals cause this—always use distilled water.
Safety Checklist Before Starting
- ✅ Test cleaners on hidden 1-inch patch first
- ✅ Disconnect battery when removing seats with airbag connectors
- ✅ Never use ammonia (Windex) or bleach—destroys leather finishes
- ✅ Verify 100% dryness before allowing children/pets in vehicle
Coffee stains don’t have to become permanent fixtures in your car interior. By following these seat-specific protocols—especially the critical 0-5 minute blotting window and foam-targeted odor removal—you’ll eliminate both visual stains and embedded smells. Remember the golden rule: pressure lifts, rubbing sets. Keep your emergency kit stocked, and that next drive-thru mishap will be nothing more than a minor detour. For persistent leather odors, book a professional ozone treatment—it’s the only method that destroys bacteria deep in foam without moisture damage. Your car’s interior will thank you every time you slide into a clean, fresh-smelling seat.


