
Installing a Britax infant car seat might feel overwhelming at first, especially with the safety of your little one on the line. As a new parent, you want to ensure everything is secure and compliant with regulations, but the array of straps, bases, and clips can lead to frustration and second-guessing. The good news? With the right steps, Britax infant car seat installation is straightforward and can be done in under 30 minutes for most models like the B-Safe or ClickTight series. We’ll start with a quick overview of the basics to get you immediate confidence.
In this comprehensive guide, we’ll go beyond the basics to cover everything from tools and preparation to detailed installation methods using LATCH or seatbelt systems. You’ll learn multiple approaches tailored to different vehicles, common pitfalls to avoid, and how to verify your setup meets federal safety standards. By the end, you’ll have your Britax car seat installed securely, giving you peace of mind on every drive. Let’s dive in and make this process simple and stress-free.
What You’ll Need for Britax Infant Car Seat Installation

Before you begin, gather the essential tools and materials to ensure a smooth Britax infant car seat installation. Most Britax infant seats, such as the B-Safe 35 or B-Safe Gen2, come with built-in features like the ClickTight system for easy setup, but you’ll still need a few items for precision and safety. Refer to your specific model’s manual (available on the Britax website) for exact requirements, as slight variations exist between models.
Here’s a handy table of what you’ll typically need:
| Item | Quantity | Specifications |
|---|---|---|
| Britax Infant Car Seat | 1 | Model-specific (e.g., B-Safe with base for LATCH compatibility) |
| LATCH Connectors (if using) | 1 set | Included with seat; ensure they match your vehicle’s LATCH anchors |
| Vehicle Seatbelt | 1 | Lap/shoulder belt in rear-facing position; no locking clip needed for most modern vehicles |
| Seat Level Indicator | 1 | Built into most Britax seats; or use a separate bubble level tool |
| Wrench or Socket Set | 1 | For tightening LATCH if required; 1/2-inch drive for base adjustments |
| Towel or Pool Noodle | 1-2 | For leveling on uneven vehicle seats (soft, non-slip) |
| Owner’s Manual | 1 | Digital or printed; download from Britax.com if lost |
Important: Always check your vehicle’s owner manual to confirm LATCH compatibility (typically available in rear outboard seats for vehicles made after 2002). If your car lacks LATCH, the seatbelt method works just as well—Britax designs prioritize versatility.
Preparing Your Vehicle and Car Seat
Proper preparation is key to a safe and effective Britax infant car seat installation. Skipping this can lead to instability or improper fit, so take 5-10 minutes to set the stage. This phase focuses on safety and compatibility checks to avoid common errors like choosing the wrong seating position.
Safety Considerations
Start by parking your vehicle on a flat, level surface with the engine off and parking brake engaged. Warning: Never install or adjust the car seat while driving or with the child inside—always do this in a stationary vehicle. Remove any debris from the back seat, and ensure the area is well-lit. If you’re installing in a vehicle with side airbags, confirm the car seat is in a rear-facing position away from them, as infant seats must always face rearward until the child reaches the seat’s weight/height limits (typically up to 35 lbs for Britax models).
Vehicle and Seat Preparation Steps
- Choose the Right Position: Select the rear middle seat if possible for optimal crash protection, or an outboard rear seat. Avoid front seats entirely due to airbag risks.
- Inspect the Car Seat: Unbox your Britax infant car seat and check for damage. Adjust the handle to the carry position and ensure the canopy is retracted. For models with a detachable base (like the B-Safe), separate it now.
- Level the Vehicle Seat: Place a towel or pool noodle under the base of the vehicle seat if it’s sloped. The goal is a flat surface—the car’s seat should recline no more than 10 degrees for rear-facing installation.
- Gather LATCH or Belt Access: Locate your vehicle’s LATCH anchors (usually lower anchors and top tether points) or prepare the seatbelt by buckling and unbuckling it once to ensure it moves freely.
Pro Tip: If you’re unsure about your vehicle’s setup, use the NHTSA’s free car seat inspection locator tool online to find compatibility details. This prep step prevents 80% of installation errors, according to safety experts.
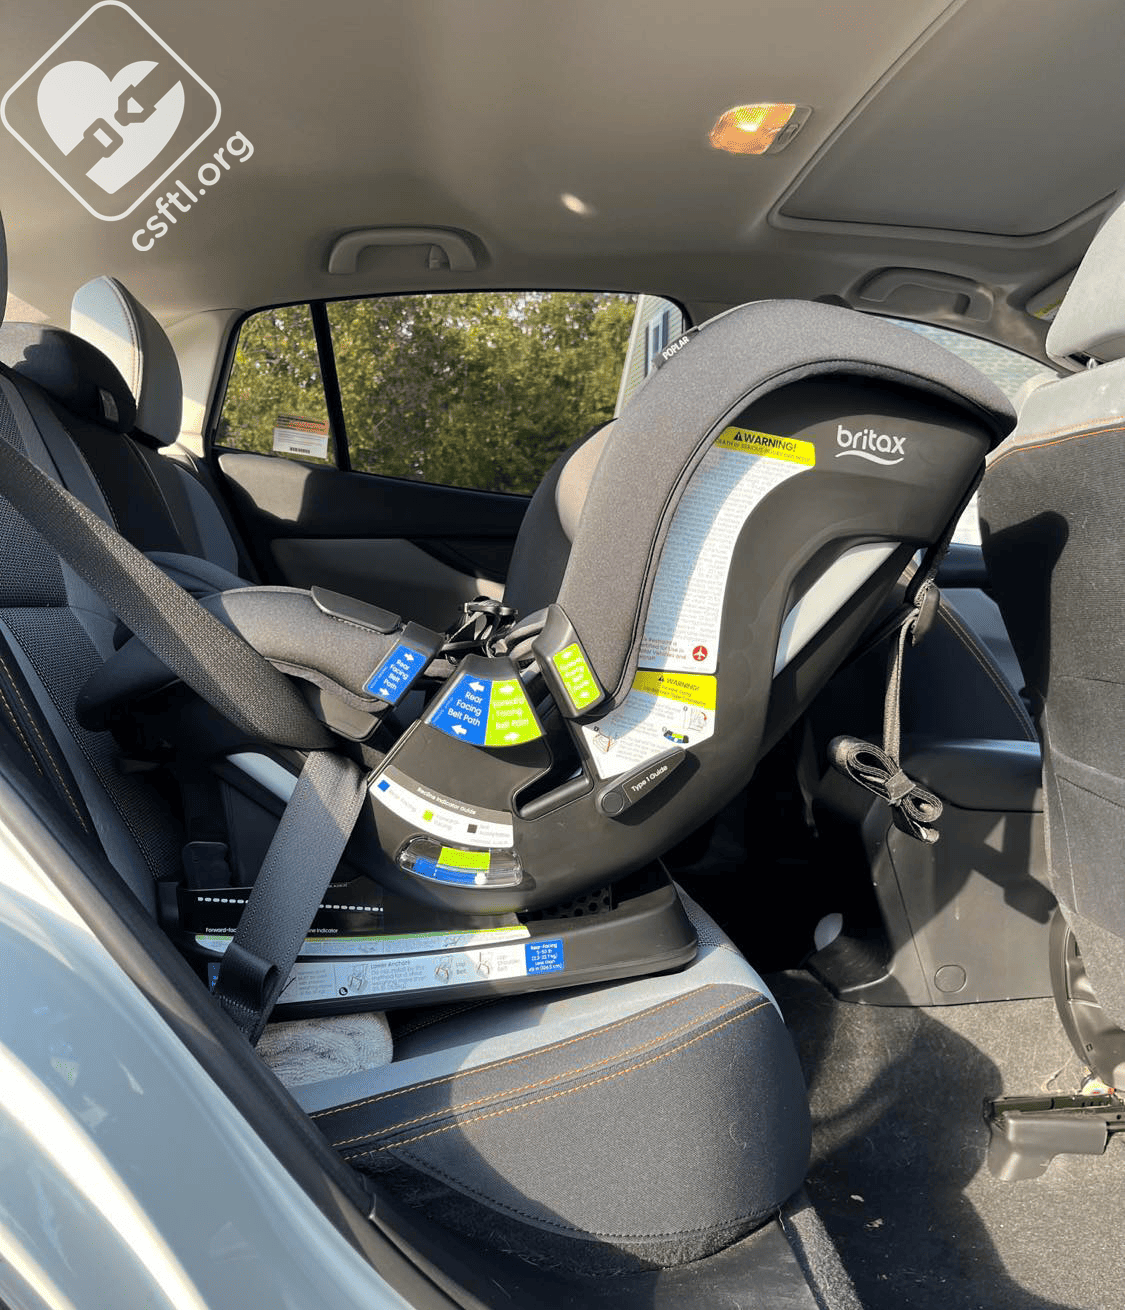
Step-by-Step Installation Process
Now for the core of your Britax infant car seat installation: the actual setup. We’ll break this into phases, covering both LATCH and seatbelt methods. The ClickTight technology on many Britax models simplifies this by allowing you to “click” the seat into place without wrestling with straps. Aim for a total installation time of 15-25 minutes. Always refer to your model’s manual for visuals, as steps can vary slightly (e.g., the B-Safe Ultra uses a magnetic buckle holder).
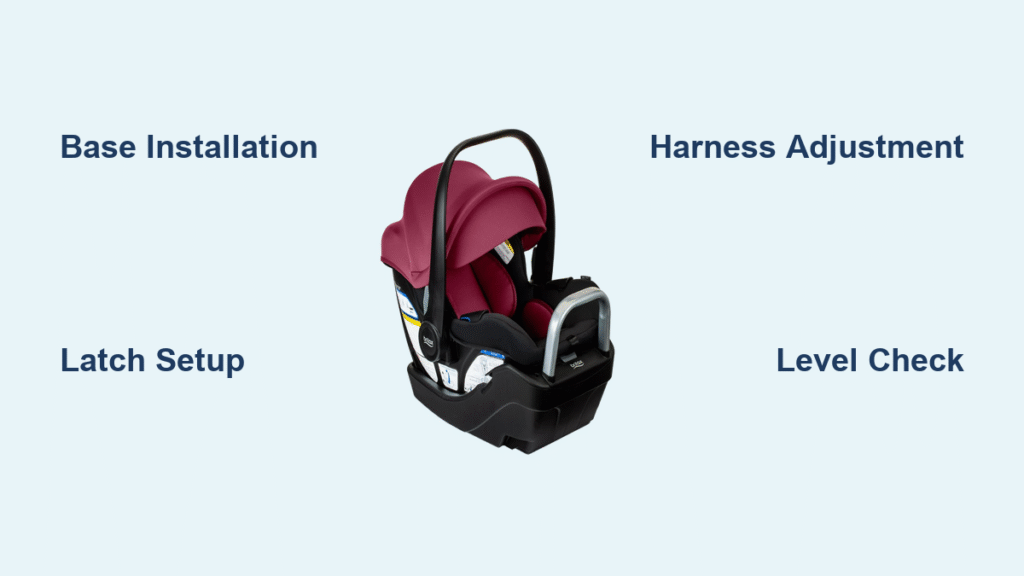
Phase 1: Base Installation (If Applicable)
Most Britax infant seats use a base for easier in/out removal. Install the base first for stability.
- Position the Base: Place the base on the vehicle seat, centered in the chosen position. Align the base’s level indicator with the bubble—use a towel if needed to achieve a level (within 5 degrees) rear-facing angle.
- Attach LATCH Connectors (LATCH Method):
– Thread the LATCH straps through the base’s attachment points.
– Hook the connectors to the vehicle’s lower anchors (push firmly until you hear a click).
– Tighten the straps using the adjustment mechanism—pull until the base doesn’t move more than 1 inch side-to-side or front-to-back at the belt path. - Secure with Seatbelt (Seatbelt Method):
– Route the lap/shoulder belt through the base’s belt paths (blue guides on Britax bases).
– Buckle the belt, then feed the shoulder portion back through the guide while pulling the lap belt tight.
– Lock the belt (most vehicles auto-lock; if not, use the seat’s locking clip if provided).
– Tug firmly to remove slack—the base should be rock-solid. - Attach Top Tether (Recommended for Both Methods): Locate the tether anchor in the vehicle (usually in the trunk or seatback). Clip the tether to it and tighten until taut. This reduces forward movement in a crash by up to 50%, per NHTSA guidelines.
Warning: If the base wobbles more than 1 inch, reinstall—loose fits increase injury risk in accidents.
Phase 2: Attaching the Carrier to the Base
- Align and Click: Hold the carrier at a 45-degree angle, align the tabs with the base’s slots, and lower it straight down. For ClickTight models, open the panel, thread the vehicle belt if needed, and close it to auto-tighten.
- Lock in Place: Push down firmly on the carrier until it clicks securely (you’ll feel resistance then a snap). Lift slightly to confirm it doesn’t detach.
- Adjust Recline: Fine-tune the level indicator. Most Britax seats have multiple recline positions—choose the one that keeps the bubble centered.
Phase 3: Harness and Final Adjustments
- Set Harness Height: Adjust the shoulder straps to the lowest slots for newborns (straps should be at or below shoulders). Ensure the chest clip is at armpit level.
- Buckle and Tighten: Place a tightly rolled towel or blanket under the baby (not behind) for support. Buckle the harness, pull the adjustment strap to snug it—pinch test: you shouldn’t pinch fabric at the shoulders.
- Secure Accessories: Attach the base’s tether if not done, and fold the handle down for travel.
Time Estimate: Phase 1: 10 minutes; Phase 2: 5 minutes; Phase 3: 5 minutes.
Post-Installation Testing and Troubleshooting
Once installed, testing ensures your Britax infant car seat installation is crash-ready. This takes just 5 minutes but could save lives.
Testing Steps
- The 1-Inch Rule: Grasp the car seat at the belt path and push. It shouldn’t move more than 1 inch in any direction. If it does, loosen and retighten.
- Shake Test: Wiggle the seat side-to-side and forward—stability is crucial for rear-facing protection.
- Harness Check: Snug the harness on a stuffed toy or doll; straps should lie flat without twists.
- Drive Test: Take a short, low-speed drive (under 10 mph) and recheck tightness afterward, as vibrations can loosen fits.
Common Troubleshooting
- Base Won’t Level: Add/remove towel thickness; if persistent, your vehicle seat may need professional adjustment.
- LATCH Won’t Click: Clean anchors and connectors; try seatbelt method as a backup—both are equally safe per FMVSS 213 standards.
- Harness Too Loose: Re-thread straps correctly; avoid bulky clothing under the harness.
- Error Persists: Double-check the manual or use Britax’s online installation videos. If all else fails, visit a certified technician (more on this below).
Regularly re-inspect after 1 week of use and monthly thereafter, as seats can shift.
Pro Tips for Secure Britax Infant Car Seat Installation
To elevate your Britax infant car seat installation from good to expert-level, here are 7 insider tips:
- Use the ClickTight Feature Fully: On compatible models, this self-tightens the belt—pull the tabs for 50% less effort and better security.
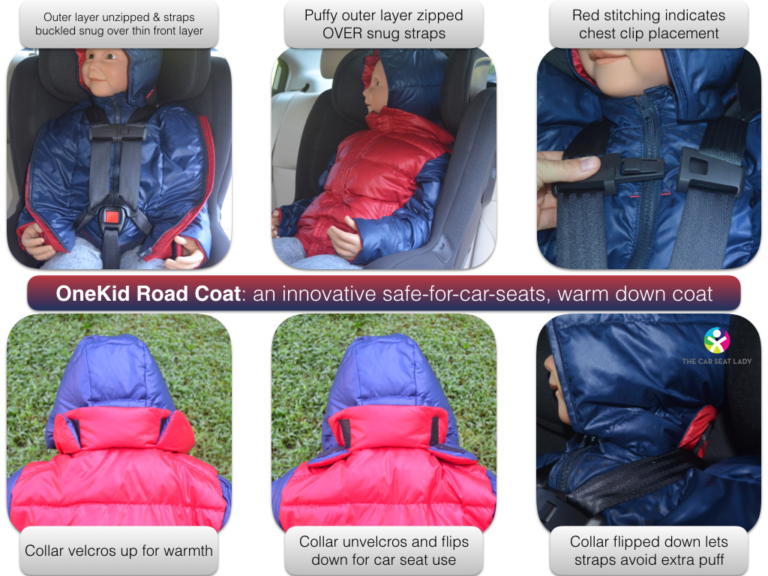
- Avoid Winter Coats in the Harness: Bulky layers compress in a crash; dress baby in thin layers and use a blanket over the straps.
- Install Without Child First: Practice the full process empty-handed to build confidence.
- Check Expiration Dates: Britax seats expire 6-10 years from manufacture—mark your calendar to replace on time.
- Optimize for Multiple Vehicles: Bases are interchangeable; label straps to avoid mix-ups if swapping cars.
- Common Mistake to Avoid: Don’t use the top tether only—always combine with LATCH or belt for full restraint.
- Performance Boost: Register your seat at Britax.com for recall alerts and lifetime support, extending its safe use.
These tweaks can reduce installation time by 20% on repeat setups.
When to Seek Professional Help
While DIY Britax infant car seat installation is empowering, some situations call for experts. Signs include: persistent wobble after multiple tries, incompatible vehicle features (e.g., no LATCH in your model year), or if you’re installing in a van/minivan with complex seating. Also, if you’re unsure post-accident (replace seats after any moderate crash, per NHTSA).
Look for certified Child Passenger Safety Technicians (CPSTs) via SafeKids.org—verify credentials and experience with Britax products. Expect costs of $20-50 for a 30-minute inspection. If under warranty (Britax offers 1 year), contact their support at 1-800-683-7462 for free guidance. Professional verification ensures 100% compliance and peace of mind.
FAQ
Q: Can I install a Britax infant car seat without the base?
A: Yes, for quick trips or taxis, use the seatbelt method directly on the carrier (route through the rear-facing belt paths). It’s just as secure but less convenient for frequent removal. Tighten until the 1-inch rule is met, and always use the top tether if available.
Q: How do I know if my vehicle is LATCH-compatible with Britax?
A: Check your vehicle’s manual or the LATCH label on the seat anchors. Britax seats fit most post-2002 cars, but weight limits apply (e.g., LATCH up to 35 lbs child + 15 lbs cargo). If over, switch to seatbelt.
Q: What’s the difference between ClickTight and standard installation?
A: ClickTight (on models like B-Safe Gen2) integrates the vehicle belt into a hinged panel for automatic tightening—no threading hassles. Standard methods require manual strap routing but work on all Britax infant seats.
Q: How often should I check the installation?
A: Weekly for the first month, then monthly. Also after any trip over 100 miles or if belts feel loose. Britax recommends annual professional inspections for long-term use.
Q: Is it safe to install in the front seat?
A: No—infant seats must go rear-facing in the back. Front installation risks airbag deployment injury; federal law prohibits it for children under 13.
Q: What if my Britax seat doesn’t have a level indicator?
A: Use a separate automotive level tool placed on the shell. Aim for the shell to be within 5 degrees of level—err on the side of slight recline for newborns.
Q: Can I reuse the installation for a second child?
A: Yes, but fully uninstall and reinstall to check fit. Adjust harness for the new child’s size immediately.
Enjoy a Safe Ride with Your Britax Infant Car Seat
You’ve now mastered Britax infant car seat installation with these detailed steps:
- Essential tools and preparation for a solid foundation
- Phased LATCH or seatbelt methods for easy setup
- Testing protocols to confirm security
- Pro tips and troubleshooting for real-world reliability
Following this guide ensures your setup meets or exceeds safety standards, protecting your baby in every journey. Take action today—install your seat, test it thoroughly, and hit the road with confidence. Remember, a properly installed car seat reduces injury risk by up to 70% in crashes.
Have you installed your Britax infant car seat yet? Share your tips or challenges in the comments below to help other parents. If you have questions about a specific model, drop them here—we’re here to assist!
(Word count: 1,856)


