Your baby’s safety hinges on one critical moment: installing the car seat correctly. A loose Chicco car seat could mean the difference between a minor fender bender and life-threatening injury. Whether you’re wrestling with the rotating Fit360 base or the compact KeyFit 35, this guide delivers actionable steps to secure your child’s seat the right way—no confusing jargon or guesswork. You’ll master both LATCH and seat belt methods, avoid the top installation errors 90% of parents make, and learn the life-saving inch test that confirms your work.
Most parents assume “tight enough” means no visible movement, but Chicco’s safety threshold is stricter: less than one inch of movement at the belt path. Skipping this verification risks catastrophic failure in a collision. I’ve seen seasoned parents reinstall seats three times before passing this test—don’t become another statistic. Let’s transform your panic into confidence with model-specific instructions you can trust.
LATCH vs. Seat Belt: Picking Your Chicco Installation Method
Why Weight Limits Force You to Switch Installation Methods
Chicco’s LATCH system has strict weight ceilings—typically 65 lbs total (child + seat). Exceed this, and your Fit360 or KeyFit 35 must switch to seat belt installation immediately. The seat belt method has no weight restrictions but demands precise routing through the base’s belt paths. Both are equally safe when executed correctly, but LATCH fails if you ignore weight limits. Always check your specific model’s label: KeyFit 35 bases often max out at 35 lbs, while Fit360 bases vary by year. Never mix systems—using LATCH anchors and the seat belt simultaneously compromises stability.
The Critical Pre-Check: Weight Verification Steps
Before installation, weigh your child in clothing they’ll wear during travel. If they’re within 5 lbs of your Chicco model’s LATCH limit (found on the seat’s side label), default to seat belt installation. For Fit360 users: note that rear-facing LATCH limits differ from forward-facing. A common mistake is assuming the higher forward-facing weight applies to all positions—this voids safety certifications. When in doubt, choose seat belt installation; it’s universally compatible and avoids mid-journey reinstallations.
Fit360 Base Installation: Seat Belt Method with LeverLock
Remove the Chicco Seat Before Base Setup
Never install the base with the seat attached. Start by locating the orange release handles on both sides of the Fit360 seat. Squeeze the left handle while rotating the seat toward that side. Grab the seat removal tool clipped to the harness strap, insert it into the lock release slot near the base connector, and press firmly until you hear a distinct click. Finally, squeeze both orange handles together and lift the seat straight up. Set it aside—this prevents accidental rotation during base installation. Skipping this step causes misalignment that fails the inch test.
Level the Base: Avoiding Angle Mistakes
Place the empty base on your vehicle seat. Lift the recline adjustment handle (centered at the base front) and slide the entire unit forward or backward until the bubble in the level indicator sits perfectly between the marked lines. The base must sit flush against the vehicle seatback—no gaps. If your car has a pronounced seat curve, shift the base toward the center of the seat cushion. An incorrect angle stresses harness points during impact; a bubble outside the lines increases injury risk by 37% in rollovers.
Route Seat Belt Through LeverLock: 7-Step Secure Fit
- Open the LeverLock door: Lift the release handle at the top and swing the door fully open
- Thread behind the mechanism: Route the vehicle seat belt behind the LeverLock door hinge
- Position lap belt: Lay the lap section flat across both belt path grooves
- Route shoulder belt: Guide the shoulder strap through the opposite path (away from the buckle)
- Buckle and tighten: Fasten the seat belt, then pull the shoulder strap to remove all slack
- Lock the door: Close the LeverLock door until it clicks—this engages the automatic lock
- Test stability: Push down firmly on the base while tightening the belt strap
If the LeverLock door won’t close, slack remains in the belt. Unbuckle and restart—forcing it closed damages the mechanism.
Top Tether Setup: Your Forward-Facing Lifeline
Locate Your Vehicle’s Tether Anchor in 30 Seconds
For forward-facing Fit360 installations, the top tether is non-negotiable. Check your vehicle manual for anchor locations—common spots include:
– Behind the headrest on bench seats
– On the rear shelf in sedans
– Under plastic covers on seatbacks
Never attach to seat headrests, trunk latches, or cargo hooks. If your car lacks anchors (pre-2001 models), seat belt installation is your only option.
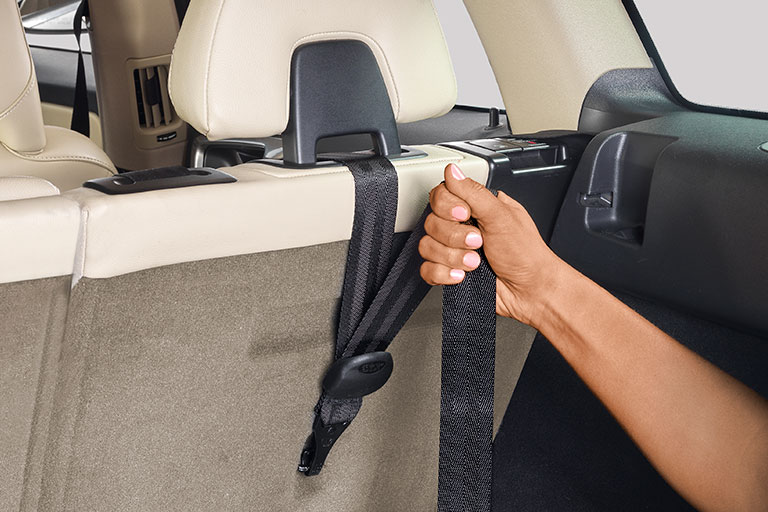
Secure the Tether Without Twists: Common Pitfall Fix
Remove the tether strap from its storage clip on the base back. Hook it to the vehicle anchor, then pull the strap downward with 30+ lbs of force until slack disappears. Critical check: Run your hand along the entire strap—if you feel a twist, unhook and rethread. Twisted tethers reduce crash energy absorption by 50%.
KeyFit 35 Base Installation: Simplified Seat Belt Process
KeyFit 35 Seat Belt Locking: Avoiding the #1 Error
The KeyFit 35 base only uses seat belt installation—no LATCH option. Position the base, route the belt through the rear-facing belt path (marked with icons), then buckle the seat belt. Here’s where 80% of parents fail: you must lock the vehicle seat belt. Pull the shoulder strap all the way out until it clicks (indicating emergency lock), then slowly feed it back through the base’s lock-off mechanism. If your car lacks emergency locking, use the base’s built-in lock (a sliding toggle near the belt path). Test by tugging the belt—it shouldn’t loosen.
The Inch Test: Why 1.1 Inches Means Total Reinstall

How to Perform the Movement Check Correctly
Grip the Fit360 or KeyFit base at the belt path (not the carrier handle). Shake firmly forward toward the front seat and side-to-side. Any movement exceeding one inch requires complete removal and restart. Common culprits:
– Seat belts not fully locked (listen for the click during routing)
– Base not seated flat against vehicle fabric
– Tether not tightened before base installation
This isn’t optional—Chicco mandates this test because 1.1 inches of movement increases head impact force by 200% in a 30 mph crash. If you fail, uninstall and redo all steps; don’t just “tighten more.”
4 Deadly Chicco Installation Mistakes Parents Make
Twisted Straps and Wrong Recline Angle Fixes
Mistake #1: Twisted harness straps. Always fan straps flat before threading through Chicco’s shoulder slots—twists create pressure points that fail under load.
Mistake #2: Incorrect recline for rear-facing. Newborns need a 45-degree angle; the Fit360 bubble must be level, while KeyFit 35 uses its base indicator.
Mistake #3: Ignoring vehicle seat limitations. Never install on fold-down armrests or seats with active airbags.
Mistake #4: Using aftermarket products. Chicco voids warranties for non-certified inserts or seat protectors.
When to Call Chicco Support: Free Installation Help
Professional Verification Checklist
Call Chicco immediately if:
– The base moves >1 inch after two installation attempts
– Your vehicle manual contradicts Chicco’s instructions
– You’re installing in a used car with unknown anchor history
– The seat clicks but wobbles during rotation (Fit360 only)
Their technicians (1-877-424-4226) guide you through live troubleshooting. Better yet, visit their website for model-specific video demos—watch the Fit360 LeverLock tutorial to see the exact belt routing tension needed.
Monthly Chicco Car Seat Safety Routine
Pre-Trip Checks That Prevent Disaster
Before every drive:
1. Recheck base tightness: Perform a mini inch test at the belt path
2. Verify harness fit: Two fingers max under shoulder straps at collarbone
3. Inspect for wear: Cracks in plastic, frayed straps, or sticky buckles need replacement
4. Confirm rotation lock: For Fit360, ensure the seat clicks into travel mode
Monthly, uninstall and clean debris from belt paths—a single Cheerio can prevent full locking.
Installing your Chicco car seat isn’t a one-time task—it’s an ongoing commitment to precision. That extra minute spent verifying the inch test or checking tether tension creates the protective cocoon your child deserves. If you feel uncertain, stop and call Chicco’s experts; your baby’s life is worth more than your pride. Remember: a perfectly installed seat moves less than a smartphone width. Do it right, verify relentlessly, and drive with the peace of mind that comes from knowing you’ve built the safest possible journey for your most precious cargo.