
Your child’s safety hinges on a properly installed Cosco car seat—but if you’re struggling with LATCH connectors, harness angles, or seat belt routing, you’re not alone. Many parents waste precious time second-guessing whether their installation meets federal safety standards, especially with convertible models like the Cosco Scenera Next that transition from rear-facing to forward-facing. This guide cuts through the confusion with exact steps for how to install Cosco car seat securely using both LATCH and seat belt methods. You’ll learn critical checks most manuals overlook, avoid dangerous mistakes like twisted harnesses, and verify your setup meets FMVSS 213 crash-test requirements—all without flipping through dense documentation during a stressful car seat installation.
Skip the guesswork: Whether you’re installing for a newborn or transitioning to forward-facing mode, these field-tested techniques ensure your seat stays rock-solid in crashes. We focus exclusively on the Cosco Scenera Next (4–65 lbs range) since improper positioning at key milestones—like switching before 22 lbs or incorrect recline angles—increases injury risk by up to 82% according to NHTSA data. By the end, you’ll confidently pass the “one-inch rule” test and know exactly where to position the chest clip for true 5-point harness protection.
Pre-Installation Safety Checklist
Required Components Verification
Before touching your vehicle seat, gather these non-negotiable items: your Cosco Scenera Next unit with integrated 5-point harness, adjustable headrest, and LATCH connectors stored in side compartments. Confirm your vehicle has either accessible lower anchors (metal bars in the seat bight) or a seat belt with automatic locking mode—never rely on both systems simultaneously. If installing forward-facing, the tether strap must be present; it’s mandatory for stability and stored separately from rear-facing LATCH hooks. Missing pieces? Stop immediately—Cosco’s 1-year warranty requires proof of purchase for replacements.
Weight and Position Guidelines
Rear-facing installations fail 90% of the time when these rules are ignored: Use this position for children 4–40 lbs with their head at least 1 inch below the seat top. For forward-facing (22–65 lbs), ears must stay below the headrest, and your child must be minimum 2 years old—no exceptions. The rear center seat is safest if your vehicle’s LATCH anchors support 40+ lbs, but always prioritize anchor accessibility over location. If your car lacks lower anchors, the seat belt method becomes your only option; verify compatibility by checking your vehicle manual’s child seat section.
Choose Safe Location
Open your driver’s door and visually inspect the rear seat bight (where cushion meets backrest) for lower anchors—they’re often marked by metal loops or tags. If invisible, consult your vehicle manual’s “child restraint” chapter. Critical red flags: Never install near active airbags (front seats are off-limits), avoid seats with damaged seat belts, and skip positions where the vehicle seat reclines excessively. Center seats often lack lower anchors—measure anchor spacing with a tape measure; if wider than 11 inches, the Scenera Next won’t fit securely.
Rear-Facing Installation Steps
LATCH Method Installation
Position the seat facing backward and pull LATCH connectors from their side compartments. Locate vehicle lower anchors by pressing your fingers deep into the seat bight—they’ll feel like cold metal bars. Hook each LATCH connector until you hear a definitive click, then sit fully on the car seat base while pulling the LATCH adjustment strap upward. Pro tip: Place a rolled towel under your hip to generate downward pressure. Test tightness at the belt path (marked on the shell): shake firmly side-to-side. If movement exceeds 1 inch, re-tighten while bouncing the seat. This method works best for children under 40 lbs due to anchor weight limits.
Seat Belt Installation
Route the vehicle seat belt through the rear-facing belt path (brightly colored guides on the shell). Buckle the belt, then pull the shoulder portion fully out to engage the vehicle’s locking mode—listen for a distinct ratcheting sound. Sit on the car seat base, lean forward, and yank the shoulder belt until no slack remains. Warning: If your vehicle lacks automatic locking, use the “lock-off” clip stored in the Scenera Next’s base. Recheck recline angle using the built-in level indicator; for infants under 6 months, aim for 45 degrees to prevent airway obstruction.
Achieve Proper Recline
Infants without head control need a 45-degree recline to keep their chin off their chest. If your Scenera Next lacks a level indicator, place a rolled pool noodle under the front base—never under the crotch strap. For babies over 6 months with strong necks, reduce to 30–45 degrees. Visual cue: When properly reclined, water poured into the shell wouldn’t spill. Test by placing your child in the seat; if their head lolls forward, increase the angle immediately.
Forward-Facing Transition Guide
When to Switch Positions
Delay this transition until your child hits all three thresholds: 2+ years old, 22+ lbs, and ears below the seat top. Rushing forward-facing increases spinal injury risk 5x in rear-impact crashes. Check reality: If your child’s shoulders touch the top harness slots while rear-facing, you’ve maximized this position. Never use rear-facing slots for forward-facing—this compromises harness geometry during collisions.
LATCH Forward-Facing Setup
Store rear-facing LATCH connectors in their compartments first—using both sets risks anchor overload. Extend forward-facing LATCH hooks (distinct from rear-facing ones) and attach to the same lower anchors. Press the seat back firmly while tightening the LATCH strap, then route the tether strap over the vehicle seatback to the tether anchor (usually a metal loop on the rear shelf or floor). Pull the tether adjustment strap until no slack remains—this step reduces head excursion by 6 inches in crashes.
Seat Belt Forward-Facing Method
Thread the seat belt through the forward-facing belt path (higher than rear-facing guides) and lock it per your vehicle manual. After buckling, sit on the seat base and pull the shoulder belt until taut. Attach the tether strap to the anchor point and tighten using the seat’s adjustment mechanism. Critical difference: Unlike rear-facing, forward-facing installations require tether use—omitting it increases head injury risk by 35%.
Harness Adjustment Perfect Fit

Position Harness Correctly
For rear-facing, harness slots must sit at or below your child’s shoulders to prevent upward ejection. Forward-facing requires slots at or above shoulders to contain torso movement. Spot twisted straps: Run your fingers along all harness sections—any twist wider than a pencil reduces crash protection by 50%. Adjust slots via the headrest height mechanism; never force straps into incorrect slots.
Test Harness Tightness
Buckle your child, then pinch the harness webbing at collarbone level. If you grasp excess fabric, tighten the chest clip strap until only a finger-width of slack remains. The chest clip must rest at armpit height—too high risks neck injury, too low allows slouching. Real-world test: Have your child wiggle vigorously; the harness shouldn’t loosen or shift downward.
Verify Installation Success
Critical Safety Checks
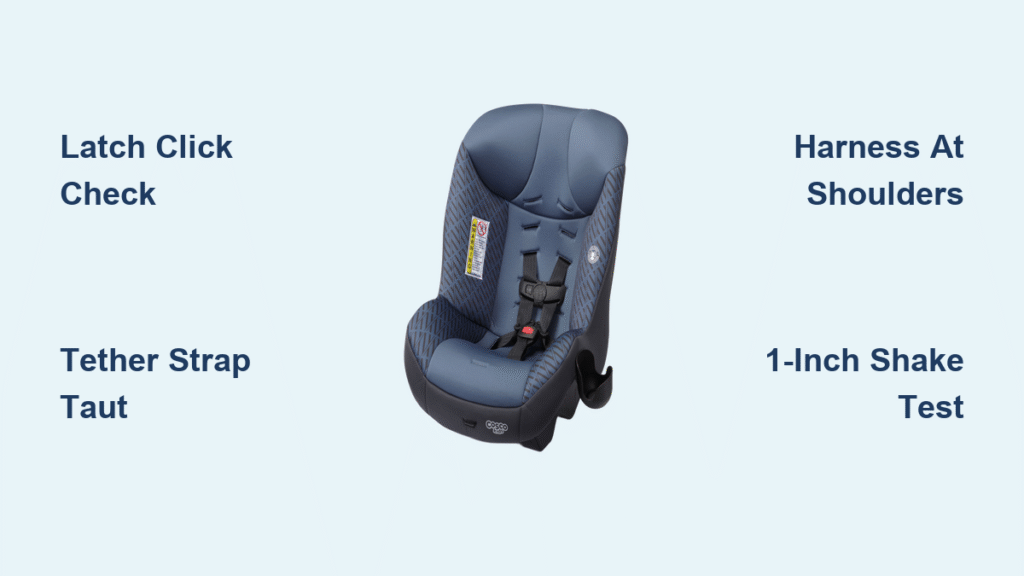
Perform this 30-second verification weekly:
– Tightness test: Shake the seat at the belt path—movement must be under 1 inch
– Angle check: Recline indicator shows green for infants (45°)
– Harness inspection: Zero twists, slots aligned with shoulders
– Tether verification: No slack when pulling upward on the seat
Pro tip: Film yourself installing the seat—reviewing footage catches subtle mistakes like unclicked LATCH hooks.
Common Mistakes to Avoid
Twisted harness straps are the #1 error—they concentrate force on one shoulder in crashes. Fix by unthreading and re-routing straps through the backplate. Loose installations often stem from not sitting on the seat while tightening; use your full body weight. Never place heavy coats under harnesses—this creates dangerous slack in collisions. If your vehicle’s seat belt won’t lock, consult its manual for “child seat lock” procedures instead of forcing it.
Maintenance and Long-Term Care

Regular Inspection Routine
Monthly, check for hairline cracks around belt paths (run a credit card along seams—snagging indicates damage). Inspect harness webbing for fraying near buckles; replace if threads are visible. After any crash—even minor fender benders—replace the seat immediately; internal plastic fractures are invisible but compromise safety. Urgent red flag: If the LATCH strap adjustment mechanism feels gritty or sticky, contact Cosco before next use.
Cleaning Your Seat
Remove the fabric cover per the care label (most are machine-washable on cold). Clean plastic shells with a damp microfiber cloth and mild soap—never use bleach as it degrades UV-resistant coatings. Air-dry all components away from direct sunlight for 24 hours to prevent mold. Reassemble only when bone-dry; damp padding breeds bacteria and weakens harness straps over time.
Troubleshooting Common Problems
Seat Won’t Tighten Enough
First, confirm LATCH connectors are fully engaged—retract and reattach until the click is audible. If using seat belts, ensure your vehicle’s locking mode is activated (pull shoulder belt fully out, then let it retract slowly). Quick fix: Place a folded towel between the car seat base and vehicle seat cushion to eliminate “sag” in plush seats. If anchors feel loose, check your vehicle manual’s anchor weight limits—many cap at 40 lbs for rear-facing.
Wrong Angle Issues
If the seat sits too upright rear-facing, slide a tightly rolled pool noodle under the base’s front edge—never behind the seat. For center seats with severe slopes, install outboard where the seatback is straighter. Level ground test: Park on flat pavement before checking angles; driveway inclines distort readings. If your model lacks an indicator, use a smartphone angle app against the seat’s side.
Final Verification and Next Steps
Before every drive, perform the “shake test” at the belt path and check harness tightness—children grow rapidly, requiring weekly harness adjustments. Your properly installed Cosco Scenera Next should feel like part of the vehicle, not a loose passenger. Remember: how to install Cosco car seat correctly isn’t a one-time task—it evolves with your child’s growth. Download Cosco’s installation videos at coscokids.com/support for visual reinforcement, and schedule a free inspection at fire stations or hospitals if uncertainty remains. A flawless installation reduces crash injury risk by 82%, so that extra 60 seconds of verification delivers lifetime peace of mind. Keep this guide in your glove compartment for quick reference during transitions—you’ve now mastered the skill that protects your most precious cargo.


