
Your Diono car seat just arrived, and you’re staring at this heavy-duty seat wondering if you’ll ever conquer the installation. Take a deep breath—while Diono’s extended rear-facing design seems complex, proper installation follows a clear sequence when you know the model-specific tricks. This guide cuts through the confusion with exact steps for Radian 3R, 3RX, 3RXT, and 3QX models, showing you how to install Diono car seat securely whether you’re rear-facing a newborn or converting to booster mode. You’ll learn the critical LATCH weight limits, why inflatable seat belts change your approach, and how to fix the three most common installation failures in under two minutes.
Most parents miss that vehicle compatibility determines 80% of your installation success. Before touching that box, verify your car’s seat belt type, LATCH anchor locations, and recline angle. Skip this step, and you’ll fight loose installations or dangerous angles later. Whether you drive a compact sedan or need three seats across, these field-tested methods work for all Diono configurations from 5-120 lbs. Let’s get your child riding safely today.
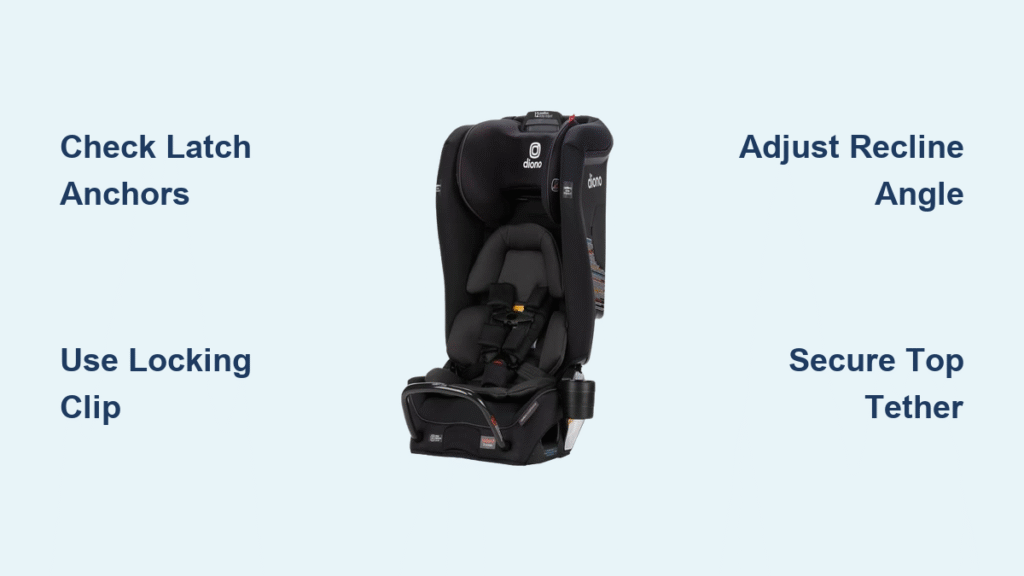
Check These 3 Vehicle Features Before Unboxing Your Diono
Your vehicle’s specifications dictate your installation method—no exceptions. Start by locating metal LATCH anchors in the seat bight (where backrest meets cushion). Slide your hand deep into the crease; if you feel metal bars, you’ve got anchors. Most vehicles built after 2002 include them, but always confirm in your owner’s manual. Next, identify your seat belt type: lap-only, lap/shoulder, or newer inflatable belts (common in Ford, Lincoln, and Mercedes models from 2011+). Inflatable belts require special handling—never use LATCH with them.
Finally, assess seat angle. Rear-facing installations need 30-45 degrees of recline. Sit in the vehicle seat and observe its natural angle—steeper seats may require towels for newborns, while upright seats work better for older infants. Critical safety note: Never install rear-facing in the front seat if airbags are active. Consult your vehicle manual for deactivation procedures before proceeding.
Find Hidden LATCH Anchors in Your Seat Bight
Many parents miss anchors buried under seat fabric. Grip the seat bight firmly and feel for metal bars about 1-2 inches deep. If you hit resistance, peel back the fabric gently—anchors often sit vertically. For center seat positions, check your manual; most vehicles lack center LATCH anchors, requiring seat belt installation instead. When in doubt, bring your Diono manual to the car—its diagrams match anchor positions perfectly.
Why Inflatable Seat Belts Change Your Installation Method
Vehicles with inflatable seat belts (identified by thicker, padded shoulder straps) prevent automatic locking retractor engagement. This makes LATCH installation unsafe—always use seat belt installation only for these systems. Pull the belt all the way out slowly; if it feels like inflating air, stop immediately. Your vehicle manual’s car seat section details specific procedures, but generally, you’ll need a locking clip positioned 1 inch from the latch plate to secure the belt properly.
Secure Rear-Facing Diono at 45 Degrees Without Towels (3RXT/3QX Trick)
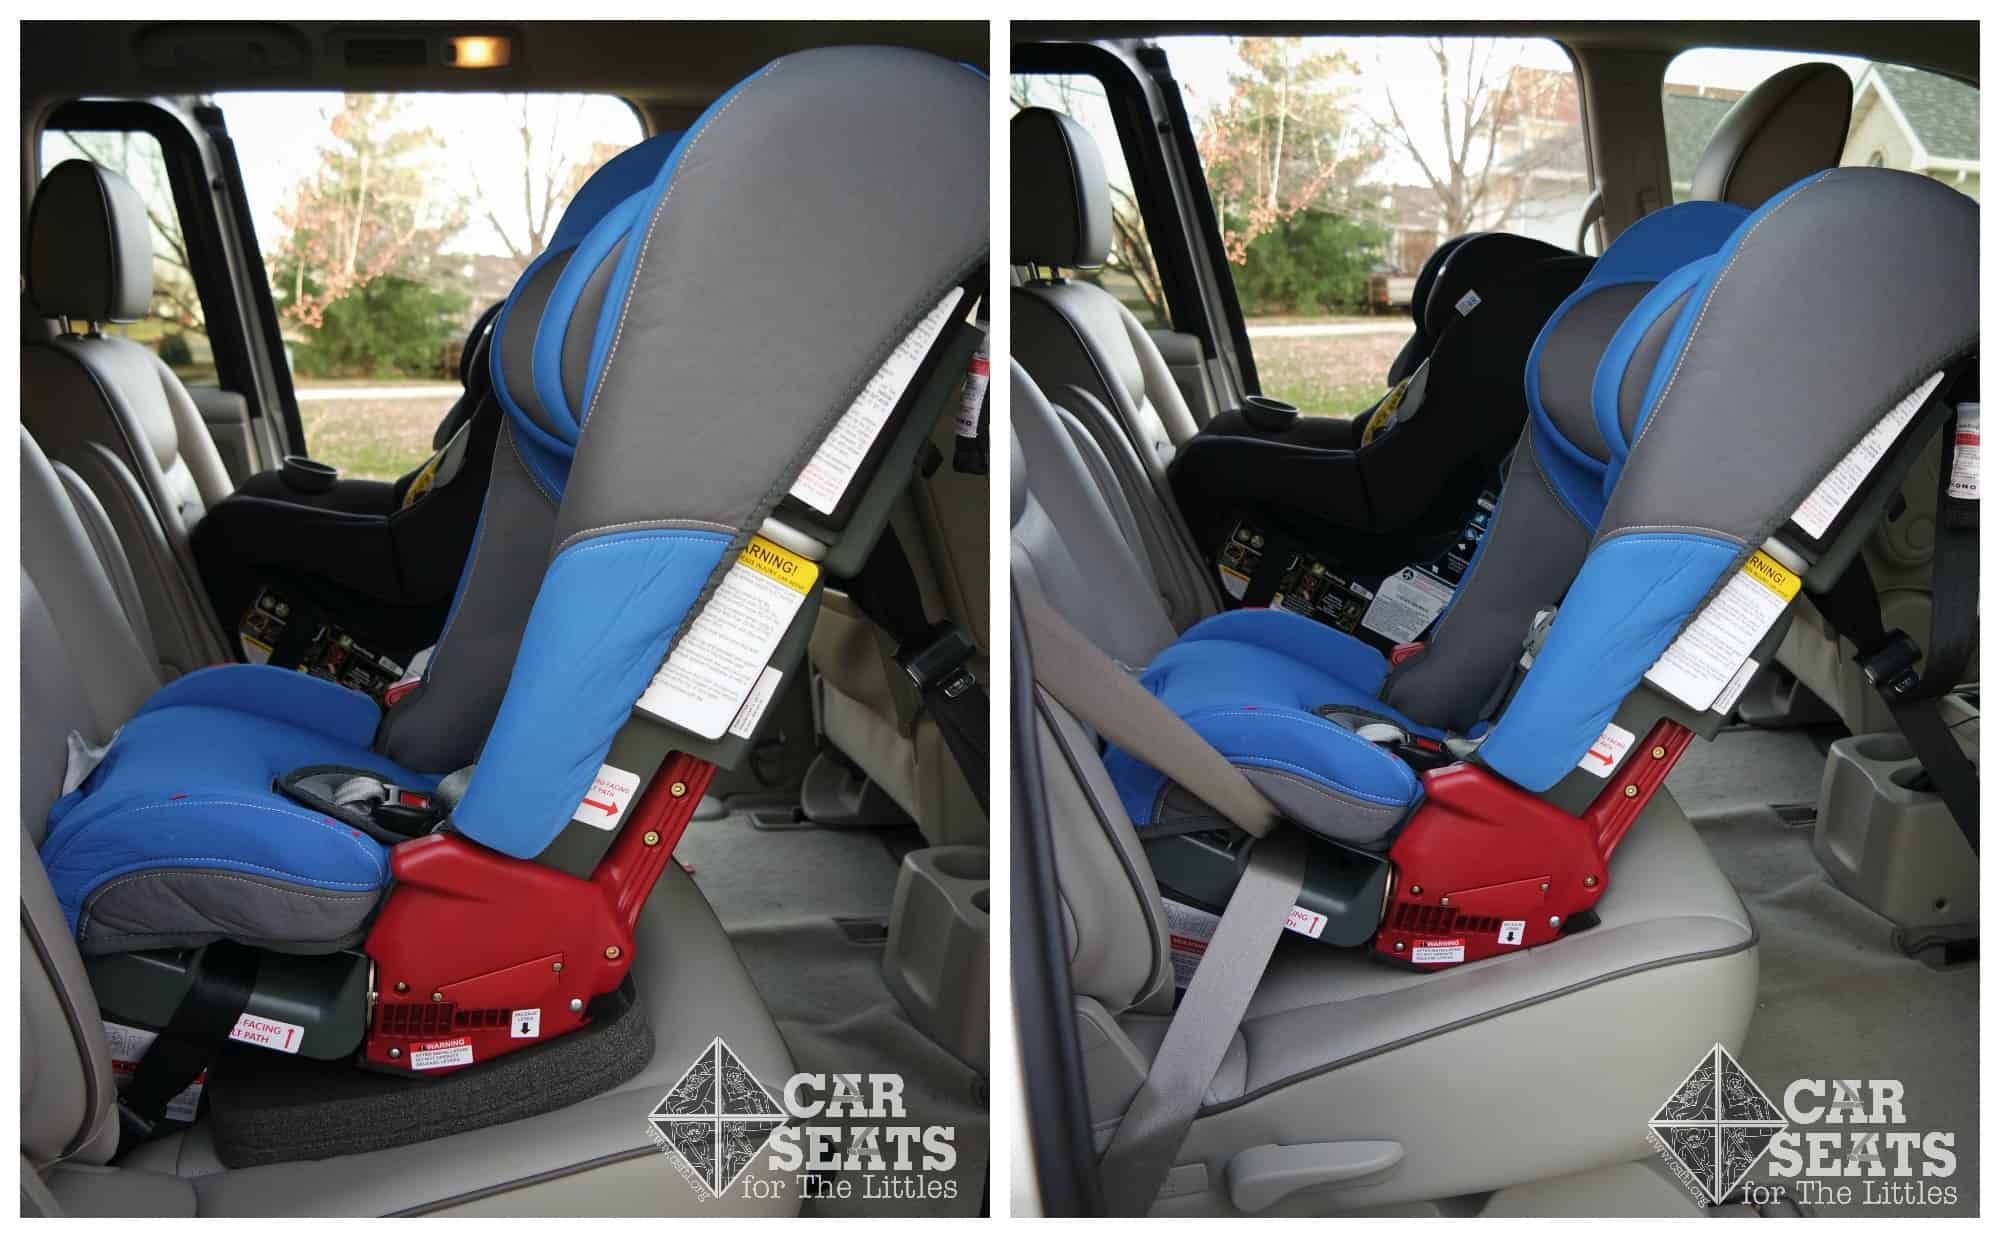
For 3RXT and 3QX models, skip the towel hassle with the built-in angle adjuster. Flip the foot forward into rear-facing mode and slide the adjustment lever to position 1 for newborns (45 degrees). Watch the side level indicators—they turn solid green when correct. Press your knee firmly in the seat bight while pulling the LATCH strap to remove slack. Test by shaking at the belt path; movement must stay under 1 inch. This method works flawlessly for infants 5-50 lbs without extra padding.
Fix Too-Upright Angle in 3R/3RX Models with Pool Noodles
If your 3R or 3RX sits too upright (common in bucket seats), roll a pool noodle tightly and place it under the front edge of the base. Start with one-third of the noodle visible, install the seat, then check the angle indicators. Pro tip: Compress the noodle further by sitting on it before installation—this creates denser support that won’t shift during drives. Never place padding under the child; only adjust the base angle. Verify with a phone app: 45 degrees for newborns, 30-45 for older babies.
Lock Seat Belts on Pre-1996 Vehicles Using Locking Clips
Vehicles built before 1996 lack automatic locking retractors, causing dangerous seat belt slippage. Use the locking clip included with your Diono: thread both seat belt straps through the clip, position it 1 inch from the latch plate, and squeeze shut with pliers. Route the belt through the blue rear-facing path, then pull the shoulder portion tight while pressing down on the car seat. The clip locks the belt in place when tension releases—test by tugging the shoulder strap upward; it shouldn’t extend.
Install Locking Clips in 60 Seconds
- Unbuckle vehicle seat belt completely
- Thread lap and shoulder straps through locking clip
- Position clip 1 inch from latch plate
- Press clip firmly until it clicks shut
- Route through Diono’s blue belt path
- Pull shoulder strap tight while pressing seat base
Warning: Never use third-party clips—only Diono’s included clip ensures proper spacing. After installation, check that the clip sits flat against the seat fabric without twisting.
Never Skip Top Tether in Forward-Facing Mode (Anchor Locations)

Top tether use is non-negotiable for forward-facing Diono seats (22-65 lbs), yet 40% of parents omit it. Locate anchors behind your vehicle seat: check the rear deck, ceiling, or floor near the trunk. In SUVs, anchors often hide under plastic covers—remove them using your manual’s diagram. Connect the tether hook, then pull the adjustment strap until webbing is taut. Shake the seat at the belt path; movement should be minimal. Critical: Route the tether straight back without wrapping around headrests—this reduces slack by 30%.
Top Tether Anchor Locations You’re Missing
- Sedans: Behind rear seatback (pull up carpeted cover)
- Minivans: On rear cargo wall (below third-row seats)
- SUVs: Under rear seat floor mats (common in Honda Pilot)
- Trucks: On cab wall behind jump seats
If your vehicle lacks anchors, purchase a tether anchor bolt from Diono ($15). Install it through the vehicle’s metal frame per their instructions—never attach to plastic trim.
Fit Three Diono Seats Across in Mid-Size Vehicles

Diono’s 17-inch width (excluding cup holders) makes three-across possible in most mid-size vehicles like Toyota Camry or Honda CR-V. Install the center seat first using seat belt installation—LATCH anchors typically don’t exist here. Position it 11 inches from each outboard seat. For the driver and passenger seats, use LATCH if weight limits allow (under 35 lbs rear-facing). Key trick: Remove cup holders during installation to maximize space, then reattach after securing.
Why Center Seat Installation Must Use Seat Belts
Most vehicles lack dedicated center LATCH anchors, making seat belt installation mandatory here. Route the belt through the blue path (rear-facing) or red path (forward-facing), pull completely out to engage locking mode, then retract slowly while pressing the seat base. Test by pushing the seat toward the doors—you shouldn’t feel contact with adjacent seats. If movement exceeds 1 inch, add a rolled towel under the center seat’s front edge for stability.
Diagnose Loose Installations: Press Here for Maximum Tightness
If your Diono moves more than 1 inch at the belt path, you’re pressing in the wrong spot. For rear-facing installations, apply knee pressure directly in the seat bight where the vehicle belt crosses the car seat. Pull the LATCH or seat belt strap in short, sharp tugs—not one long pull. Pro technique: Sit on the car seat base while tightening to simulate body weight. If still loose, remove the cover to access the belt path directly—padding sometimes hides twisted straps.
Solve Seat Belt That Won’t Lock in 2 Minutes
When seat belts retract unexpectedly during installation:
1. Unbuckle completely and pull shoulder strap all the way out
2. Allow slow retraction while pressing car seat firmly
3. If belt extends when released, engage emergency lock:
– Pull shoulder strap until you hear clicks
– Release slowly—if belt locks, proceed
– If not, install locking clip as described earlier
Test by lifting the shoulder strap; it should stay locked at the tightest position.
Final Safety Check: The 1-Inch Movement Rule
After installation, perform this critical verification: grasp the car seat where the belt crosses the shell (not the harness) and shake side-to-side and front-to-back. Movement must not exceed 1 inch in any direction. Next, check harness tightness using the pinch test at shoulder level—no webbing should be pinchable between your fingers. Position the chest clip at armpit height, never on the belly. Finally, ensure the top tether (forward-facing) has zero slack—pull the adjustment strap until you see webbing tension.
Daily Harness Tightening You’re Skipping
Before every drive, tighten the harness using Diono’s adjustment strap. Buckle your child, then pull the strap until you can’t pinch the webbing at their collarbone. Critical mistake: Bulky winter coats compromise safety—remove them before buckling, then place coats over the harness. Check expiration dates annually; Diono seats expire 10 years from manufacture (stamped on the base).
Model-Specific Fixes: 3R vs 3RX vs 3RXT vs 3QX Differences
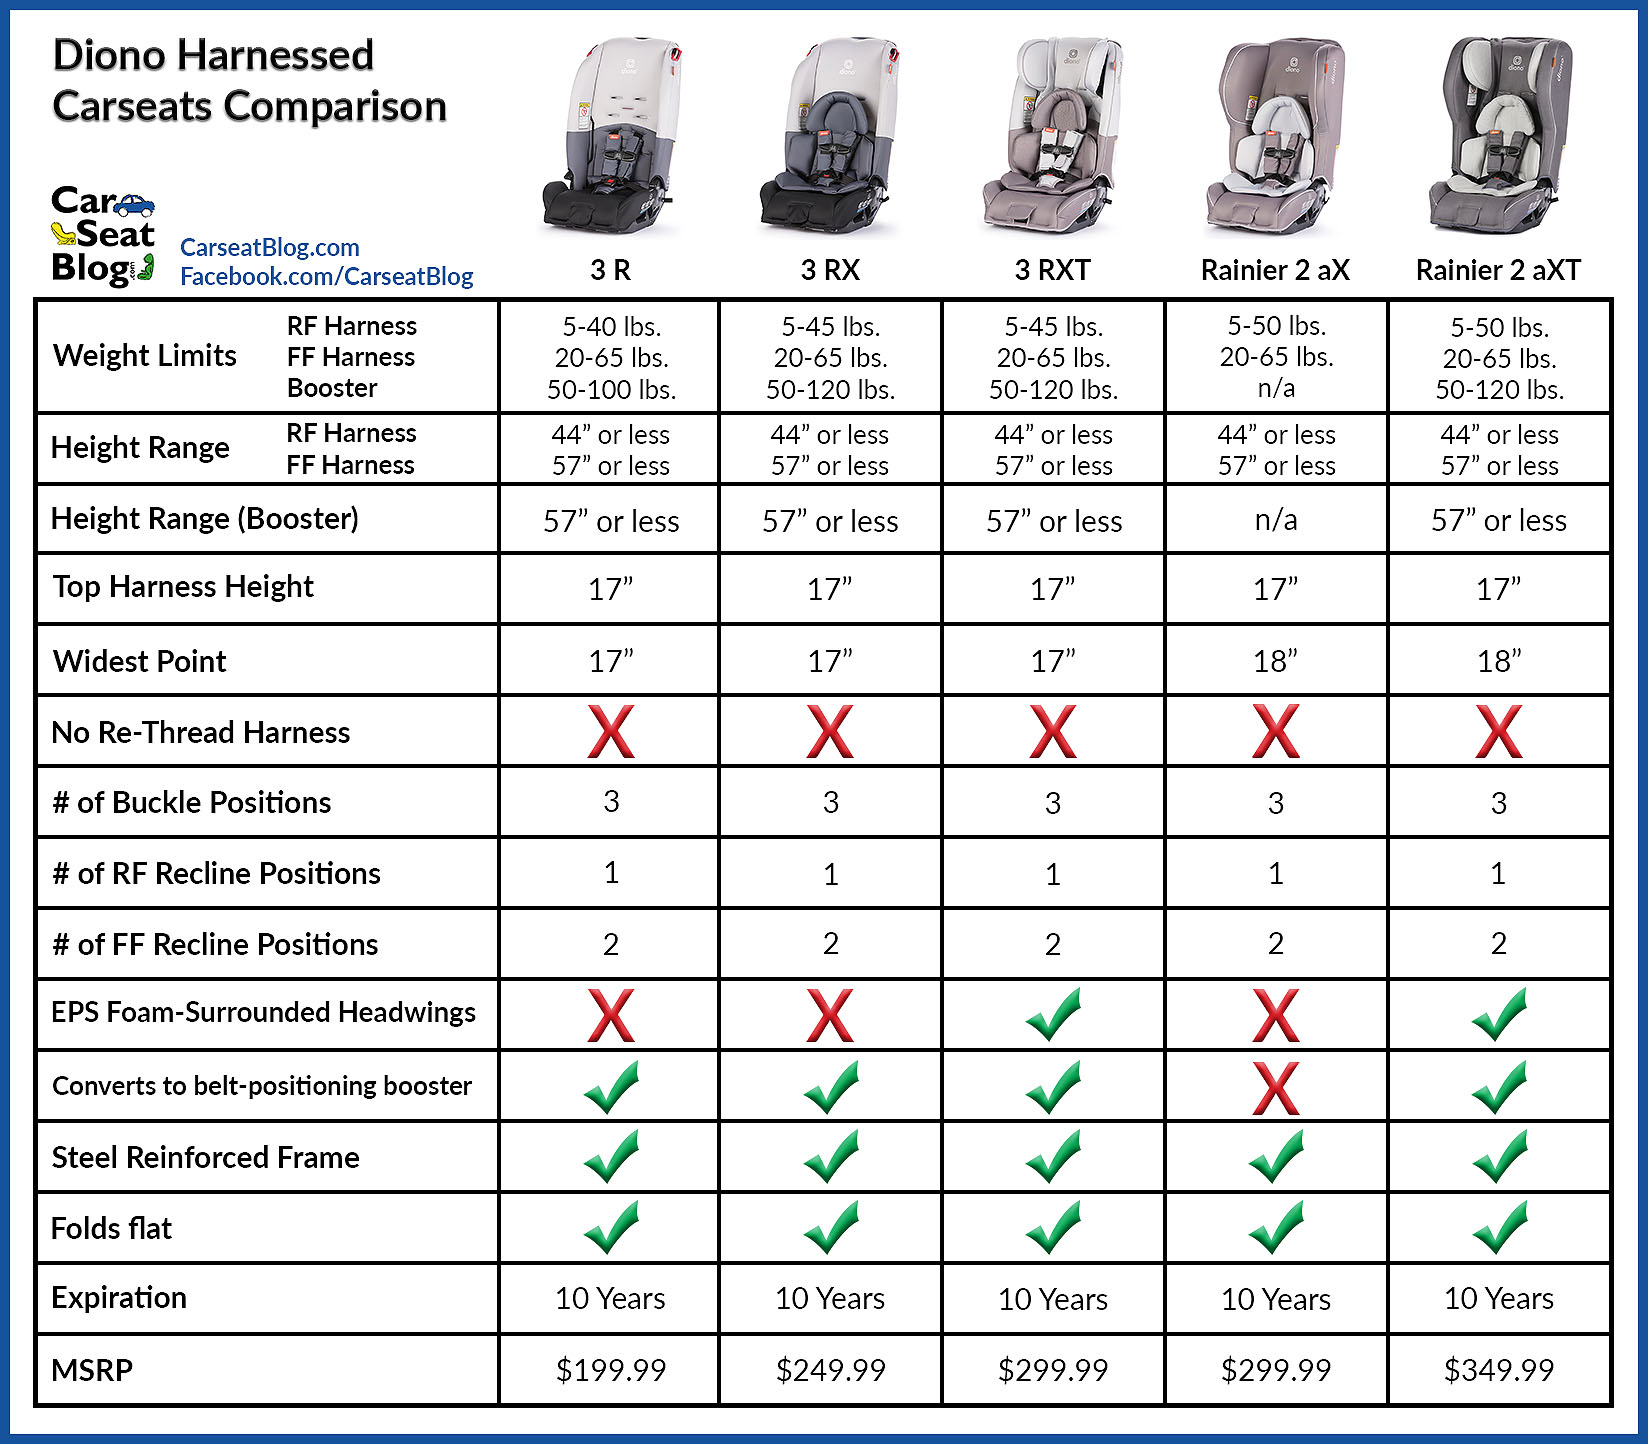
The 3QX’s SuperLATCH system allows higher weight limits (40 lbs rear-facing vs 35 lbs on other models). For 3R installations, always use the pool noodle method—its fixed angle requires manual adjustment. 3RX and 3RXT models include infant inserts; tuck them into the harness slots for newborns but remove at 6 months. Key note: Only the 3QX has an easy-remove cover—others require careful unzipping to avoid damaging straps during cleaning.
SuperLATCH Weight Limits for 3QX Owners
When using SuperLATCH on your 3QX:
– Rear-facing: Max 40 lbs child weight
– Forward-facing: Max 45 lbs child weight
– Always switch to seat belt beyond these limits
– Top tether remains mandatory in forward-facing mode
Press the red LATCH release button only when uninstalling—never during travel. Test tightness after each use since SuperLATCH loosens slightly over time.
When to Call a Certified Technician (Free Inspection Guide)
If you’ve followed these steps but still feel uncertain, get professional help immediately. Visit SafeKids.org/certification to find certified technicians—most offer free inspections. Bring your Diono manual, vehicle manual, and the seat itself (no child needed). Technicians spot critical errors like:
– Harness routed through wrong belt path
– Twisted LATCH straps hidden under padding
– Top tether attached to incorrect anchor
Pro tip: Schedule inspections during daylight—they reveal angle issues better. Most technicians spend 20-30 minutes verifying your installation, often fixing problems in under 5 minutes. Never skip this step when transitioning between modes (rear to forward-facing) or after cleaning the seat. A properly installed Diono moves less than 1 inch at the belt path, positions the harness correctly, and gives you unshakable confidence on every ride.


