
Traveling with a baby can be stressful enough without worrying about safety during takeoff and turbulence. If you’ve ever struggled to figure out how to install an infant car seat on an airplane, you’re not alone—many parents face confusion over airline rules, FAA guidelines, and the actual setup process. The good news? It’s entirely possible and often safer for your little one when done right, using just the airplane’s seatbelt for a secure fit that keeps your baby protected from 30,000 feet up.
In this comprehensive guide, we’ll go beyond the basics to cover everything you need to know about installing an infant car seat on an airplane. From checking FAA approval and airline policies to a detailed step-by-step process, preparation tips, and troubleshooting common issues, you’ll gain the confidence to handle this like a pro. By the end, you’ll have all the tools to ensure a smooth, safe flight for your family, whether it’s your first trip or a frequent flyer adventure.
What You’ll Need to Install an Infant Car Seat on an Airplane
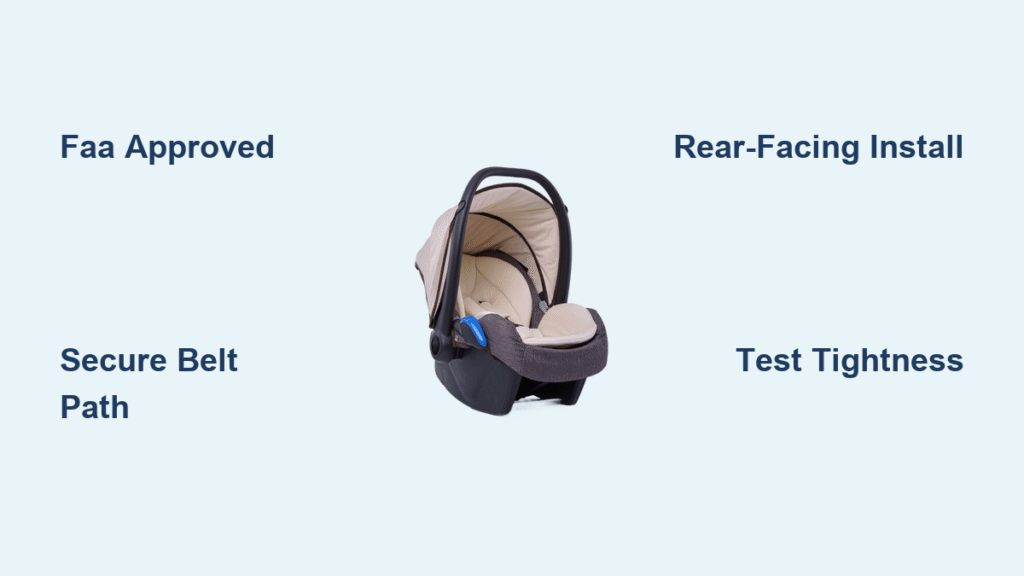
Before heading to the airport, gathering the right items and verifying compatibility is crucial. Not all car seats are approved for airplane use, so start by confirming yours meets Federal Aviation Administration (FAA) standards. Look for the label on the side of the seat stating it’s certified for aircraft use—most forward-facing or rear-facing infant seats from reputable brands like Graco, Chicco, or Britax qualify, but boosters and some travel systems do not.
You’ll also need to review your airline’s specific policies, as they can vary (e.g., some charge extra for a seat for the car seat). Aim for a window seat in economy to avoid blocking aisles or other passengers. Here’s a quick checklist of essentials:
| Item | Quantity | Specifications |
|---|---|---|
| FAA-approved infant car seat | 1 | Rear- or forward-facing; weight limit matches your baby’s (typically 4-40 lbs); no damaged parts |
| Airplane seatbelt (provided) | N/A | Standard lap belt; ensure it’s not frayed |
| Car seat base (if applicable) | 1 | Only if your seat uses one—most airplane installs don’t require it |
| Blanket or padding | 1-2 | For comfort and to prevent slipping; avoid loose items during flight |
| ID tags or stickers | 1 set | Label the car seat with your contact info in case it’s gate-checked |
| Airline confirmation | N/A | Printed or digital proof of policy compliance (e.g., extra seat purchase) |
Important: Always weigh your car seat beforehand—most airlines require it to be under 25 lbs (excluding the base) for cabin use. Pack it in a travel bag for protection during boarding.
Preparing for Airplane Installation
Preparation starts well before you reach the gate, as improper setup can lead to denied boarding or an unsafe ride. First, contact your airline at least 48 hours in advance to confirm their car seat policy and reserve a seat for it—treating the car seat as a passenger means buying an extra ticket for children under 2 who would otherwise fly free on your lap. Airlines like Delta and United generally allow FAA-approved seats in window or middle seats, but avoid bulkhead rows where bassinets might conflict.
Safety is paramount: The FAA recommends car seats for infants under 2 because lap-held babies are at higher risk during turbulence. Ensure your baby fits comfortably in the seat without bulky clothing, and practice the install at home using a similar-width belt (about 2 inches wide, like a car lap belt). Check for any recalls on the National Highway Traffic Safety Administration (NHTSA) website.
Warning: Never install a car seat on a seat with airbag-equipped belts (rare on planes) or in an exit row. If flying internationally, verify International Civil Aviation Organization (ICAO) rules, which align closely with FAA standards but may have carrier-specific tweaks.
Time estimate for prep: 30-60 minutes at home, plus a quick airport check. Double-check battery life on any attached monitors or toys, and bring snacks for delays—babies don’t wait patiently.
Step-by-Step Guide to Installing Your Infant Car Seat on an Airplane
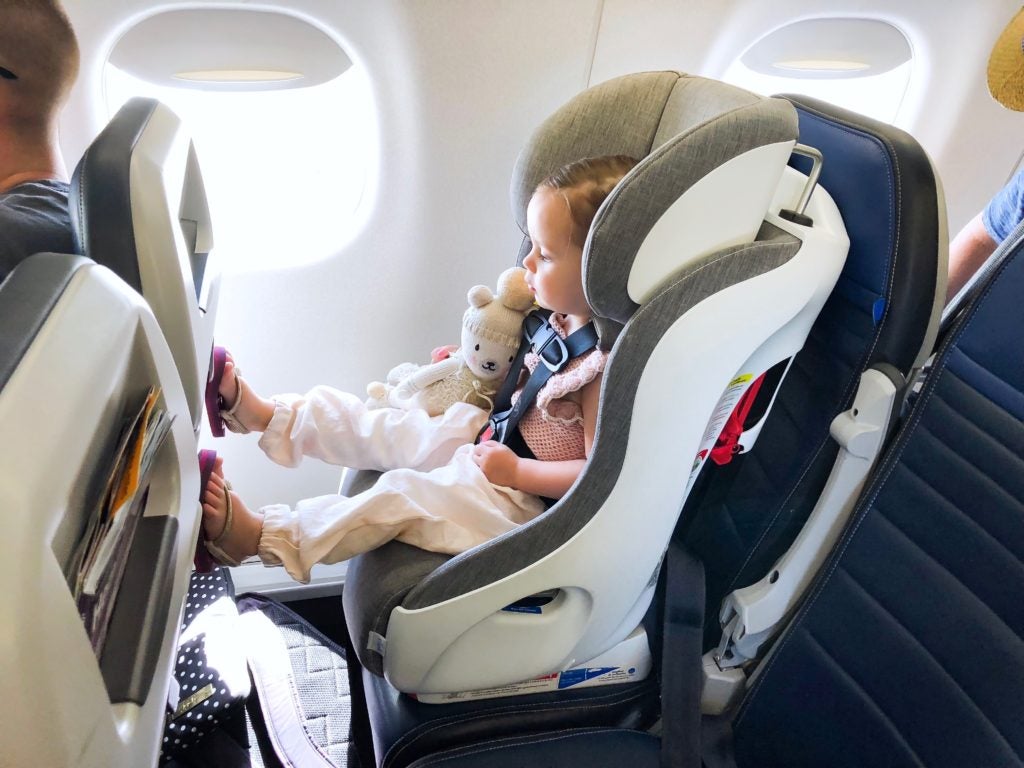
Installing an infant car seat on an airplane is simpler than it sounds, typically taking 5-10 minutes once you’re seated. The key is using the aircraft’s lap belt to secure the seat tightly to the passenger seat, mimicking a car’s LATCH system but without anchors. Always install rear-facing for babies under 1 year (or per the seat’s manual) for maximum protection—their heads and necks are more vulnerable in crashes or turbulence.
Follow these phases in order, and involve a flight attendant if needed—they’re trained to assist but can’t install it for you.
Phase 1: Boarding and Seat Selection
- Board early (pre-boarding for families) to secure space and avoid rushing.
- Choose a window seat if possible— it provides more room and a stable base away from the aisle.
- Place any bags in overhead bins or under the seat ahead; the car seat takes priority.
Pro Tip: If the plane is full, politely ask adjacent passengers if they’d mind a middle-seat install—they often appreciate the safety context.
Phase 2: Positioning the Car Seat
- Place the car seat on the airplane seat with the back facing the direction of travel (rear-facing for infants).
- Adjust the seatback to upright (required by FAA for takeoff/landing) and ensure the car seat doesn’t recline—use padding if the aircraft seat is too deep.
- Thread the airplane’s lap belt through the car’s belt path (usually marked in blue or with a belt icon on the shell). For rear-facing seats, route it under the base; for forward-facing, over the top.
Safety Note: The belt should lie flat without twists. If your seat has a top tether, don’t use it on planes—lap belt only.
Phase 3: Securing the Car Seat
- Buckle the lap belt and pull it as tight as possible—aim for less than 1 inch of movement at the belt path. Tug firmly on the car seat from side to side and front to back to test stability.
- Install your baby: Secure them in the harness, ensuring straps are at or below shoulder height for rear-facing (snug but not pinching skin).
- Attach any accessories like a sunshade, but remove loose items before flight.
Time estimate: 5 minutes. If the belt is too short (common on some older planes), ask for an extender from the crew.
Phase 4: Verification and Flight Adjustments
- Double-check tightness before the safety demo— the car seat shouldn’t shift more than 1 inch.
- During flight, you can recline the aircraft seat slightly if allowed, but keep the car seat upright for takeoff and landing.
- Monitor for comfort; adjust the harness if your baby fidgets.
Troubleshooting Tip: If the car seat wobbles, reposition and retighten. For narrow seats (e.g., on regional jets), slim-profile seats like the Clek Fllo work best.
Post-Installation Testing and Troubleshooting
Once installed, test the setup thoroughly to ensure safety. Shake the car seat vigorously (with baby out) to confirm no more than 1 inch of give—FAA standards require it to be as secure as in a car. Have a flight attendant inspect if you’re unsure; they’re required to verify child restraint systems.
Common issues and fixes:
– Belt too loose: Pull the belt release and rethread, yanking harder on the free end.
– Seat doesn’t fit: Opt for a narrower model next time or choose an airline with wider seats (e.g., American Airlines’ mainline flights).
– Airline denial: If they reject it at the gate, it might not be FAA-approved—have the label ready and cite FAA Advisory Circular 120-36B.
– Turbulence concerns: The install protects against sudden drops; keep the seatbelt sign on as a cue to stay buckled.
If problems persist, gate-check the seat in its bag—it’s safer than holding your baby on your lap. Post-flight, inspect for damage from baggage handling.
Pro Tips for Installing Infant Car Seat on Airplane
To make your experience smoother and safer, here are expert insights from pediatricians, FAA guidelines, and frequent-flying parents:
– Choose the right seat early: Book a bassinet seat as a backup if your airline offers them (great for long-haul flights like on Emirates), but confirm car seat compatibility.
– Practice makes perfect: Simulate the install with a luggage strap at home to build speed—boarding lines wait for no one.
– Avoid common mistakes: Don’t use the car seat’s own seatbelt; always use the plane’s. And skip installing across an armrest—it’s unstable and against rules.
– Optimize for baby comfort: Add a travel neck pillow for older infants, but nothing that interferes with the harness. Nurse or feed during takeoff to ease ear pressure.
– Long-flight hacks: For international trips, pack a FAA-approved car seat cover to block germs and light. Weigh your setup at home to avoid surprises.
– Eco-friendly choice: Reusing your car seat reduces waste—plus, it’s often cheaper than renting at the destination.
– Stay updated: Airlines tweak policies yearly; check the FAA’s website or apps like SeatGuru for plane-specific seat widths (aim for 17+ inches).
These tips can cut installation time in half and minimize stress, ensuring a peaceful journey.
When to Seek Professional Help
While most parents handle airplane car seat installs independently, certain scenarios warrant assistance. If your car seat is damaged, expired (replace after 6-10 years), or doesn’t fit despite efforts, consult the manufacturer or a certified Child Passenger Safety Technician (CPST) before travel—find one via Safe Kids Worldwide.
At the airport, flight attendants can guide but not perform the install due to liability. For complex cases (e.g., premature babies or medical needs), contact the airline’s special assistance team in advance. Look for attendants with family-travel experience or request a supervisor if issues arise.
Costs: No extra for help, but buying a seat for the car seat runs $0-100+ depending on the route (infants under 2 fly free on laps otherwise). Warranty-wise, check your car seat’s coverage—air travel doesn’t void it, but document any damage for claims.
FAQ
Q: Can all infant car seats be installed on airplanes?
A: No, only FAA-approved ones with the certification label. Check the NHTSA database for your model; avoid forward-facing-only or booster seats, as they’re not suitable for aircraft turbulence protection.
Q: Do I need to buy a separate ticket for the car seat?
A: Yes, if you want it in its own seat—treat it like an extra passenger. Lap infants fly free, but for safety, the FAA strongly recommends a dedicated seat.
Q: What if the airplane seat is too narrow for my car seat?
A: Measure your seat’s width (shell without canopy) against the plane’s (via SeatGuru). Slimmer options like the Cosco Scenera Next (17 inches) fit most; otherwise, gate-check it.
Q: Is it safe to install a rear-facing car seat on an airplane?
A: Absolutely—it’s the safest orientation for babies under 2, providing better head and neck support during sudden movements, per FAA and American Academy of Pediatrics guidelines.
Q: Can I use a car seat on international flights?
A: Yes, if FAA- or ICAO-approved. Most global carriers like British Airways accept them, but confirm policies—some EU airlines require rear-facing only for under 2s.
Q: What happens if I need to check the car seat at the gate?
A: Protect it with a padded bag (e.g., J.L. Childress brand) and attach to checked luggage if needed. It’s FAA-approved for cargo holds but less ideal than cabin use.
Q: How do I know if the install is tight enough?
A: The “1-inch rule”: Grab the seatbelt at the path and pull—no more than 1 inch of movement. Test by wiggling the top; it should feel rock-solid.
Q: Are there airlines that ban car seats?
A: Rare, but some low-cost carriers like Spirit limit them to window seats only. Always call ahead—policies evolve, especially post-2025 regulations.
Alternative Solutions for Airplane Travel with Infants
If installing an infant car seat on an airplane isn’t feasible (e.g., due to space or cost), consider these options. They’re not as protective as a secured car seat but can work for short flights.
| Solution | Pros | Cons | Best For |
|---|---|---|---|
| Lap child (hold baby on your lap) | Free ticket; no extra setup | Less secure in turbulence; uncomfortable for long flights | Short domestic hops under 2 hours; budget travelers |
| Airline bassinet | Free on many international flights; spacious for sleeping | Limited weight (under 20-30 lbs); first-come, first-served; no car seat use | Long-haul like NYC to London; newborns |
| CARES harness (FAA-approved alternative) | Lightweight (1 lb); easy install over seatbelt | Only for forward-facing kids 22-44 lbs; not for rear-facing infants | Toddlers transitioning from car seats; small planes |
| Stroller or carrier to gate, then hold | Convenient for airport navigation | No in-flight protection; carrier limits for takeoff | Very young infants; ultra-short flights |
Weigh pros like cost savings against safety—the car seat remains the gold standard for under 2s.
Enjoy Safe Air Travel with Your Baby
With this guide, you’re equipped to master installing an infant car seat on an airplane, from FAA checks to that final tug on the belt:
– Essential prep and tools for compliance
– Detailed step-by-step phases for a secure fit
– Troubleshooting and pro tips for real-world hiccups
– Alternatives if needed
Following these steps not only complies with regulations but prioritizes your baby’s safety, turning potential chaos into calm skies. Book that family getaway with peace of mind—your little one deserves the best protection up there.
Have you successfully installed an infant car seat on a flight? Share your tips or airline experiences in the comments below to help other parents soar safely! If issues persist, describe your setup for tailored advice.


