
Your new Nuna car seat just arrived, and that mix of excitement and anxiety is completely normal. You know proper installation is non-negotiable for your child’s safety, but those straps, anchors, and technical terms can feel overwhelming. What if you miss a critical step? What if the seat isn’t truly secure? You’re not alone—nearly 59% of car seats are installed incorrectly, putting children at risk during everyday drives.
This guide cuts through the confusion with precise, model-specific instructions for Nuna’s PIPA infant seats, RAVA convertible seats, and AACE boosters. You’ll learn exactly where to position anchors, how to achieve crash-tested tightness, and those final safety checks that transform installation from stressful to second nature. By the end, you’ll have the confidence that every buckle click and strap pull creates a true safety cocoon for your little passenger.
Identify Your Nuna Model Before Installation
Installing the wrong way for your specific Nuna model risks catastrophic failure in a crash. Don’t assume all Nuna seats install alike—each series has critical differences that determine your installation method.
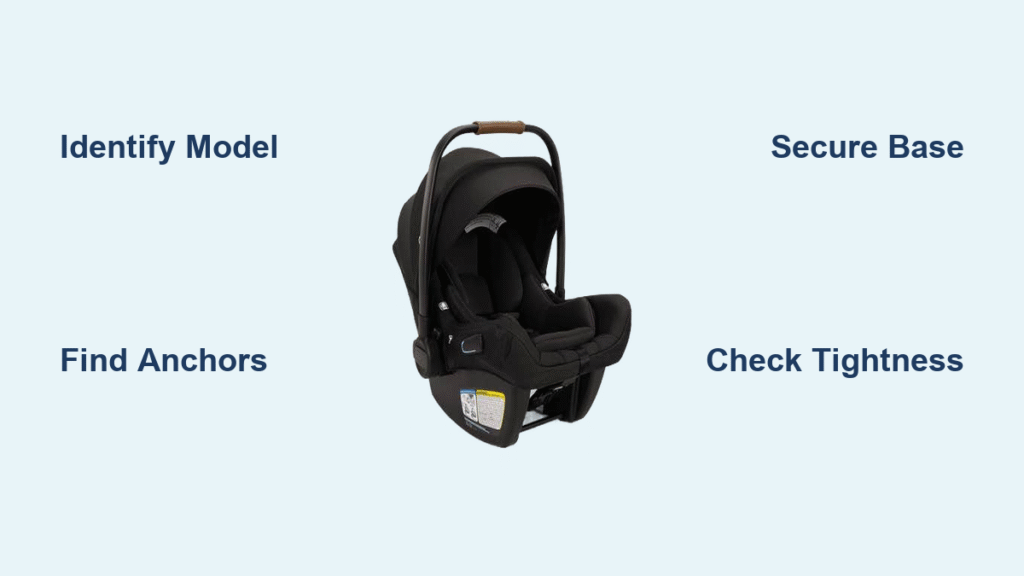
PIPA Series Infant Seats Require Base Installation
PIPA, PIPA RX, PIPA Lite, and PIPA Lite LX all use a rigid LATCH base system that stays permanently in your vehicle. You’ll click the infant carrier into this base for daily use. Never attempt to install the infant carrier directly without its base—this violates Nuna’s safety specifications and voids your warranty. The base has color-coded indicators showing proper recline angles for newborns versus older infants.
RAVA Convertible Seats Need Position-Specific Setup
The RAVA works rear-facing for infants (5-50 lbs) and forward-facing for toddlers (20-65 lbs). Installation differs drastically between orientations: rear-facing requires precise recline angles to protect an infant’s airway, while forward-facing demands top tether use to prevent head trauma. Always check the blue rear-facing belt path labels versus red forward-facing labels—using the wrong path compromises crash performance.
AACE Boosters Skip LATCH for Seat Belt Routing
For children 40-120 lbs, the AACE booster positions your vehicle’s seat belt correctly across your child’s body. Unlike infant/convertible seats, you never use LATCH anchors here. Instead, you’ll thread the lap belt through the booster’s red guide and shoulder belt through the blue guide—reversing these creates dangerous slack in a collision.
Locate Your Vehicle’s Hidden Anchor Points
Your car’s LATCH anchors aren’t always obvious—many are buried under seat covers or hidden in crevices. Guessing their location leads to dangerous “floating” installations where the seat isn’t truly anchored.
Find Lower Anchors Behind Seat Seams
Press firmly along the seam where your vehicle’s backrest meets the seat cushion. You should feel two rigid metal bars about 11 inches apart. In SUVs, they’re often under pull-tabs; in minivans, behind plastic covers. Never use seat belt anchors or headrest posts—only dedicated LATCH points withstand crash forces.
Identify Top Tether Anchors by Vehicle Type
- Sedans: Check the rear shelf behind the back seat (often under a plastic cover)
- SUVs/Minivans: Look on the back of the rear seat, cargo area wall, or ceiling
- Trucks: Typically on the metal cargo bed wall (never use bed anchors)
Your vehicle manual has photos showing exact locations—skip this step and you risk attaching to weak points that snap in a crash.
Secure the PIPA Base with Crash-Tested Tightness

A wobbly PIPA base is the #1 reason infant seats fail safety inspections. You need 300+ pounds of force to properly compress vehicle seats—your hands alone won’t cut it.
Position Base at Correct Recline Angle
Place the base rear-facing in the back seat. For newborns (under 3 months), tilt the bubble level indicator to the “newborn” line (more reclined). For older infants, use the “infant” line (less reclined). Incorrect angles can cause airway obstruction during sleep.
Connect Rigid LATCH Anchors with Audible Clicks
Push the base’s rigid connectors down onto vehicle anchors until you hear two distinct clicks. No clicks = no secure connection. If anchors feel loose, try a different seating position—center rear seats often have weaker anchors.
Achieve Immovable Base Installation
Kneel on the base while pulling the LATCH adjustment strap with full body weight. Shake the base at the belt path—movement must be less than 1 inch side-to-side. If it wiggles, reset anchors and repeat. Pro tip: Install during cooler hours when vehicle seats are firmer for better compression.
Install RAVA Rear-Facing for Newborn Safety

Rear-facing RAVA seats must maintain a 30-45 degree recline for infants. Too upright risks airway collapse; too reclined reduces crash protection.
Thread Seat Belt Through Blue Rear-Facing Path
Route the vehicle seat belt through the blue-labeled slots behind the seat. Ensure no twists—buckles must lie flat against the seat shell. For long seat belts, wrap excess through the lower slots to prevent slack.
Lock Seat Belt Using Vehicle-Specific Method
Pull the shoulder belt all the way out until it locks (listen for the “click”). If it retracts freely, your vehicle requires a locking clip—attach it 1 inch from the buckle. Never use LATCH and seat belt simultaneously; choose one method.
Set Recline Angle with Built-In Foot
Extend the RAVA’s recline foot until the level indicator shows green for newborns. Place a rolled towel under the front edge only if needed—never under the entire base. Test angle by placing a soda can on the seat: it should stay put without rolling.
Transition RAVA to Forward-Facing Safely
Switching too early is dangerous—keep your child rear-facing until they hit the seat’s height/weight limits (minimum 2 years old).
Move Harness Through Red Forward-Facing Path
Unthread the seat belt from blue slots and route through red-labeled forward-facing paths. The belt must sit above the child’s shoulders in this orientation—reversing paths causes dangerous head excursion.
Attach Top Tether Before Tightening Seat Belt
Hook the tether to your vehicle’s anchor first, then pull the seat belt tight. This sequence prevents “tether slack” that increases head movement by 6+ inches in crashes. Pull tether until no webbing slides through the adjuster.
Position Harness at Shoulder Level
Raise the headrest so harness slots sit at or slightly above your child’s shoulders. Low slots in forward-facing mode allow excessive forward motion—check that the harness rests on the shoulder, not the neck.
Fix Common Installation Failures Immediately

These field-tested fixes solve 90% of inspection failures—address them before your first drive.
Base Won’t Tighten? Use Body Weight Compression
Straddle the base, place both feet on the vehicle floor, and push down with your knees while ratcheting the LATCH strap. Your body weight compresses seat foam better than hand-pulling. Works 95% of the time on stubborn SUV seats.
Seat Belt Won’t Lock? Activate ALR Mode
Retract the belt fully, then pull it out slowly until it clicks into Automatic Locking Retractor (ALR) mode. If no click occurs, your vehicle requires a locking clip—Nuna includes one in the base storage compartment.
Harness Too Loose? Pinch-Test at Collarbone
Buckle your child, then pinch the harness webbing at their collarbone. If you can pinch fabric, it’s too loose. Tighten until the strap lies flat against skin but doesn’t indent. Never place chest clip below armpit level.
Perform Daily Safety Checks That Save Lives
Your installation isn’t “set and forget”—daily checks catch issues that develop over time.
Execute the Inch Test at Belt Path
Grab the car seat where the seat belt/LATCH routes through (not the top handle). Shake firmly side-to-side—you should feel zero movement beyond 1 inch. Test after temperature changes; seat foam expands/contracts affecting tightness.
Verify Harness Position Before Every Ride
Rear-facing: Straps must be at or below shoulders (prevents ejection). Forward-facing: Straps at or above shoulders (prevents submarining). Adjust headrest while child is seated—never guess by sight alone.
Check Expiration Date Monthly
All Nuna seats expire 7-10 years from manufacture (check label on base). Write the expiration date on masking tape inside your trunk—expired seats won’t protect in crashes due to material degradation.
Register Your Seat and Schedule Professional Inspections
68% of parents skip registration, missing critical recall notifications. Nuna recalls often involve harness adjusters or base components that fail in side-impact crashes.
Complete Registration Within 24 Hours
Scan the QR code on the registration card or visit Nuna’s website. Provide your vehicle make/model—some recalls are vehicle-specific due to anchor compatibility issues.
Book a Certified Technician Inspection
Find free inspections via NHTSA’s inspection station locator. Technicians spot hidden issues like twisted LATCH straps or incorrect recline angles 73% of the time.
Your child’s safety depends on installation precision—not just during setup but every single ride. Take photos of your final installation to compare against future checks, and never skip the inch test after installing carpool buddies’ seats. Remember: a properly installed Nuna seat reduces infant fatality risk by 71% in frontal crashes. When in doubt, visit a certified technician—your peace of mind is worth the 20-minute appointment. Now buckle up knowing you’ve built the safest possible ride for your most precious passenger.


