
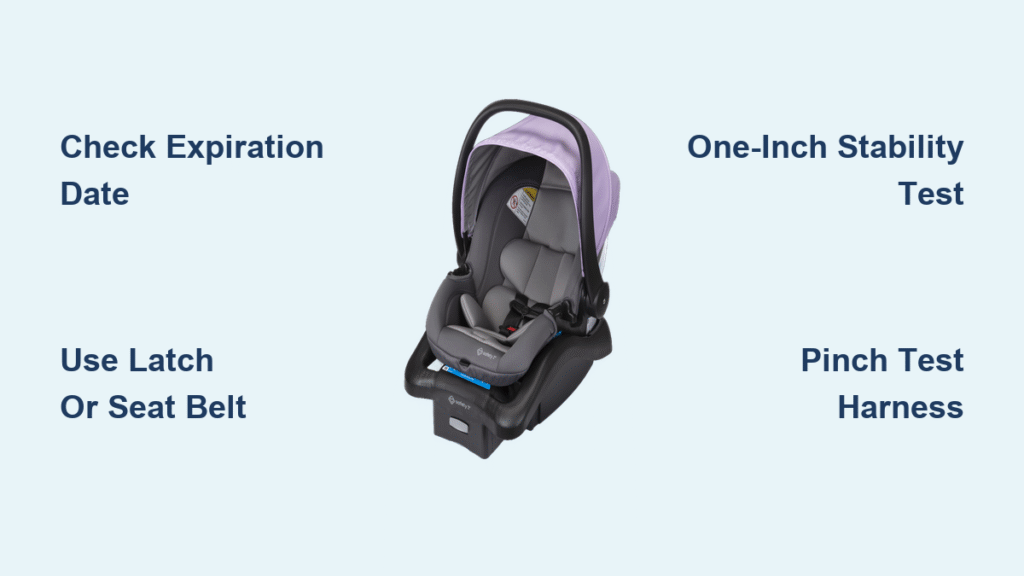
Your child’s safety in the car hinges entirely on proper car seat installation, yet critical errors happen in nearly half of all setups. When you purchase a Safety 1st car seat, you’ve chosen a trusted brand—but that protection vanishes if the seat isn’t secured correctly. This guide cuts through confusing manuals to give you actionable steps for flawless installation, whether you’re using LATCH anchors or your vehicle’s seat belt. You’ll learn exactly how to position straps, achieve that crucial one-inch stability, and avoid dangerous mistakes that compromise your child’s safety from day one.
Skip Risky Secondhand Seats and Check Expiration Dates
Never gamble with your child’s safety by using unverified secondhand seats. Purchase only new Safety 1st models or manufacturer-certified refurbished units directly from the brand. Facebook Marketplace deals and hand-me-downs from unknown sources carry hidden dangers: undetected crash damage, missing parts, or outdated safety standards. If reusing a seat from an older sibling, immediately locate the expiration date stamped on the seat’s base or back. Most Safety 1st seats expire 6-10 years after manufacture—using an expired seat risks structural failure during impact. Pro tip: Set a phone reminder 3 months before expiration to replace the seat proactively.
Keep Both Manuals Open Before Touching the Seat
Your vehicle and car seat manuals are non-negotiable installation tools. Before unwrapping your Safety 1st box, pull both manuals from your glove compartment and trunk. Your Safety 1st manual specifies exact LATCH weight limits (often 40 lbs max), critical harness slot heights, and when to remove infant inserts. Your vehicle manual reveals hidden LATCH anchor locations—some center seats lack anchors despite appearing suitable. Lay both manuals flat on your passenger seat with installation sections bookmarked. Skipping this step causes mid-installation confusion that leads to dangerous shortcuts. Remember: Safety 1st’s online manuals at safety1st.com/support are searchable by model number if yours is misplaced.
Position for Maximum Crash Protection: Center vs. Side Seats

The center rear seat offers optimal side-impact protection but requires anchor verification. Never assume your vehicle supports center LATCH installation—check your manual’s anchor diagram first. If anchors are absent, the rear passenger-side seat becomes your safest option, keeping the seat away from potential side-impact zones. Crucially, never combine LATCH and seat belt installation methods. This creates dangerous tension conflicts that compromise the seat’s integrity during a crash. Choose one method based on your child’s weight: LATCH typically works up to 40 lbs (verify your model), while seat belts handle higher weights. Visual cue: Anchor bars should feel like solid metal loops between the seat cushion and backrest—not loose fabric tags.
Lock LATCH Anchors with Zero Slack
Locate Anchors Without Guesswork
Find LATCH anchors by running your fingers deep into the seat crevice where the cushion meets the backrest. Look for molded plastic covers or fabric loops labeled with anchor symbols—never rely on seat color or texture alone. If anchors are buried, recline the seat slightly to expose them.
Achieve Click-Confirmed Security
- Fully extend both lower LATCH straps from your Safety 1st seat—partial extension causes slack
- Connect hooks firmly to anchors until you hear a distinct double-click (no visual check needed)
- Push down hard on the car seat base while tightening the LATCH webbing with the tensioning handle
- Test at the belt path—grab the seat where straps exit and shake side-to-side; movement must be under 1 inch
Secure Forward-Facing Tethers Immediately
For forward-facing installations, attach the top tether before routing harness straps. Locate your vehicle’s tether anchor (usually on the rear shelf or ceiling) and hook the tether until it clicks. Tighten by bouncing on the seat base—this reduces head excursion by 6-8 inches in crashes.
Seat Belt Installation: Locking Mode is Non-Negotiable
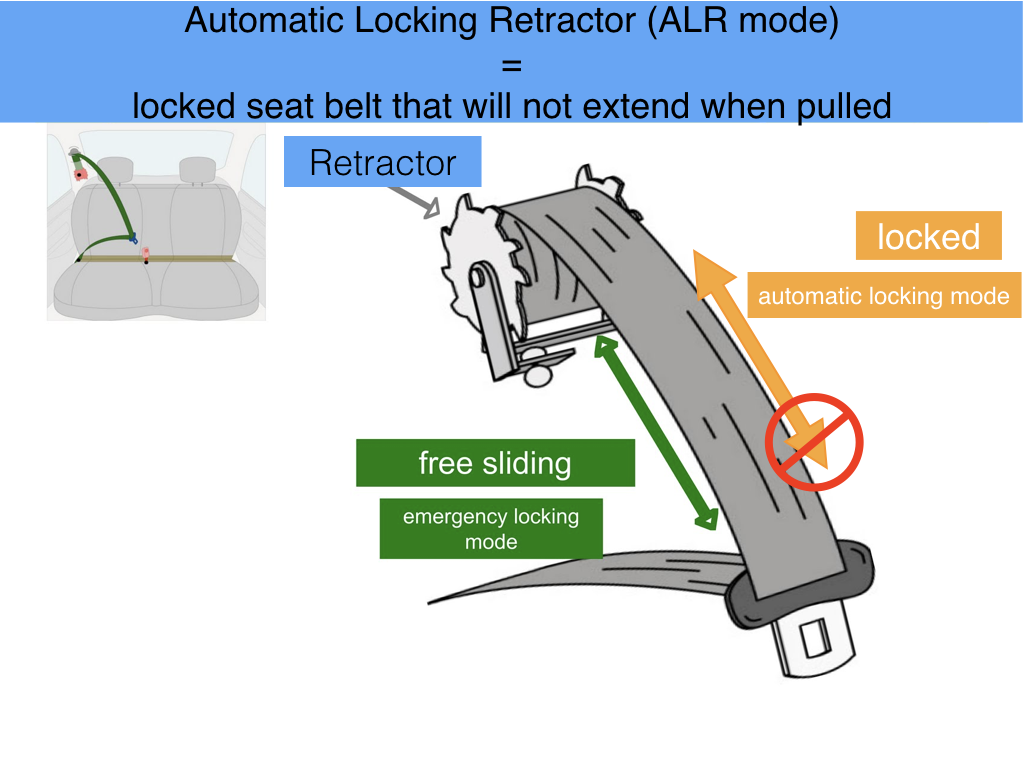
Engage Automatic Locking Correctly
- Pull the seat belt fully extended until it clicks into automatic locking mode (ALR)
- Thread through the correct belt path—rear-facing uses the red path, forward-facing uses blue (ignore color if labels faded)
- Buckle and feed slack back slowly while pressing the seat base down with your knee
- Verify lock by tugging the belt webbing—it should not extend further
Troubleshoot Failed Locking Mode
If the belt retracts after installation, you missed the ALR engagement. Do not use manual locking plates—they’re incompatible with Safety 1st seats. Restart by fully retracting the belt, then pulling it out smoothly until it locks. Test by trying to extend the belt with one hand while holding the latch plate with the other—it should resist movement.
Harness Positioning: Rear vs. Forward Facing
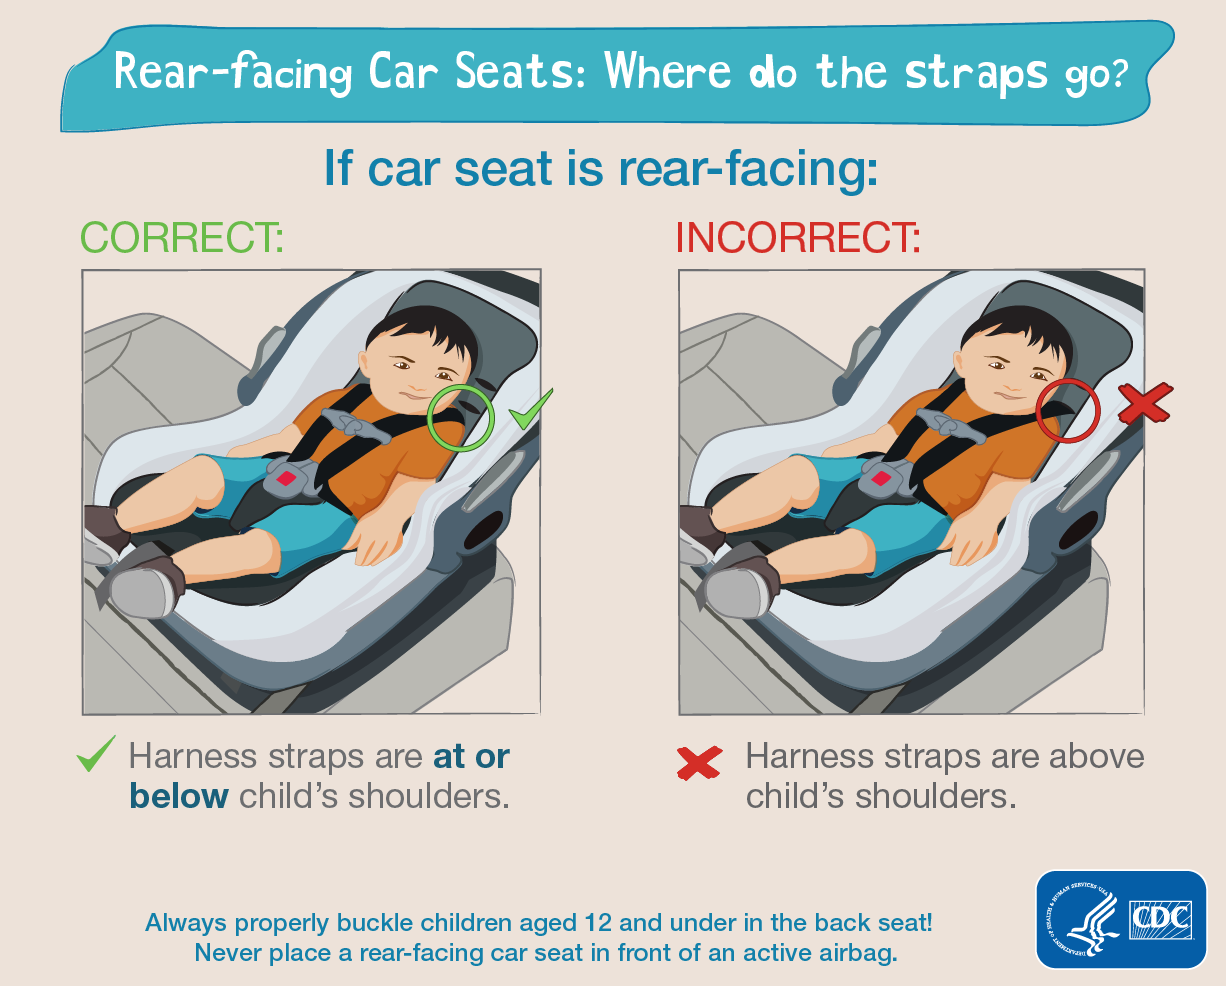
Rear-Facing Precision Setup
- Straps must exit at or slightly below shoulders—higher positions cause head snap in crashes
- Remove infant inserts immediately after your baby exceeds 11-14 lbs (check manual)
- Eliminate all twists—run straps through your fingers like dental floss to detect hidden kinks
Forward-Facing Transition Protocol
- Move straps to slots at or above shoulders before transitioning
- Discard all rear-facing padding—using it forward-facing creates dangerous harness slack
- Confirm height limits: Child’s head must be at least 1 inch below the shell top
Pass the Pinch Test Every Single Ride
Harness Tightening Sequence
- Buckle your child in everyday clothing—no puffy coats or bulky snowsuits
- Pull the harness adjuster strap until no slack remains at the shoulders
- Perform the pinch test: Try pinching harness webbing at the shoulder—if fabric folds, tighten further
- Position chest clip at armpit height—never on the neck or stomach
Winter Riding Safety Fix
Bulky coats create fatal slack that compresses in crashes. Instead:
– Dress child in thin layers
– Buckle them in first
– Tuck a blanket over the secured harness
– Use seat-back warmers instead of coat hoods
Eliminate Hidden Projectile Hazards
Immediate Danger Zone Cleanup
Remove these items before every drive:
– Hard plastic toys or cups (become missiles in 20mph crashes)
– After-market seat mirrors (shatter on impact)
– Window shades with rigid frames
– Loose diaper bags under seats
Safe Storage Solutions
Store essentials in the trunk or door pockets lined with soft fabric. Only allow soft plush toys in the cabin—and never attach them to the car seat handles. Check your vehicle after each ride; stray pacifiers or bottles become dangerous projectiles.
Verify Installation with the One-Inch Rule
Spot-Check at the Critical Point
Test security ONLY at the belt path—not the top handle or front edge. Place your hand where the LATCH strap or seat belt exits the seat base. Attempt to move the seat side-to-side and front-to-back. Exceeding one inch of movement means immediate reinstallation. Common failure points: twisted LATCH straps (reduces strength by 50%) or unengaged seat belt locks.
Emergency Correction Checklist
If installation fails:
– Recheck anchor connection clicks
– Ensure no fabric is pinched in buckles
– Confirm seat belt is in ALR mode
– Remove seat covers that interfere with belt routing
Get Free Professional Verification
Schedule Instant Expert Help
Don’t second-guess your work—Safety 1st offers free virtual consultations with certified Child Passenger Safety Technicians (CPSTs). Call 1-800-321-5475 during extended hours (Mon-Fri 8 AM-8 PM EST, Sat 9 AM-5 PM EST) for real-time video guidance. Most technicians spot critical errors within 60 seconds that parents miss after hours of effort.
Find Local Inspection Events
Visit safekids.org to locate free car seat inspection events at fire stations and hospitals. Many technicians travel to community centers—these sessions include hands-on corrections and recall checks you can’t do alone.
Register Immediately for Recall Alerts
Complete online registration at safety1st.com/register within 24 hours of purchase. Enter your seat’s serial number (found on the base) and purchase date. This ensures instant email alerts for safety recalls—like the 2022 notification about faulty LATCH connectors in specific models. Unregistered seats miss 87% of critical safety updates according to NHTSA data.
Pre-Drive Safety Checklist
Before every trip, verify:
– [ ] Less than 1-inch movement at belt path when shaken firmly
– [ ] Harness passes pinch test at shoulder level
– [ ] Chest clip positioned precisely at armpit height
– [ ] Child wearing non-bulky clothing under harness
– [ ] Zero loose items within cabin reach
Final Note: If installation feels overwhelming, that’s completely normal—even experienced parents miss critical steps. The 30 minutes you spend perfecting your Safety 1st setup could mean the difference between safety and tragedy. When in doubt, call Safety 1st’s support line or visit a certified inspection station. Your child’s life depends on getting this right, and no professional will ever judge you for double-checking. Drive with confidence knowing every strap, anchor, and adjustment meets the highest safety standards.


