
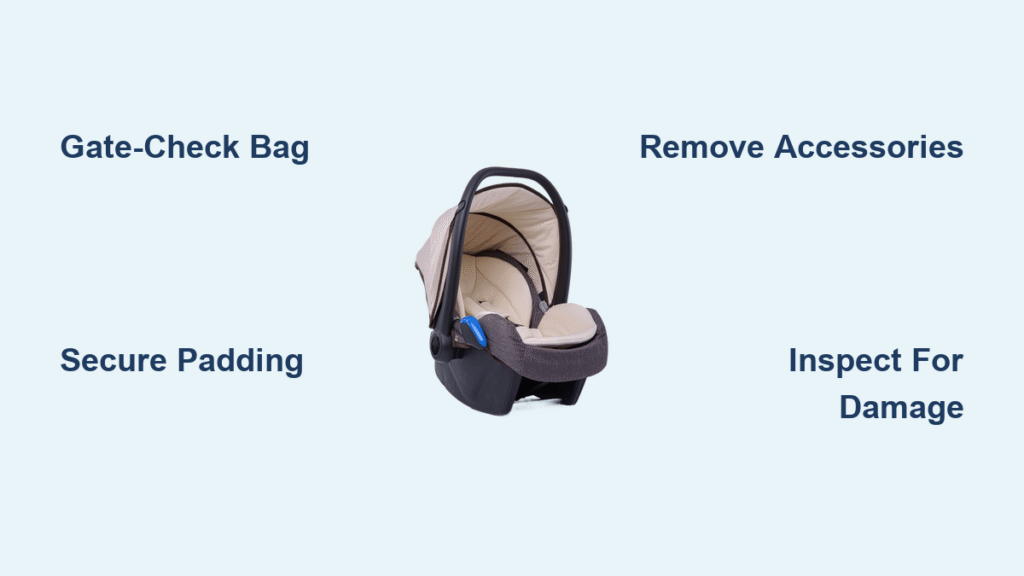
Traveling with an infant can be stressful enough without worrying about how to safely pack your infant car seat for air travel. Whether you’re heading to a family vacation or a cross-country move, figuring out the best way to transport that bulky car seat through airports and onto planes often leaves parents frustrated and second-guessing airline policies. The good news? A simple gate-check bag and some strategic packing can protect your seat from damage and make the whole process smoother, ensuring your little one’s safety gear arrives intact.
In this comprehensive guide, we’ll go beyond the basics to cover everything from airline rules and preparation tips to a detailed step-by-step packing process. You’ll learn multiple methods for checking or carrying your car seat, how to handle common hiccups like tight connections, and prevention strategies to avoid wear and tear. By the end, you’ll feel confident navigating air travel with your infant car seat, ready to focus on the joys of your trip instead of the logistics.
Understanding Airline Policies for Infant Car Seats
Before you start packing, it’s crucial to know the rules—airline policies can make or break your travel plans. Most major U.S. carriers, like Delta, American Airlines, and Southwest, allow you to bring an FAA-approved infant car seat on board as a separate seat for your baby (if you purchase an extra ticket) or gate-check it for free. However, international flights and budget airlines might have stricter limits, such as requiring the seat to fit in the overhead bin or charging fees for checked baggage.
Check your airline’s website or app for specifics: Search for “infant car seat policy” and note details like size restrictions (most seats must be under 22x18x10 inches when stowed) and whether adapters are needed for strollers. Pro tip: Contact the airline 24-48 hours before your flight to confirm, as policies can change seasonally. This step alone can prevent surprises at the gate and save you from repacking on the spot.
Common variations include:
– Domestic U.S. flights: Free gate-checking is standard, and car seats count as your personal item if carried on.
– International flights: Some require the seat to be checked in the cargo hold, which means extra padding is essential.
– Lap infants: If your baby is under 2 and flying on your lap, you can still bring the car seat but must gate-check it.
Always verify your specific car seat model is FAA-approved—look for the label on the side. Non-approved seats can’t be used onboard but can still be checked.
What You’ll Need to Pack Your Infant Car Seat

Gathering the right supplies upfront makes packing efficient and protects your investment. Infant car seats like the Graco SnugRide or Chicco KeyFit are durable but vulnerable to baggage handlers’ rough treatment, so focus on protective gear.
Here’s a handy checklist of essentials:
| Item | Quantity | Specifications |
|---|---|---|
| Gate-check bag | 1 | Padded, water-resistant (e.g., J.L. Childress Ultimate Backpack Bag, fits most infant seats up to 30 lbs) |
| Bungee cords or straps | 2-4 | Heavy-duty, adjustable (at least 1-inch wide to secure without damaging fabric) |
| Luggage tags | 2 | Waterproof with your contact info and flight details |
| Ziplock bags | Several | For small parts like inserts or harness clips |
| Blanket or foam padding | 1 | Soft, clean towel or bubble wrap for extra cushioning |
| Duct tape or zip ties | As needed | For quick reinforcements on tears |
| Stroller adapter (optional) | 1 | Airline-specific if gate-checking with a stroller |
These items are affordable—expect to spend $20-50 total—and widely available at stores like Target or Amazon. If you’re flying frequently, invest in a durable bag with wheels for easier airport maneuvering. Time estimate: 10-15 minutes to assemble everything before your trip.
Preparation Steps and Safety Considerations
Proper prep starts days before your flight to avoid last-minute rushes. Begin by cleaning your infant car seat thoroughly: Remove the fabric cover, wash it per the manufacturer’s instructions (usually machine-washable on gentle cycle), and vacuum out crumbs or debris. A clean seat is lighter and less prone to attracting dirt during travel.
Safety first—inspect for damage like cracks in the plastic shell or frayed straps, as these could compromise protection post-flight. If your seat is over 6-7 years old (check the expiration date on the label), consider replacing it before travel; car seats have a shelf life due to material degradation.
Key safety considerations:
– Weight limits: Ensure your packed seat doesn’t exceed airline carry-on weight (usually 25 lbs max for overhead bins).
– TSA screening: Car seats must go through X-ray; remove any loose items like toys to speed this up.
– Child’s age/weight: Confirm the seat still fits your growing infant—rear-facing is required for babies under 2 on planes.
– Health note: If your baby has special needs, consult your pediatrician about in-flight use.
For families with multiple kids, prioritize the infant seat and pack older children’s boosters separately. Allow 30-45 minutes for prep time, including labeling everything with bright tags for easy spotting on the carousel.
Step-by-Step Process to Pack Your Infant Car Seat for Air Travel
Now, let’s break down the packing into manageable phases. This method focuses on gate-checking, the most common and safest option for infant seats, as it avoids the rough cargo hold. The whole process takes about 20-30 minutes once prepped.
Phase 1: Disassemble and Protect the Car Seat
Start by emptying the seat completely to reduce weight and prevent damage to accessories.
1. Remove the infant insert, harness pads, and any toys or blankets—store these in a ziplock bag.
2. Detach the base if your model allows (e.g., many Graco seats separate easily with a release button). Pack the base separately in checked luggage if it’s too bulky.
3. Wrap the seat in a clean blanket or bubble wrap, focusing on high-impact areas like the handle and shell edges. Secure with bungee cords loosely—avoid overtightening to prevent strap misalignment.
4. If carrying on, collapse the handle and test-fit in your carry-on bag. For gate-check, skip to the bag step.
Warning: Never use the car seat without its full assembly post-flight; re-inspect all connections before reinstalling in your vehicle.
Time: 10 minutes. This phase minimizes scratches and keeps the seat hygienic.
Phase 2: Secure in the Gate-Check Bag
The gate-check bag is your best friend—it’s designed to shield against dirt, rain, and bumps.
1. Place the wrapped car seat into the bag handle-first for stability. If it doesn’t fit flat, angle it diagonally.
2. Zip the bag securely, then add extra padding around the sides with towels if there’s wiggle room.
3. Attach luggage tags to the bag’s exterior and the car seat itself (through the harness straps). Include your name, phone, email, flight number, and destination.
4. For added security, loop bungee cords through the bag’s handles and around the seat to prevent shifting during handling.
If your airline requires a protective cover (rare but check), use a simple plastic sheath from a hardware store. For stroller combos, attach the car seat to the stroller frame first, then cover the whole unit.
Important: At the gate, inform staff you’re gate-checking; they’ll tag it and load it last, returning it planeside upon landing.
Time: 5-10 minutes. Test the packed weight by lifting—if over 20 lbs, remove non-essentials.
Phase 3: Navigating the Airport and Boarding
Packing isn’t just at home; it continues at the airport.
1. Arrive 2-3 hours early to account for security lines with baby gear.
2. At check-in, confirm the car seat is noted on your boarding pass as gate-check (free for most airlines).
3. During TSA screening, place the bagged seat on the belt separately. If questioned, politely explain it’s FAA-approved infant gear.
4. At the gate, wait until boarding group 1 or pre-boarding to attach to your stroller. Hand it over just before boarding—staff will return it at your destination gate.
For overhead bin carry-on (if your seat is compact like the Clek Fllo), ensure it fits by measuring beforehand. Avoid this if possible, as tight spaces can stress the frame.
Troubleshooting tip: If the bag tears en route, use duct tape immediately and file a claim with the airline upon arrival.
Time: Varies by airport, but plan for 30-60 minutes total.
Phase 4: Post-Flight Inspection and Reassembly
Don’t skip this—damage might not be obvious right away.
1. Once reunited with your seat at the gate, unzip the bag and inspect for dents, tears, or loose parts under good lighting.
2. Wipe down with a baby-safe cleaner and let air out any odors from the plane.
3. Reassemble fully before leaving the airport: Reattach the base, test the harness (it should click securely), and do a weight test with a stuffed animal.
4. If damage is found, photograph it and report to the airline’s baggage services desk within 24 hours for potential reimbursement (up to $3,800 for domestic flights per DOT rules).
This ensures the seat is road-ready for your rental car or ride-share. Time: 10-15 minutes.
Pro Tips for Stress-Free Infant Car Seat Air Travel
To elevate your packing game and avoid common pitfalls, here are expert insights from frequent-flying parents and travel pros:
– Opt for lightweight models: Seats like the Uppababy Mesa weigh under 10 lbs empty, making them easier to maneuver without a bag.
– Layer for weather: In rainy climates, add a plastic liner inside the gate-check bag to block moisture.
– Combine with stroller travel: Use a universal adapter to keep the seat attached to your stroller through the airport—frees up hands for your baby.
– Pack backups: Bring a portable infant head support or blanket as a just-in-case if the seat gets delayed.
– Avoid overpacking: Skip attaching cup holders or extras; they can snag and cause imbalances.
– Track digitally: Use apps like TripIt to log your packing checklist and airline confirmations.
– Common mistake to dodge: Forgetting to remove the LATCH connectors—wrap and bag them separately to prevent bending.
These tweaks can shave time off your airport routine and extend your car seat’s life by 1-2 years with proper care.
When to Seek Professional Help
While DIY packing works for most, call in pros if your car seat has complex features (e.g., rotating bases) or you’ve noticed structural issues. Signs you need help:
– Visible cracks or recalls (check NHTSA.gov for your model).
– You’re uncomfortable with disassembly—visit a local baby gear store for a free fitting session.
– Frequent international travel requiring custom crating.
Look for certified child passenger safety technicians (CPSTs) via safekids.org; they offer packing consultations for $50-100. Costs for professional shipping services like FedEx (if not flying with it) run $100-200 one-way. Always check your car seat’s warranty—brands like Britax cover travel damage if packed per guidelines.
FAQ
Q: Can I use my infant car seat on the plane?
A: Yes, if it’s FAA-approved and you buy a seat for your child. Install it rear-facing in a window seat (avoid exit rows or bulkheads). The flight attendant will verify it’s secure during boarding—practice the install at home for a 5-minute setup.
Q: What’s the best gate-check bag for infant car seats?
A: The J.L. Childress Gate Check Bag is top-rated for its padding, backpack straps, and lifetime warranty. It fits 95% of models and costs around $30. For heavier-duty, try the guava Family Bag at $100.
Q: Do I have to pay to check an infant car seat?
A: No, most airlines treat it as free gate-checked baggage, even if you’ve already checked a bag. Exceptions include some low-cost carriers like Spirit—always confirm to avoid $50+ fees.
Q: How do I pack the car seat base separately?
A: Wrap it in clothing from your suitcase for cushioning, then secure with straps. It’s denser, so it fits better in checked luggage. Reconnect at your destination using the seat’s belt guides.
Q: What if my car seat gets damaged in transit?
A: Document everything with photos and file a claim immediately. Airlines cover up to the ticket price; if denied, your manufacturer’s warranty might step in. Replacement costs average $150-300 for a new infant seat.
Q: Can I carry on the car seat without a bag?
A: Technically yes, but it’s risky—airports are germy, and it counts as your personal item. Use a disposable cover if gate-checking isn’t an option.
Q: How early should I start packing for air travel with an infant?
A: 1-2 days ahead to clean and test. On travel day, pack the bag right before leaving home to keep it fresh.
Alternative Solutions for Packing Infant Car Seats
If gate-checking isn’t ideal (e.g., solo travel or oversized seats), consider these options. Each has trade-offs based on your needs.
| Solution | Pros | Cons | Best For |
|---|---|---|---|
| Carry-on in overhead bin | No checking fees; quick access | Fits only compact seats; takes bin space | Short flights with small planes |
| Ship via ground service (e.g., UPS) | Avoids airport hassle; insured up to $100 | Costs $50-150; arrives separately | Long trips where you rent a car seat at destination |
| Rent at destination (e.g., BabyQuip) | No packing needed; delivered clean | $30-50/day; unfamiliar with your brand | One-off vacations; eco-friendly choice |
| Use airline bassinet (if available) | Frees up your seat entirely | Limited to bulkhead; size/weight restrictions for baby | International flights with lap infants |
For rentals, pros include convenience and sanitized gear, but cons are higher costs and ensuring FAA approval. Weigh based on your itinerary—shipping shines for multi-leg trips.
Travel Safely with Your Infant Car Seat
You’ve now got a foolproof plan to pack your infant car seat for air travel, from policy checks and protective packing to post-flight tweaks:
– Essential supplies like a padded gate-check bag
– Detailed disassembly and airport navigation steps
– Pro tips and alternatives for every scenario
Following this guide ensures your baby’s safety gear stays protected, letting you enjoy takeoff without the worry. With a little prep, air travel becomes a breeze—safe journeys ahead!
Have you packed an infant car seat for a flight before? Share your tips or challenges in the comments to help other parents! If this helped, bookmark it for your next trip.


