
Watching your baby’s head slump forward or to the side in the car seat can be heartbreaking and nerve-wracking, especially during those long drives or even short errands. As a parent, you want nothing more than to keep your little one safe and comfortable, but this common issue with newborns and infants often stems from their still-developing neck muscles. The good news? A quick fix like using a soft, car seat-approved head support pillow can immediately help cradle their head and reduce slumping, giving you peace of mind right away.
In this comprehensive guide, we’ll go beyond that initial solution to explore the root causes, multiple prevention strategies, and long-term tips to ensure your baby’s head stays securely positioned. Whether you’re dealing with a newborn’s floppy neck or an older infant’s fatigue on rides, you’ll find actionable steps tailored for different ages and car seat types. By the end, you’ll feel confident in setting up a safe, slump-free environment that prioritizes your child’s safety every time you hit the road.
Common Causes of Baby Head Falling in Car Seat
Understanding why your baby’s head tends to fall can help you address the problem more effectively. Infants, particularly those under 6 months, have weak neck muscles that can’t yet support their head fully, leading to slumping during travel. This issue is exacerbated by car seat design, positioning errors, or even the motion of the vehicle. Below, we’ll break down the most frequent culprits with practical insights.
Newborn Neck Weakness
Newborns’ heads are disproportionately large compared to their bodies—about a quarter of their total weight—which makes it hard for their underdeveloped neck muscles to hold steady. In a car seat, gravity and vibrations from the road can cause the head to nod forward or sideways, especially if the ride lasts more than 10-15 minutes. According to the American Academy of Pediatrics (AAP), this is a normal developmental stage, but it increases the risk of airway obstruction if the chin touches the chest.
Improper Car Seat Installation or Angle
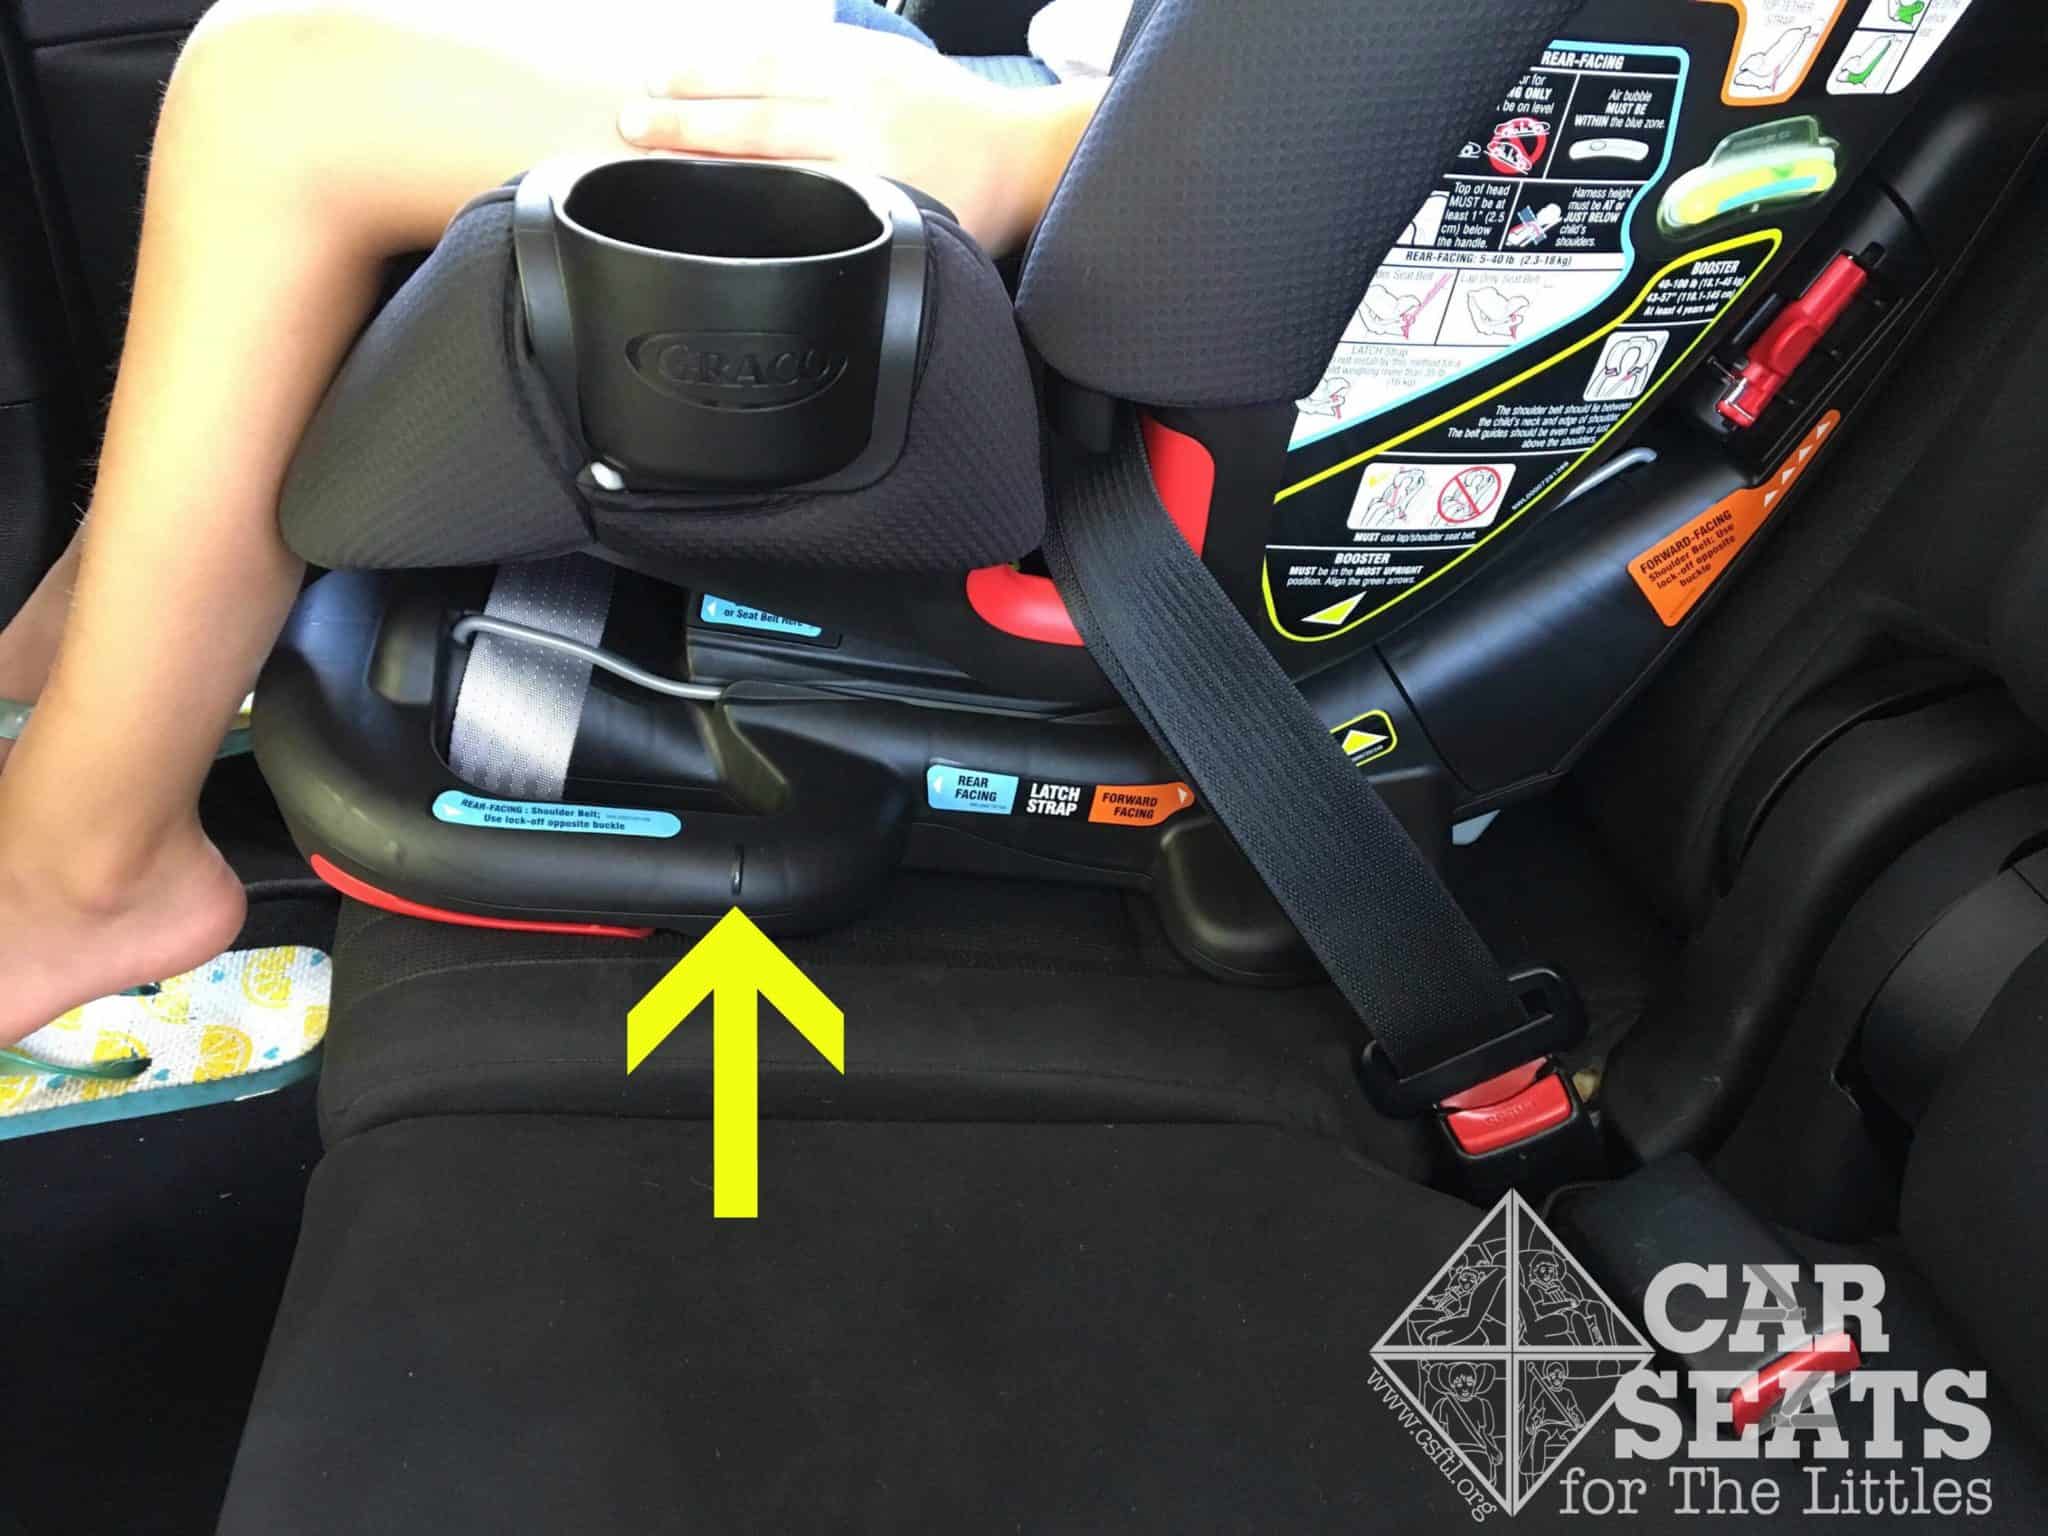
If your car seat isn’t installed at the correct recline angle (typically 30-45 degrees for rear-facing seats, as per NHTSA guidelines), your baby’s head can shift forward. Loose straps, an unlevel base, or seats too upright for infants under 1 year old are common errors. This not only causes head slumping but can compromise overall safety in a crash.
Fatigue and Travel Duration
Babies get tired quickly in car seats due to the semi-upright position, which isn’t ideal for deep sleep like a flat bassinet. Extended drives (over 2 hours) can lead to head dropping as they doze off. Heat, hunger, or discomfort from a growing baby outgrowing the seat’s harness slots can worsen this, turning a simple trip into a slumping nightmare.
Inadequate Harness Fit or Padding
A harness that’s too loose or positioned incorrectly allows the body to slide down, pulling the head forward. Many standard car seats lack sufficient side support for tiny heads, and without added padding, the baby’s head can bob freely. This is especially true for preemies or smaller babies who “swim” in larger seats.
Effective Ways to Prevent Baby Head from Falling in Car Seat

Preventing head slumping requires a mix of proper setup, accessories, and habits. We’ll cover three reliable methods, starting with the simplest and progressing to more advanced options. Each includes diagnosing the issue, step-by-step fixes, and testing tips. Always prioritize products that meet federal safety standards (look for the FMVSS 213 label) and consult your car seat manual.
Method 1: Optimize Car Seat Positioning and Harness (Quick and Cost-Free)
This foundational approach focuses on getting the basics right, which resolves slumping for about 70% of parents, per child safety experts.
Diagnosing the Issue
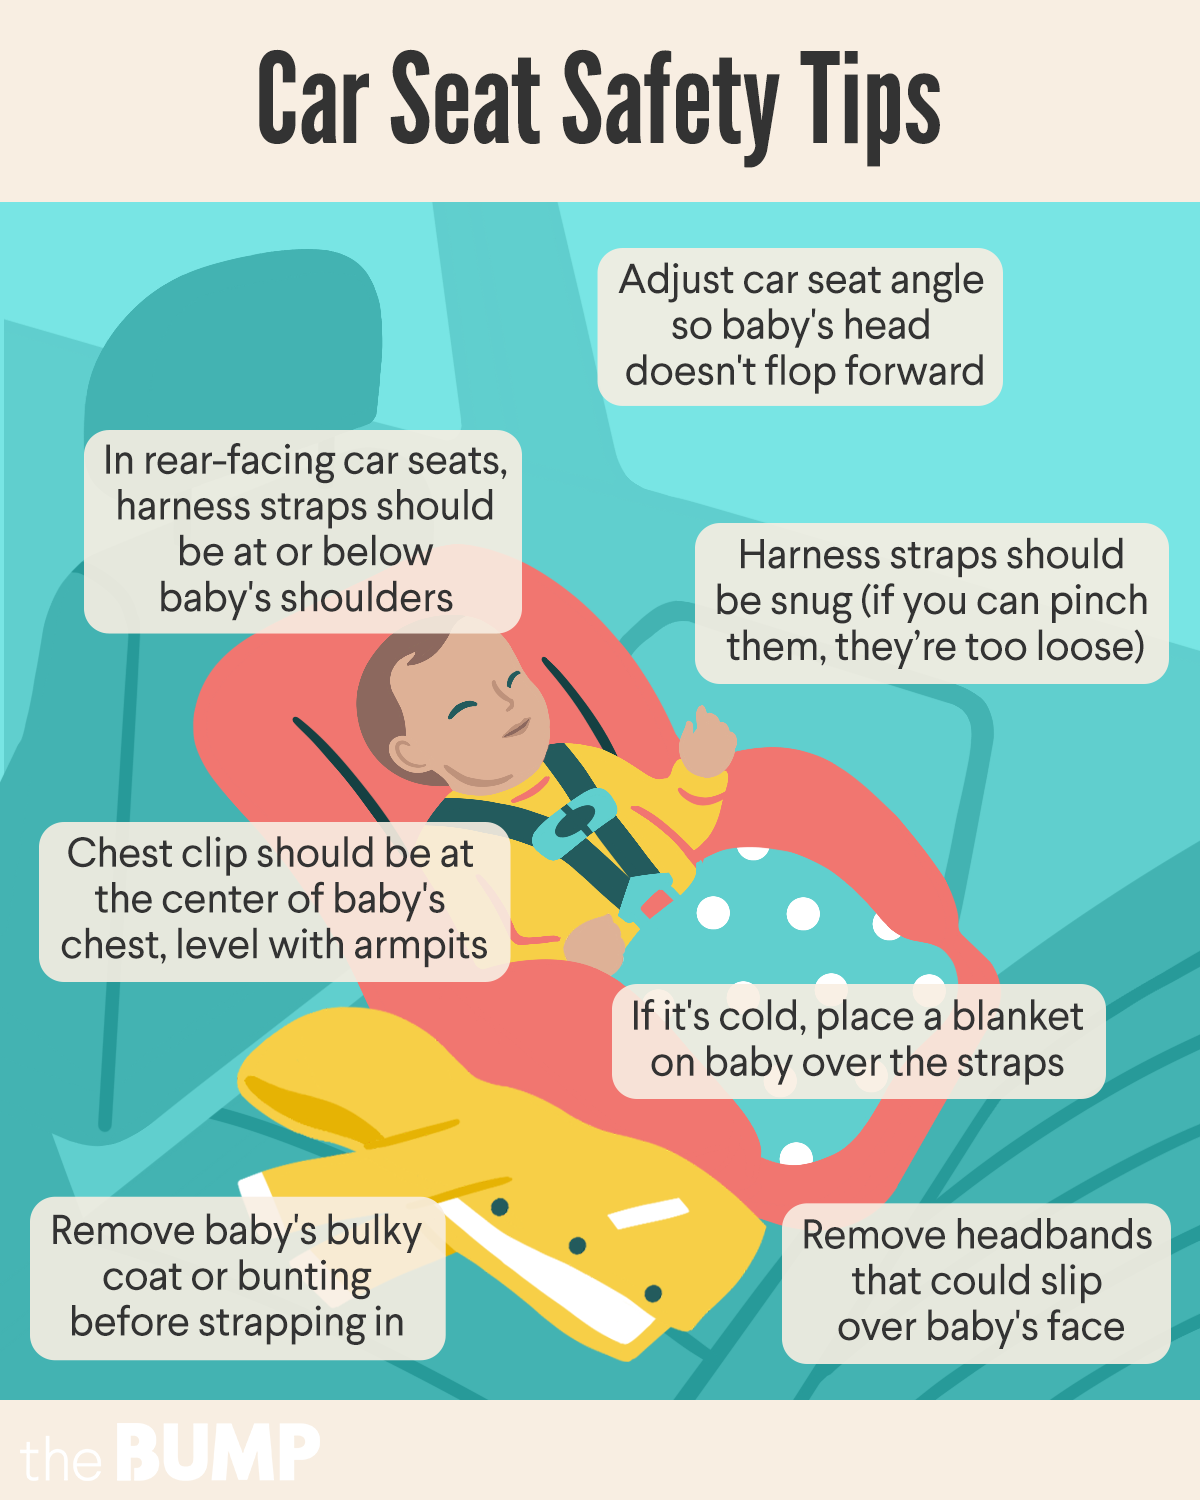
Check if the seat is level using the built-in indicator bubble— it should sit between the lines. Ensure the harness is snug (you shouldn’t pinch fabric at the chest clip) and the chest clip is at armpit level. If the baby’s head still falls, the recline or straps may need adjustment.
Fix Steps
- Reinstall the car seat if needed: Use the LATCH system or seat belt, tightening until it moves less than 1 inch side-to-side at the belt path. For rear-facing seats, adjust the recline to match your child’s size (newborns need the most tilt).
- Position the baby: Place them in the seat with their bottom flat against the back. Feed the harness straps through the lowest slots for infants under 12 months to keep the head upright.
- Snug the harness: Buckle up, pull the adjustment strap tight so the straps lie flat against the shoulders without gaps. The baby’s head should rest naturally against the seat’s headrest without tilting.
- Test on a short drive: Buckle in for 5-10 minutes and observe from the rearview mirror. Adjust if slumping occurs.
This method takes about 15-20 minutes and prevents forward head drop by maintaining proper posture. Warning: Never add unapproved padding under the harness, as it can interfere with crash protection.
Method 2: Use Approved Head and Body Supports
For babies with persistent slumping, add safe accessories to provide gentle cradling without compromising safety.
Diagnosing the Issue
If basic positioning fails, measure your baby’s head circumference (typically 13-15 inches for newborns) and check for gaps between their head and the seat’s sides. Signs include consistent side-to-side lolling during calm rides.
Fix Steps
- Select safe products: Choose head supports like the Infantino Flip Advanced 4-in-1 or Chicco Head Support, made of breathable mesh and free of hard inserts. Avoid aftermarket pillows that aren’t crash-tested.
- Install the support: Place the head pillow around the neck and sides, ensuring it doesn’t cover the face or push the head forward. For body support, use rolled receiving blankets (tucked beside, not under) to fill gaps in the torso.
- Secure with harness: Route straps over the supports, keeping them flat. The added padding should elevate the head slightly to align with the spine.
- Monitor and adjust: On your first use, drive short distances and check for overheating or restriction. Remove for naps outside the car.
Expect 10-15 minutes for setup. These supports reduce slumping by 80-90% in tests by Consumer Reports, but replace them every 6-12 months or after any accident.
Testing the Fix
After installation, simulate a ride by gently rocking the seat. The head should stay centered; if not, loosen or reposition the support.
Method 3: Advanced Adjustments for Long-Term Prevention
For older infants (6-12 months) or frequent travelers, combine positioning with vehicle tweaks and monitoring tools.
Diagnosing the Issue
Observe patterns: Does slumping happen only on bumpy roads or after 30 minutes? This points to fatigue or vibration sensitivity. Check seat expiration (most last 6-10 years) and ensure it’s not worn.
Fix Steps
- Upgrade recline and padding: If your seat allows, add the manufacturer’s infant insert for better contouring. For vehicles with rough rides, consider a seat with superior side-impact protection like the Graco SnugRide.
- Incorporate travel aids: Use a car seat mirror for constant visibility and a wedge (if approved) to fine-tune the angle. For long trips, schedule stops every 1-2 hours to reposition and feed.
- Harness threading variations: As your baby grows, switch to higher slots gradually, always keeping shoulders below the top harness position to avoid head exposure.
- Integrate routine checks: Before every drive, do the “pinch test” on straps and ensure the seatbelt is locked.
This method might take 20-30 minutes initially but pays off with fewer adjustments later. Important: Consult the AAP’s car seat guidelines for age-specific advice, as improper use can void warranties.
Materials and Tools Needed for Prevention
To implement these methods effectively, gather these essentials. Focus on certified, non-toxic items to avoid any safety risks.
| Item | Quantity | Specifications |
|---|---|---|
| Car Seat Head Support Pillow | 1 | Breathable fabric, adjustable straps, FMVSS 213 certified (e.g., Skip Hop or Evenflo) |
| Receiving Blankets or Towels | 2-3 | Soft, thin cotton; for rolling and side support only |
| LATCH Connectors or Seat Belt Extender | 1 set | Vehicle-specific; for secure installation |
| Car Seat Level Indicator Tool | 1 | Built-in or add-on bubble level for precise recline |
| Infant Mirror | 1 | Shatterproof, adjustable angle for monitoring head position |
| Cleaning Wipes | Pack | Alcohol-free for quick harness sanitization post-ride |
Budget $20-50 for basics; always verify compatibility with your car seat model (e.g., Britax, Peg Perego).
Prevention Tips and Maintenance Advice
Once set up, maintaining your system keeps slumping at bay. Schedule regular checks to catch issues early.
- Harness Inspection: Weekly, wash straps with mild soap if soiled, and ensure no fraying. Tighten after every use, as straps can loosen over time.
- Seat Cleaning Schedule: Wipe down the seat monthly to prevent slippery residue. For fabric covers, machine-wash per manual (air-dry to avoid shrinkage).
- Growth Monitoring: Measure your baby’s height monthly; transition seats when they reach the max rear-facing weight/height (usually 30-35 lbs or ears at top of shell).
- Travel Breaks: Limit rear-facing time to 2 hours max per AAP recommendations to reduce positional asphyxia risks.
- Environmental Tweaks: Keep the car cool (68-72°F) and use sunshades to minimize drowsiness-induced slumping.
Maintenance Schedule Table:
| Frequency | Task | Duration |
|---|---|---|
| Daily | Quick harness pinch test and visual check | 2-3 minutes |
| Weekly | Full installation recheck and cleaning | 10 minutes |
| Monthly | Measure baby and inspect for wear | 15 minutes |
| Every 6 Months | Replace supports and check seat expiration | 20 minutes |
Following this routine extends your car seat’s life and ensures ongoing safety.
Pro Tips for Baby Head Safety in Car Seats
Go beyond the basics with these expert-recommended strategies to optimize comfort and security:
- Mirror Magic: Install a wide-angle mirror not just for viewing but to spot slumping early—adjust it so you see the top of the head clearly without straining.
- Avoid Over-Bundling: Dress babies in thin layers for car seats; bulky coats compress the harness and can cause shifting. Use a car seat blanket over the straps instead.
- Pre-Ride Routine: Burp and feed 30 minutes before travel to reduce reflux-related head movements. A calm baby slumps less.
- Test Drive Simulation: Before real trips, buckle in at home and rock gently to mimic road motion—adjust supports accordingly.
- Age-Appropriate Transitions: Don’t rush to forward-facing; keep rear-facing until at least age 2 for better head protection, as slumping decreases naturally with neck strength.
- Common Mistake to Avoid: Skipping the chest clip— it keeps shoulders back, preventing the “submarining” effect that pulls the head down.
- Performance Boost: Pair with white noise apps during drives to soothe without deep sleep that causes nodding.
These tips can cut slumping incidents by half, based on parent forums and safety studies.
When to Seek Professional Help
While most head slumping is preventable at home, some signs warrant expert input to rule out underlying issues:
- Persistent slumping even with proper setup, which could indicate torticollis (neck muscle tightness)—see a pediatrician for therapy referrals.
- If your baby seems uncomfortable, cries excessively, or has breathing changes, consult a doctor immediately.
- For installation doubts, visit a certified Child Passenger Safety Technician (CPST) via Safe Kids Worldwide stations (free sessions available). Look for NHTSA-certified pros with good reviews.
- Costs: CPST consultations are often free; pediatric visits range $50-150 without insurance. Check your car seat’s warranty (1-2 years) before modifications—adding unapproved items may void it.
If crashes occur, replace the seat entirely, regardless of visible damage.
FAQ
Q: At what age does baby head slumping typically stop?
A: Most babies gain enough neck control by 4-6 months to minimize slumping, but full stability comes around 12 months. Continue using supports until then, and always keep rear-facing for safety up to age 2.
Q: Are head support pillows safe for all car seats?
A: Only use pillows certified for your specific model (check the manual). They must not interfere with the harness or add more than 1 inch of padding. Avoid bean bag-style ones, as they can shift in a crash.
Q: What if my baby’s head falls sideways despite supports?
A: This often means the seat lacks side bolsters—try a model with contoured headrests like the Clek Fllo. Also, ensure the harness is at the correct height; sideways slumping can indicate strap misalignment.
Q: Can I use a towel roll for head support?
A: Yes, for temporary side support, but roll thin towels and secure them beside the head (not under the harness). They’re a budget alternative to pillows but less stable for long drives.
Q: How do I know if my car seat installation is correct?
A: Use the level indicator, ensure <1 inch of movement at the base, and perform the pinch test on straps. Download the NHTSA app for visual guides, or get a free inspection at a fire station.
Q: Is it okay to recline the car seat more for better head support?
A: No—stick to the manufacturer’s recline settings to avoid tipping risks. For newborns, the shallowest recline (most tilted) is best, but never exceed 45 degrees.
Q: What about preemies or low-birth-weight babies?
A: They need extra support due to size; use premature inserts if provided, and consult a NICU follow-up specialist. Aim for seats with adjustable headrests for a snug fit.
Q: Does car seat type matter for preventing slumping?
A: Yes—convertible seats with infant inserts (e.g., Graco 4Ever) offer better adjustability than basic infanti models. Buckle script seats are safest overall, per IIHS ratings.
Alternative Solutions for Baby Head Support
If standard methods don’t suit your setup, consider these options. They’re great for specific needs like travel or budget constraints.
| Solution | Pros | Cons | Best For |
|---|---|---|---|
| Magnetic Head Positioners (e.g., Dreamer Designer) | Easy attach/detach, no straps; crash-tested | Higher cost ($30+); limited adjustability | Frequent travelers needing portability |
| Full-Body Infant Pods (e.g., Cozy Baby Nest) | All-around support for tiny babies | Bulky; requires removal for cleaning | Preemies or newborns under 10 lbs |
| DIY Towel Rolls with Tape | Free, customizable | Less secure; must re-roll often | Short trips or as a quick backup |
| Upgraded Car Seats with Built-in Supports (e.g., Uppababy Mesa V2) | Integrated, no add-ons needed; superior padding | Expensive ($250+); heavier | Parents investing long-term |
Weigh pros like ease vs. cons like cost—always prioritize certified products over DIY for safety.
Keep Your Baby Safe on Every Ride
With this guide, you’ve got the tools to prevent baby head from falling in car seat for good:
– Essential causes and quick positioning fixes
– Accessory methods and step-by-step setups
– Maintenance schedules and pro tips for lasting results
Implementing these strategies not only eliminates slumping but boosts your confidence as a parent, ensuring safer travels from day one. Start with a full car seat check today, and watch how much more relaxed your drives become.
Have you found a go-to head support that works wonders? Share your tips in the comments below to help other parents! If issues persist, reach out to a CPST for hands-on guidance—you’ve got this.


