

When your car’s factory upholstery cracks like dried riverbeds or toddler juice boxes leave permanent stains, replacement covers become essential. But dealership prices can drain your wallet faster than a leaking sunroof. Learning how to sew car seat covers unlocks a cost-effective solution that matches your exact fabric preferences and fits like factory-original. Whether you’re restoring a classic Mustang’s bucket seats or creating washable cotton covers for a car seat, this guide delivers battle-tested techniques from automotive upholsterers. You’ll discover how to transform worn seats into show-worthy interiors using common sewing tools and smart material choices—all without professional training.
Most DIYers fail by skipping critical prep steps like foam curing or pattern alignment. But by following this sequence precisely—starting with frame rehabilitation and ending with heat-relaxed seams—you’ll avoid the puckering and misalignment that plague 70% of first attempts. In just one weekend, you can achieve results that outlast mass-produced covers while saving hundreds. Let’s dive into the exact workflow that turns fabric bolts into custom automotive luxury.
Match Your Project to the Right Method
Adult Seat Restoration vs. Baby Seat Covers
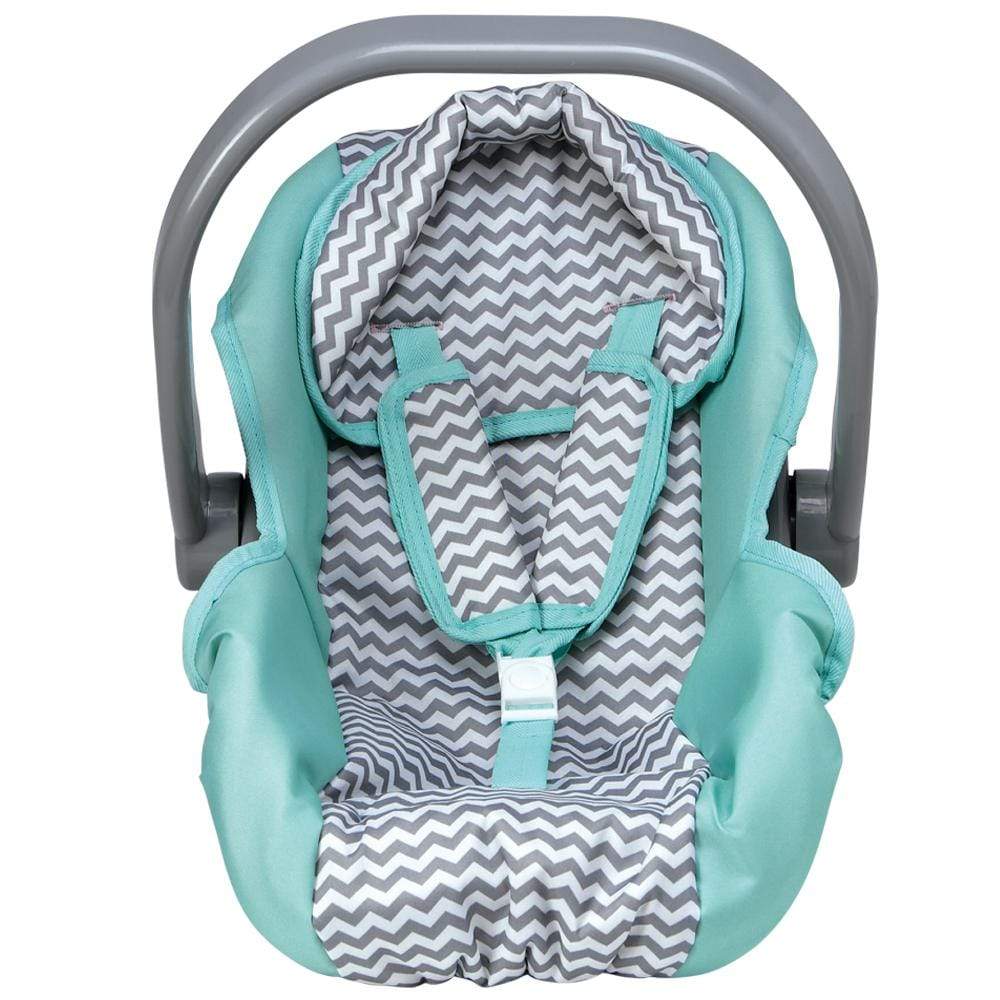
Adult seat restoration requires heavy-duty materials and surgical precision. You’ll strip seats to bare frames, rebuild foam layers, and sew automotive vinyl with bonded polyester thread. Expect 6-8 hours per seat but gain decade-long durability. Baby seat covers prioritize safety and washability: use breathable cotton with bound harness slots, skipping frame work entirely. Slip-on canopies for travel seats take 30 minutes using stretch knits—perfect for frequent laundering.
Choosing the wrong approach wastes materials. If your bucket seat foam crumbles when touched, commit to full restoration. For baby seats, never alter harness routing—only replace outer fabric layers. Confirm your path now to avoid mid-project panic.
Strip Seats Without Losing Your Mind
Photo and Tag Every Component
Shoot high-resolution photos from every angle before removing a single clip. Number foam sections, bolsters, and brackets with painter’s tape—this becomes your reassembly blueprint. Skip this, and you’ll waste hours puzzling over which panel fits where.
Remove Old Upholstery Safely
Pop hog-rings with side-cutters, peel Velcro strips, then run a seam-ripper along all stitch lines. Critical mistake: Don’t discard original fabric pieces—they’re your perfect pattern templates. Keep vinyl sections intact; heat-gunned wrinkles often smooth during re-sewing.
Rehab the Frame First
Degrease metal with acetone, sand rust spots to bare metal, and apply matte black enamel. Cure 24 hours before proceeding. Replace sagging springs now—once foam is glued, access disappears forever. Skipping frame prep causes premature wear on new covers.
Select Fabrics That Won’t Fail Mid-Drive
| Component | Adult Seats | Baby Seats |
|---|---|---|
| Face Fabric | Automotive vinyl (Targa), faux leather | 100% cotton, minky |
| Backing Foam | ½” scrim foam for pleats | ⅛”-¼” fleece |
| Thread | Bonded polyester 69-92 wt | All-purpose poly tex-27-40 |
| Notions | 20-gauge hog-rings, 16-gauge wire | Fold-over elastic, bias tape |
Yardage cheat sheet: One bucket seat needs 2½-3 yards of 54″ fabric plus 1 yard vinyl for sides. Baby seat reupholstery requires just 1-1½ yards of 45″ cotton. Pro tip: Buy 10% extra—vinyl nap direction mismatches ruin symmetry.
Draft Patterns That Fit Like Factory
Template Method for Adult Seats
Drape 4-mil clear vinyl over foam contours, trace with Sharpie, then transfer to poster board. Add ½” seam allowance everywhere except the hog-ring sleeve (give that 2″). Mark centerlines and bolt holes directly on patterns. Visual cue: If your template wrinkles when draped, add ⅛” more seam allowance in curved zones.
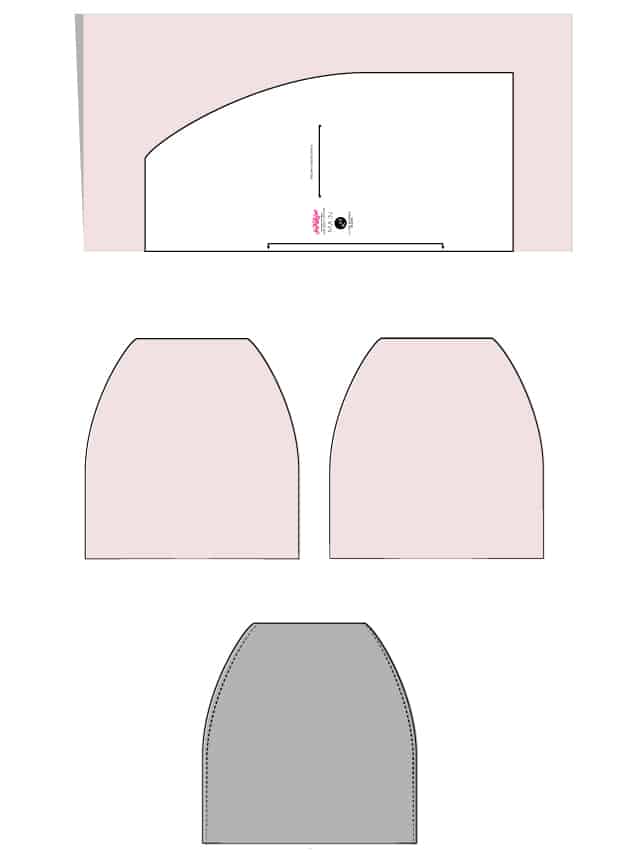
Copy-Original Method for Baby Seats
Iron deconstructed fabric pieces flat, trace onto new cotton, and add ⅜” seam allowance. Label each piece “L-back panel” or “harness slot.” Warning: Never skip ironing—wrinkled templates cause misaligned seams that compromise safety harness slots.
Sew Adult Seat Covers in 8 Precision Steps
-
Sew pleated inserts
Sandwich vinyl + scrim foam + backing vinyl. Sew 1″ finished pleats using a walking foot, then press with a warm roller. Time saver: Space pleats with a metal ruler—never eyeball. -
Construct side panels
Cut vinyl with ½” foam backing. Top-stitch ⅛” from edge for crisp definition. Common mistake: Skipping foam backing causes unsightly bulges at seams. -
Join center fronts
Use ⅜” French seams—they’re stronger and hide raw edges. Sew right-sides together at ¼”, trim seam allowance, flip, then stitch at ⅜”. -
Attach inserts to sides
Sew with ½” seam allowance, then top-stitch ⅛” from edge on face side. Pro tip: Baste first to prevent shifting during final stitching. -
Clip stress points
Snip curves every ½” and reinforce with binding tape inside. Unclipped curves pucker when stretched over foam. -
Create hog-ring sleeve
Fold 2″ double hem around perimeter, stitch with 4mm zig-zag, and insert 16-gauge wire. Key detail: Leave 3″ opening to thread wire through. -
Test-fit before final install
Slip cover loosely onto seat. Mark final hog-ring points with tailor’s chalk. Adjust sleeve length if fabric sags. -
Hog-ring in sequence
Start at back edge, work toward center, then sides, finishing at front. Space rings 1-1.5″ apart. Urgent: Check seat belt latches aren’t obstructed.
Machine settings: 110/18 leather needle, 3mm straight stitch, tension reduced 1-2 points. Pause every 30 seconds to cool the needle when sewing vinyl.
Sew Baby Seat Covers Without Safety Risks
Bound Harness Slots Are Non-Negotiable
Sew zig-zag stitches over stabilizer around slot openings. Cut slits precisely, fold edges under, and zig-zag again. Safety rule: Never add padding behind the child—only replace outer fabric layers. Altering harness routing risks failure in crashes.
Reassemble in Original Order
Join pieces exactly as disassembled, pressing seams flat. Finish perimeter with bias tape—this prevents fraying during washes. For stretch canopies, attach ¼” elastic to hems using 50% stretch. Visual cue: Elastic should slightly gather fabric but not constrict harness straps.
Install Covers That Resist Wrinkles
Hog-ring like a pro: After securing the first ring at the seat back, compress foam inward while stretching fabric outward. Work toward center to eliminate slack. For persistent wrinkles, warm vinyl with a heat gun at 180°F max—never higher.
Thread end hack: Singe cut polyester thread ends with a lighter to prevent unraveling. Trim all threads before installation; loose strands catch on seat mechanisms.
Extend Cover Lifespan With Smart Care
| Fabric Type | Cleaning Method | Lifespan |
|---|---|---|
| Automotive vinyl | Soap/water + 303 Aerospace protectant every 6 months | 7-10 years |
| Cotton toddler cover | Cold machine wash, air dry | 3-5 years |
| Knit canopy | Gentle cycle, lay flat dry | 2-3 years |
Critical maintenance: Reapply 303 protectant every 6 months on vinyl. UV exposure without protection causes cracking within 2 years. Never use vinyl cleaners with silicone—they attract dust.
Avoid These 5 Costly Mistakes
- Skipping foam cure time: Glued foam shrinks if patterned before 24-hour cure, causing loose covers.
- Mismatched nap direction: Vinyl panels look different when light hits opposing nap angles—mark arrows on all pieces.
- Wrong thread weight: Standard thread snaps under seat stress; use bonded polyester 69+ wt for automotive work.
- Ignoring harness clearance: Test baby seat covers with harness buckled—slots must align perfectly.
- Overlooking wire insertion: Hog-ring sleeves without wire flop during installation, wasting hours.
Pro shortcut: For matching travel pillows, use leftover vinyl scraps with ½” foam cores. Sew French seams and attach with hook-and-loop tape—ready in 20 minutes.
Essential Tool Checklist
- Sewing machine with walking foot and 6mm+ stitch width
- Needles: 110/18 leather (vinyl), 80/12 universal (cotton)
- Cutting tools: Hot-knife for vinyl, rotary cutter for knits
- Measuring: 60″ metal ruler, disappearing ink marker
- Installation: Hog-ring pliers, ¼” rings, 16-gauge wire
With patterns cut and machine calibrated, you’re equipped to sew car seat covers that outperform store-bought versions. Remember: Precision in pattern drafting and hog-ring spacing makes the difference between amateur and pro results. Start with a baby seat cover to build confidence—then tackle that classic car restoration you’ve dreamed of. Your custom interior awaits one stitch at a time.


