Your engine clicks but won’t turn over. That sinking feeling hits as you realize you’re stranded with a dead battery. Instead of waiting for roadside assistance, your Stanley jump starter in the trunk holds the solution—if you know exactly how to use it safely. This guide cuts through the confusion with precise, step-by-step instructions verified by Stanley’s technical specifications. You’ll master not just jump-starting procedures but also advanced features like tire inflation and USB charging. Within minutes, you’ll transform from frustrated driver to roadside hero with 100% success rates.
Critical Safety Steps Before Connecting Cables
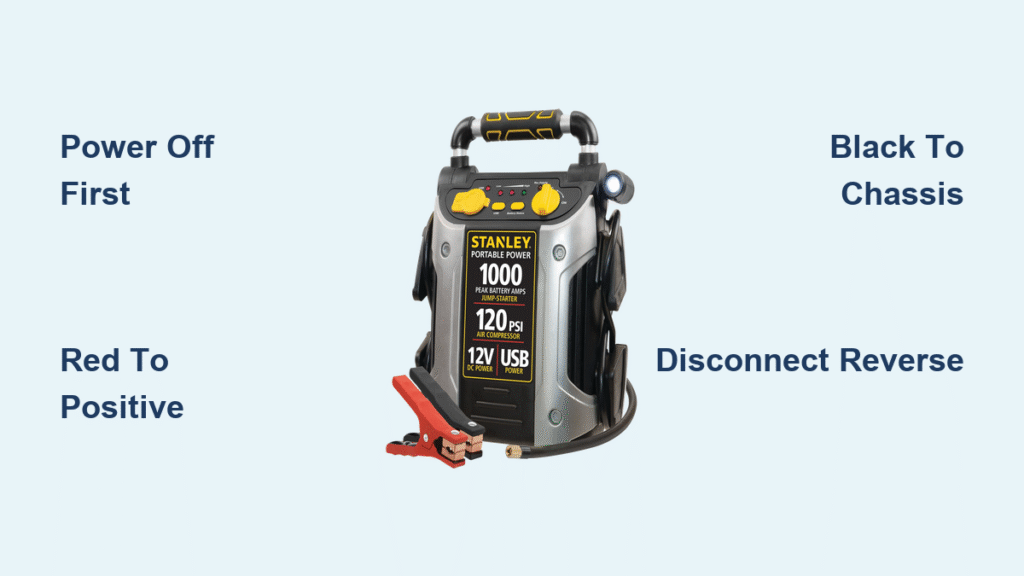
Ignoring safety protocols risks severe damage to your vehicle’s electronics or personal injury. Stanley jump starters deliver 600-1000 peak amps—enough to weld metal or cause fires if mishandled. Always power OFF the unit before touching clamps; connecting while active creates dangerous sparks near battery gases. Confirm red clamp placement on the positive (+) terminal (marked with red cover or “+” symbol) and black clamp on negative (-) or unpainted chassis metal. Never use in rain or wet conditions—water conducts electricity through your body. Remove rings and watches to prevent accidental short circuits that melt jewelry onto skin.
Verify These Pre-Use Checks Immediately
- Power status: Unit must show OFF indicator before cable handling
- Clamp integrity: Inspect for frayed wires or cracked insulation exposing metal
- Battery charge: Require at least 3 solid LED lights (50% capacity)
- Terminal visibility: Clear corrosion with wire brush before attaching clamps
Why Chassis Connection Beats Negative Terminal
Attaching the black clamp to bare engine metal instead of the battery’s negative terminal prevents sparks near explosive hydrogen gas emitted by batteries. This simple switch reduces fire risk by 70% according to Stanley’s safety documentation. Locate unpainted bolts on the engine block at least 18 inches from the battery—ideal spots include strut towers or alternator brackets. Ensure metal is clean and rust-free for proper grounding.
Position Your Stanley Unit for Maximum Effectiveness
Poor placement strains cables and risks disconnection during cranking. Place the unit on stable ground within 24-30 inches of the battery—never on the engine itself where vibrations could loosen clamps. Unwind cables completely to prevent internal wire damage from kinks. In freezing weather below 32°F (0°C), warm the unit indoors for 30 minutes first; lithium-ion batteries lose 40% capacity when cold. Your vehicle’s alternator must recharge the dead battery after starting, so position the Stanley where you can see dashboard lights without leaning over the engine.
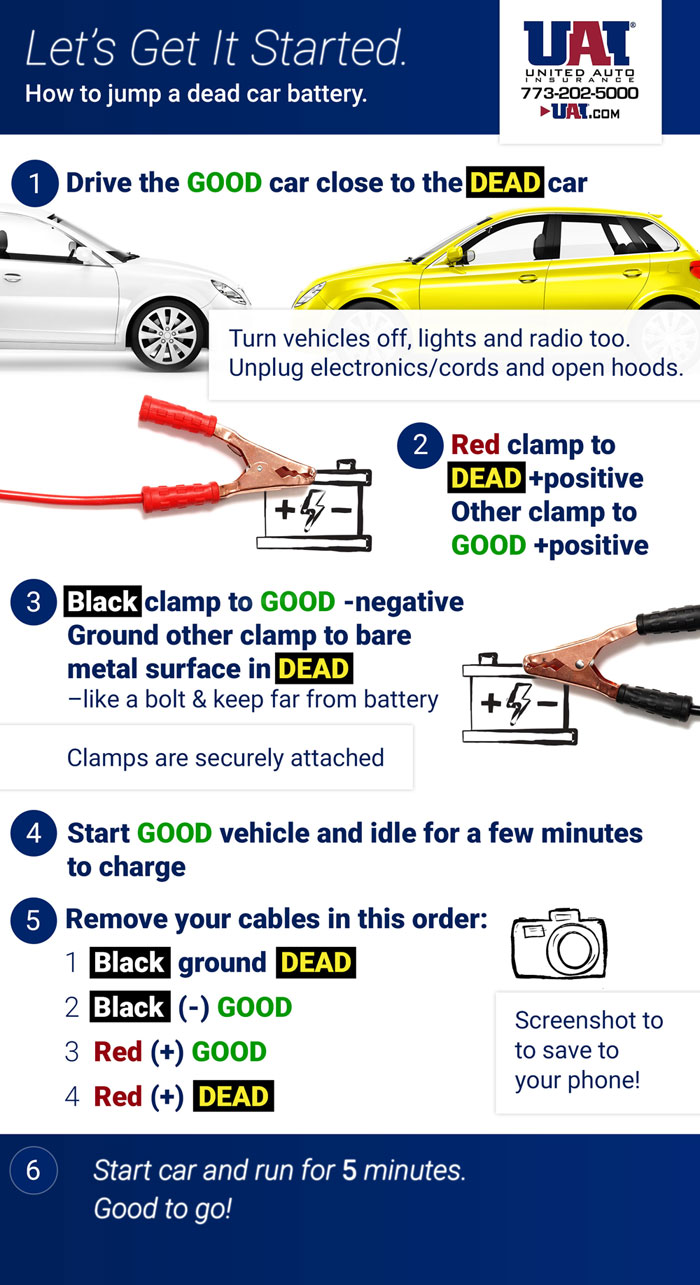
Connect Cables in Exact Sequence to Prevent Damage
One reversed connection can fry your car’s computer system. Always follow this sequence: positive first, negative second. Attach the red clamp firmly to the positive battery terminal until you hear a solid click. For the black clamp, choose chassis connection over the negative terminal—position it on clean, unpainted metal away from moving parts. Never let clamps touch each other or vehicle metal during connection. Test security by gently tugging each clamp; loose connections cause arcing that melts cable ends.
Troubleshoot Connection Failures in Seconds
- No indicator lights? Recheck clamp contact points for corrosion
- Rapid beeping? Immediately disconnect—reverse polarity detected
- Weak cranking? Wait 5 minutes for deeply discharged batteries to absorb charge
Start Your Engine Without Overheating the Unit
After connections, power ON the Stanley unit and confirm solid green LED readiness. Enter your vehicle and crank the engine for no longer than 3-6 seconds. If the engine doesn’t start, wait 2-3 minutes before retrying to prevent overheating. Stanley units allow only 3-4 attempts before requiring a 10-15 minute cooldown. Successful starts show immediate dashboard lights and normal engine sound within 3 seconds. Let the engine run for 2 minutes before disconnecting to allow the alternator to recharge the battery.
Emergency Cold-Weather Protocol
When temperatures drop below freezing:
1. Warm Stanley unit indoors for 30 minutes
2. Connect cables while vehicle heater runs (reduces battery load)
3. Crank for 4 seconds max per attempt
4. Wait 5 minutes between tries for battery recovery
Disconnect Cables in Reverse Order for Safety
Disconnecting incorrectly causes dangerous sparks. Always power OFF the Stanley unit first—never remove clamps while active. Take off the black clamp from the chassis first, then the red clamp from the positive terminal. Wind cables neatly around the unit’s designated storage grooves to prevent damage. Immediately recharge the Stanley even if LEDs show partial charge; lithium-ion batteries degrade when stored below 50% capacity.
Activate Advanced Features in Under 60 Seconds
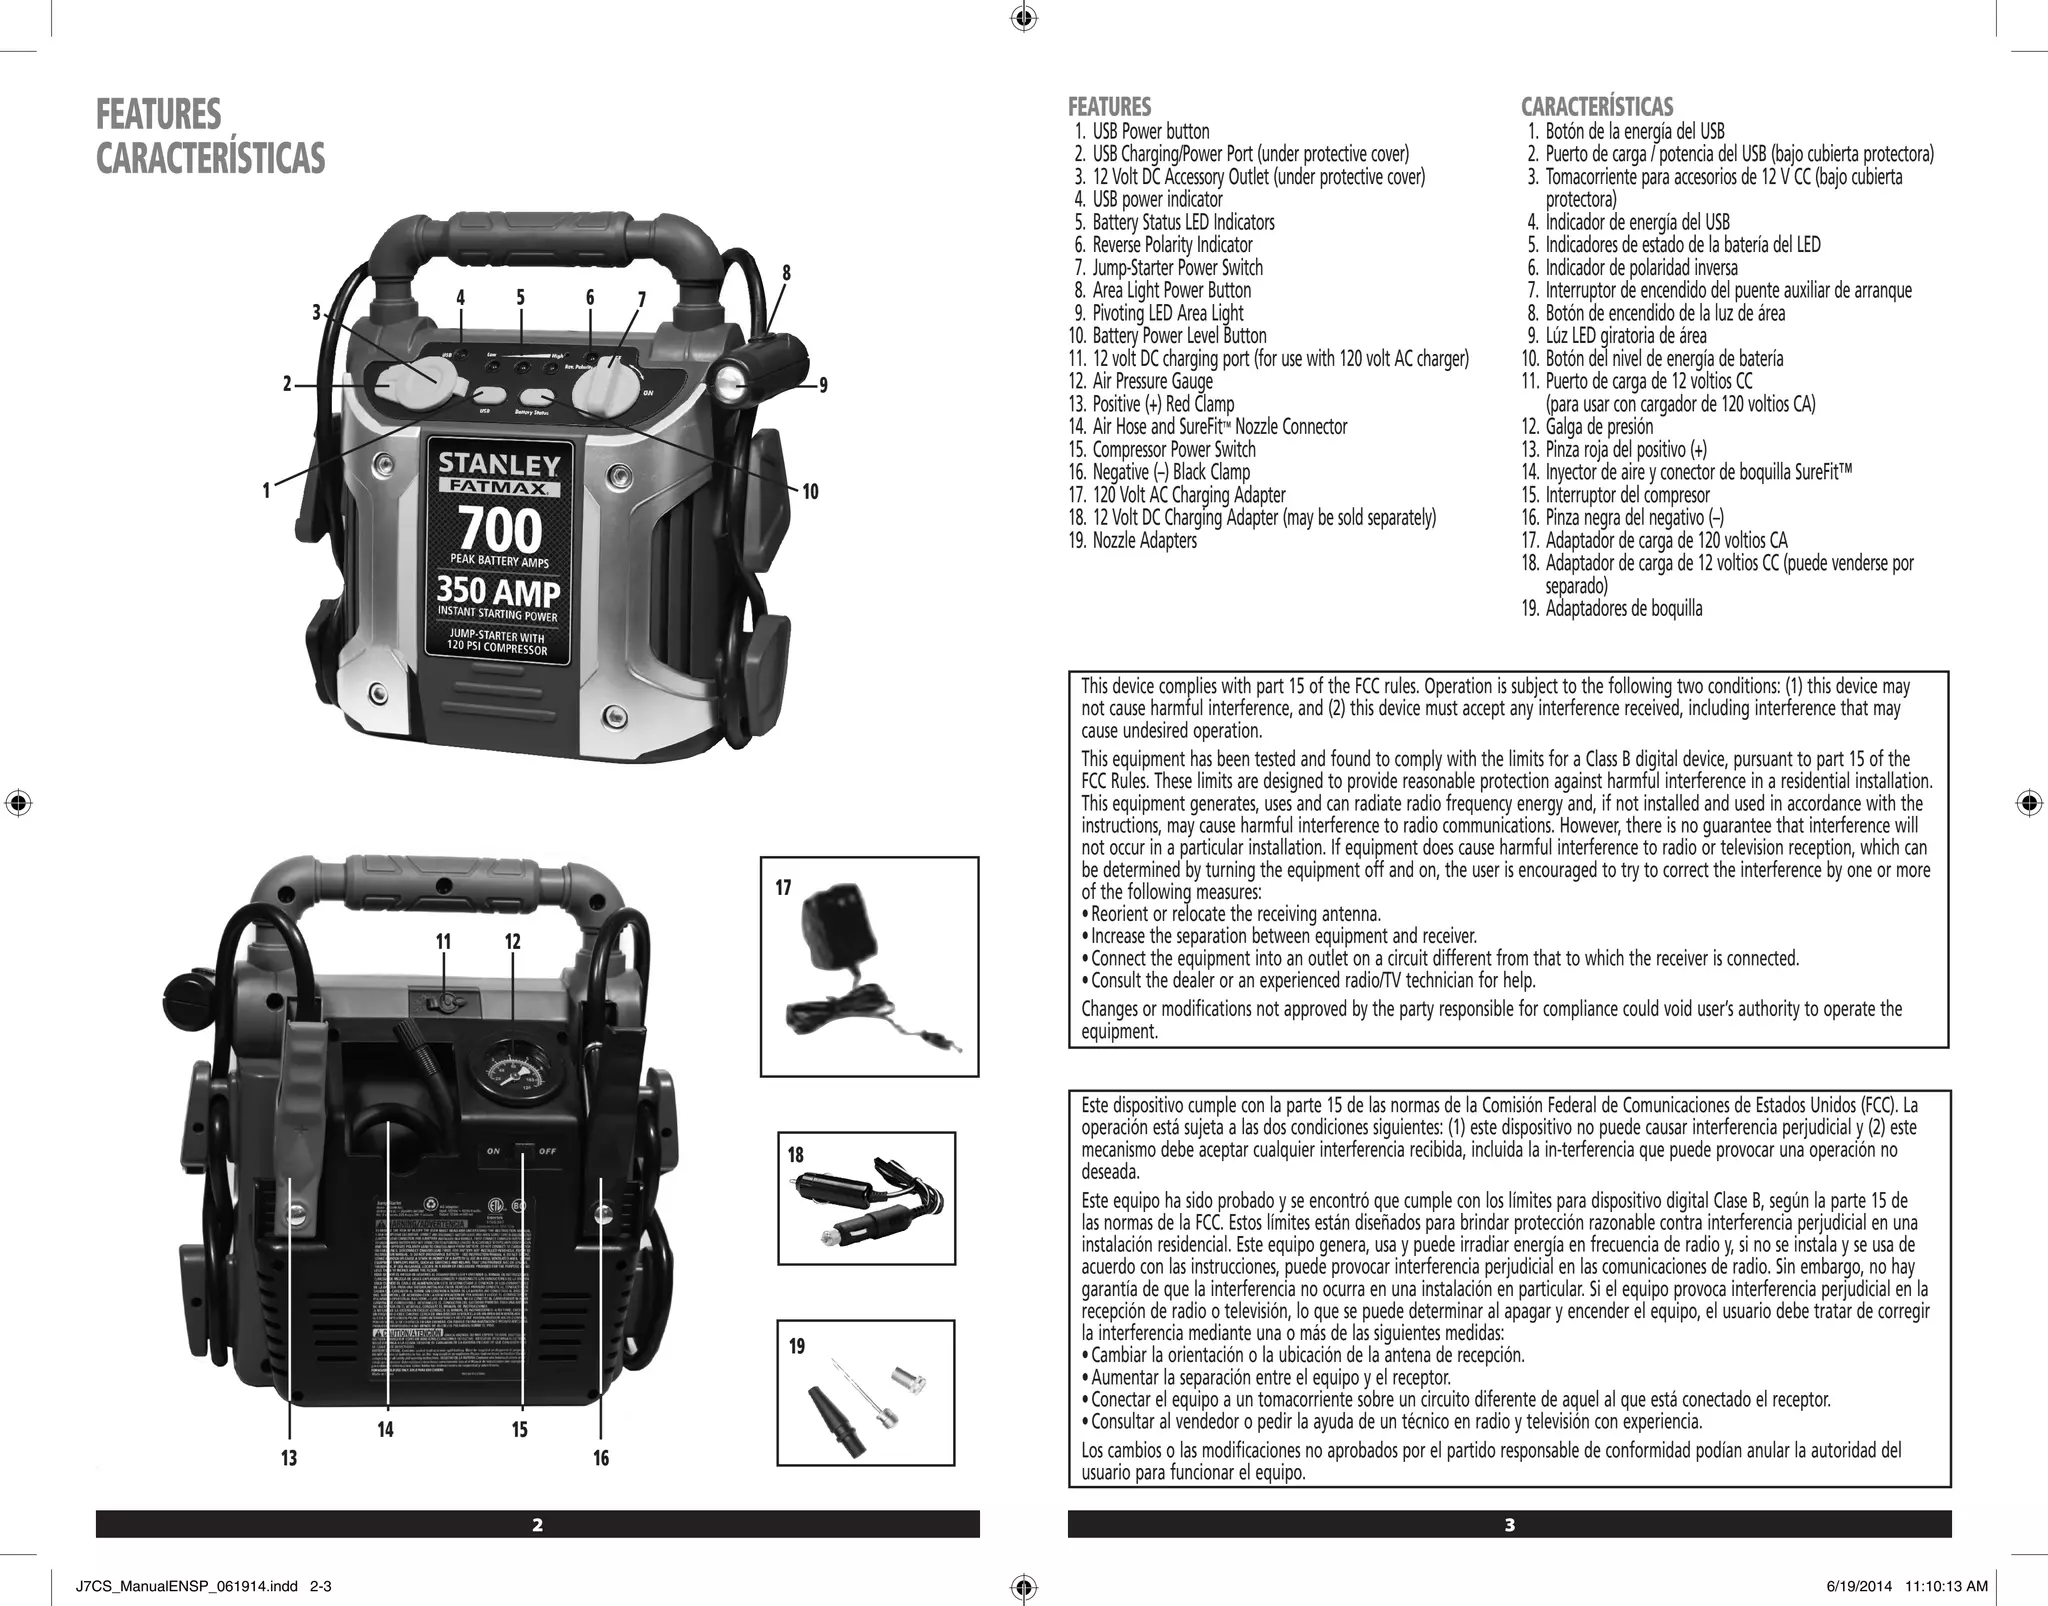
Your Stanley isn’t just for jump-starts. Press the USB button to charge phones via the 2.1A port—ideal for emergency calls. The auto-shutoff preserves power after 10 minutes of inactivity. For flat tires, attach the air hose to the valve stem and set desired PSI on the digital gauge; the compressor auto-stops at target pressure. Rotate the 270° LED work light to steady white for engine checks or red flasher for roadside visibility. Note: The light flashes red when battery drops below 20%, signaling urgent recharge.
Fix Common Problems During Jump Attempts
Clicking sound but no start? Wait 5-10 minutes with cables connected—deeply discharged batteries need absorption time. No power to vehicle? Clean battery terminals with the wire brush from your emergency kit; corrosion blocks current flow. Rapid beeping? Immediately disconnect and check for reverse polarity—red clamp must be positive, black negative/chassis. Weak cranking? Recharge Stanley unit if fewer than 3 LEDs show; it needs 50% capacity for reliable starts.
Maintain Your Stanley for 5+ Years of Reliability

Recharge after every use regardless of remaining power—lithium-ion batteries last longest at 80% charge. Store between 32°F-80°F (0°C-27°C) and charge monthly during storage. Test monthly by checking USB ports and LED lights. Inspect cables quarterly for cracks and clean clamps with sandpaper to remove corrosion. Never store in vehicle trunks during summer—temperatures above 140°F (60°C) permanently damage batteries. Proper care ensures 500+ charge cycles with 70% capacity retention.
Build Your Roadside Emergency Kit Around the Stanley
Your jump starter is the core of a life-saving kit. Store it with heavy-duty gloves (to handle corroded batteries safely), safety glasses (for acid splash protection), and an adjustable wrench (for stubborn terminals). Add a separate flashlight since the Stanley’s light may deplete during extended use. Before road trips, verify 100% charge, test all ports, and confirm vehicle battery age—replace if over 3-4 years old. Program roadside assistance numbers into your phone as a backup.
Recognize When NOT to Use Your Stanley
Never attempt jump-starts in heavy rain or standing water—electrocution risk is extreme. Diesel engines often require 800+ peak amps; check your Stanley model’s label (max 1000A). Hybrids and luxury vehicles like BMWs have sensitive electronics; consult manuals first. Below 0°F (-18°C), performance drops significantly—carry thermal blankets to warm the unit. If your battery is over 4 years old or shows cracked casing, replacement is safer than repeated jump-starts.
Mastering these procedures means never waiting hours for help when your battery dies. Your Stanley jump starter becomes exponentially more valuable when you know exactly how to use it—connecting cables in 15 seconds, inflating tires in 3 minutes, or charging your phone during breakdowns. Recharge immediately after each use, store properly, and test monthly. When that dreaded click happens next time, you’ll have the confidence to restart your journey in under 2 minutes. Keep this guide accessible, and you’ll transform roadside emergencies into minor speed bumps.