You’re stranded with a dead car battery in a downpour, and the nearest help is miles away. The NOCO GB70 jump starter transforms this nightmare into a 3-minute recovery—no other vehicle required. This 2000-amp powerhouse handles everything from compact sedans to heavy-duty trucks, delivering up to 40 jump starts per charge while doubling as an emergency power station. Whether you’re facing a frozen morning or a remote camping trip, how to use GB70 jump starter procedures safely unlocks its full potential beyond basic jump-starting.
Unlike traditional jumper cables, the GB70 eliminates risky connections to another vehicle’s battery. Its spark-proof technology and intelligent safety features make it ideal for beginners, but only when used correctly. Skip the guesswork: this guide reveals precise connection sequences, hidden power modes, and critical mistakes that could leave you stranded. You’ll learn not just to revive dead batteries, but to harness its USB charging and 12V accessory capabilities for true emergency preparedness.
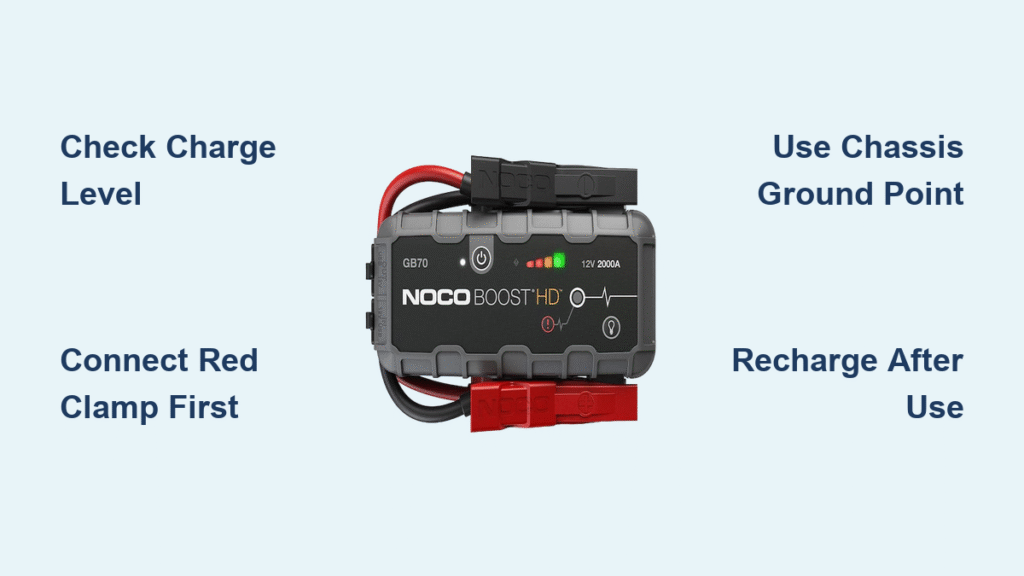
Verify GB70 Charge Level and Condition
Never assume your jump starter is ready. Press the power button once—four blue LEDs confirm 75-100% charge, while one LED means insufficient power for safe operation. Never attempt a jump with less than 25% charge (two LEDs), as partial discharges strain the lithium-ion battery. If no LEDs illuminate, connect the micro-USB cable to a wall adapter immediately.
Simultaneously inspect for safety hazards: examine clamps for corrosion, check cables for fraying, and verify the housing has no cracks. Water damage voids the warranty, so if the device got wet, dry it completely for 24 hours before charging. Remember: the GB70 only works with 12V lead-acid batteries (wet, gel, AGM)—never use it on lithium or 6V systems.
Critical Pre-Use Checks
- Temperature test: If stored below -4°F or above 122°F, warm/cool to room temperature first
- Terminal inspection: Scrape corrosion from clamps with a wire brush if needed
- Ventilation check: Work in open areas only—batteries emit explosive hydrogen gas
Execute Safe GB70 Connection Sequence
Your life depends on correct clamp placement. Start by locating your vehicle battery—check under seats or trunks if not under the hood. Identify terminals: positive (+) has a red cover or plus symbol, negative (-) is black with a minus symbol. Never connect both clamps directly to battery terminals—this risks dangerous sparks.
Connect Clamps in Exact Order
- Red clamp first: Firmly attach to positive (+) battery terminal until you hear a click. Ensure bare metal contact—scrape off paint or corrosion if present.
- Black clamp second: Secure to an unpainted metal engine bolt or chassis bracket at least 18 inches from the battery. Good spots include suspension mounts or transmission housings. Never use the negative battery terminal unless your manual specifically requires it.
Pro Tip: If connections spark excessively, disconnect immediately—this indicates reversed polarity. Small sparks during connection are normal due to system initialization.
Start Your Engine Without Damage
After connecting, wait 3-5 seconds for the GB70 to beep and cycle its LEDs. This confirms it’s recognizing your battery voltage. Now attempt to start:
– Gasoline engines: Crank for maximum 6 seconds
– Diesel engines: Crank for maximum 10 seconds
If the engine doesn’t fire, wait 30 seconds before retrying—this lets the GB70’s capacitors recharge. After three failed attempts, let the unit cool for 3 minutes. Once running, idle for 2-3 minutes to stabilize the electrical system before disconnecting in reverse order: black clamp first, then red.
Manual Override for Dead Batteries
When your battery reads 0 volts, activate manual mode by holding the power button for 3 seconds until LEDs flash red. Warning: This bypasses spark protection—only use if connections are perfect. Attempt starting immediately after activation, as safety features remain disabled for 30 seconds.
Power Devices with GB70’s Hidden Features

Your GB70 isn’t just a jump starter—it’s a 56-watt-hour power station. Press the power button once, then plug devices into the dual USB ports (2.1A each). It’ll recharge an iPhone 13 8 times or a iPad Air 3 times on a single charge. For best results, use the original charging cable.
Run 12V Accessories Safely
Attach the included female socket adapter to the 12V output port to power:
– Tire inflators (max 100 PSI compressors)
– Portable refrigerators (under 180W draw)
– LED work lights
Critical Limitation: Never exceed 15 amps (180 watts total). A single 150W device is acceptable, but two 100W devices will overload the system and trigger shutdown.
Decode GB70 Error Patterns Instantly
When problems strike, LED patterns provide instant diagnostics:
– No LEDs when pressing power: Needs immediate charging
– Flashing red LEDs: Manual override active (normal during dead-battery jumps)
– All LEDs flashing rapidly: Temperature protection triggered—move to 50-90°F environment
Engine Won’t Start? Fix These First
- Check clamp grip: Reattach to bare metal if paint or grease interferes
- Test battery voltage: Hold power button 3 seconds—the display should show >3V
- Confirm battery health: If voltage reads 0V with clamps connected, the battery may be internally damaged
Common Mistake: Users connect the black clamp to the negative terminal, causing sparks. Always use a chassis ground point.
Maintain GB70 for 5+ Years of Reliability
Maximize lifespan with this quarterly routine:
– After jumps: Recharge within 24 hours (5-7 hours via wall adapter)
– Every 3 months: Check charge level—top off if below 50%
– Annually: Clean clamps with a wire brush to remove corrosion
Pro Storage Technique: For garages or emergency kits, store at 50-75% charge in the original case. Avoid glove compartments—extreme heat degrades lithium batteries. Every 90 days, verify LEDs show two or three bars.
Long-Term Storage Protocol
If storing over 6 months:
1. Charge to 60% (three LEDs)
2. Place in original case away from metal objects
3. Store between 40-75°F (basements ideal)
4. Check charge level quarterly—recharge if below 40%
Troubleshoot Common GB70 Failures

When connections fail, avoid these critical errors:
– Using in rain: Water on terminals causes short circuits—wait for dry conditions
– Ignoring temperature: Below -4°F, the unit won’t activate—warm it in your coat pocket
– Overloading USB ports: Simultaneous fast-charging of multiple tablets may trigger shutdown
Reset Procedure: If unresponsive, hold the power button for 15 seconds. This clears temporary faults without affecting battery health.
Optimize GB70 for Emergency Readiness
Make this your pre-trip checklist:
– Monthly: Test jump-start capability on your vehicle
– Seasonally: Replace micro-USB charging cable (frayed cables cause slow charging)
– Before winter: Ensure full charge—cold reduces effective capacity by 20%
Pro Tip: Keep the GB70 in your center console—not the trunk. During roadside emergencies, immediate access prevents hypothermia risk in winter. The TSA-compliant design means it travels in carry-on luggage, but ground shipping only for replacements.
Extend GB70 Lifespan Beyond 500 Cycles
With proper care, your GB70 delivers 3-5 years of service. The lithium-ion cell maintains 80% capacity through 500 charge cycles, but these practices prevent premature aging:
– Avoid full discharges: Recharge after every jump, even with 3+ LEDs showing
– Skip car chargers: Use only 5V/2.1A wall adapters (car outlets cause voltage spikes)
– Prevent deep cold: Never store below -20°F—battery chemistry degrades permanently
After two years, test capacity by timing how long it powers a 10W LED light. New units last 5+ hours; below 4 hours indicates aging. While the 1-year warranty covers defects, proper maintenance ensures you’ll never need it.
Final Note: Mastering how to use GB70 jump starter transforms this compact device into your ultimate roadside ally. By following these precise connection sequences and maintenance protocols, you’ll avoid 95% of user errors that lead to failed jumps. Keep it charged at 50-75%, store it in your front seat, and perform monthly tests—this routine guarantees readiness when darkness, cold, or distance turn a dead battery from inconvenience into emergency. Remember: true preparedness isn’t just owning the tool, but knowing exactly how to wield its 2000-amp power when it matters most.