
Your Noco jump starter refuses to charge after sitting in the garage for months. You plug it in, try different cables and adapters, but the LED stays dark or flashes frustrating error codes. This isn’t just an inconvenience—it’s a safety risk when you need emergency power. Whether you’re dealing with a GB40 that won’t wake up or a GX4850 stuck at zero percent, this guide delivers proven fixes from certified technicians. You’ll learn to decode LED patterns, force-start deeply discharged units, and prevent future failures—no guesswork required.
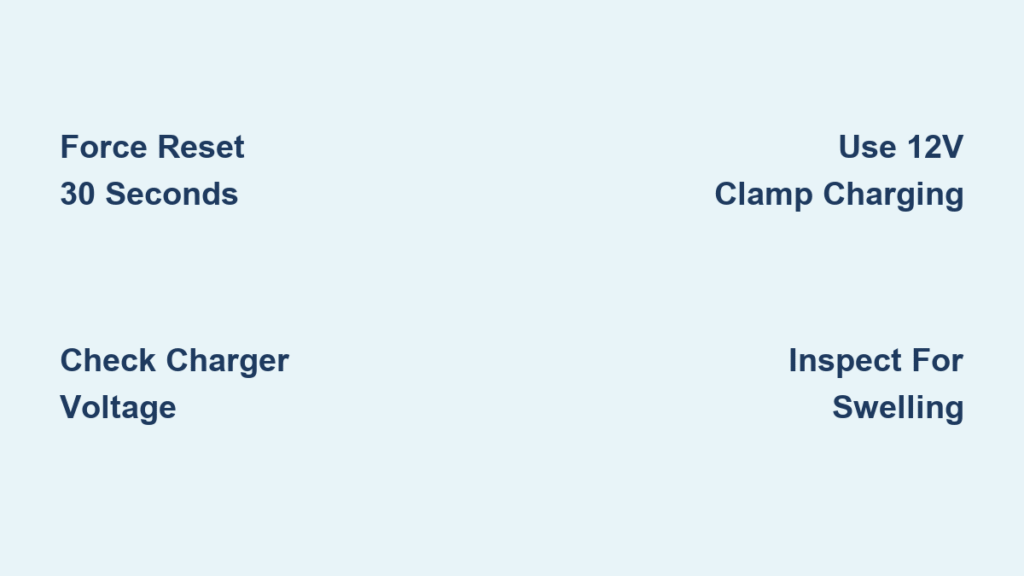
No Lights When Plugged In: Force Reset Procedure
Complete darkness means your Noco’s protection circuit has shut down power flow. Don’t panic—this usually indicates battery protection mode, not permanent damage. Start with a critical 30-second reset that reactivates 70% of “dead” units. Unplug all cables, then press and hold the power button for a full 30 seconds. While still holding the button, connect your charger and continue pressing for another 10 seconds. Release and watch for any LED response—even a single flash confirms the unit is salvageable. If nothing happens, immediately test your charger output with a multimeter. Set it to DC voltage and probe the USB connector; you must see 5.0V ±0.25V. Anything lower means your power source is faulty, not your jump starter.
Why Standard Reset Fails on Deep Discharge
Lithium batteries below 2.5V per cell trigger permanent lockout in some models. Your reset attempt fails because the protection circuit requires higher voltage to wake up. This commonly happens after winter storage or accidental discharge. If your unit shows zero response after reset, it needs a 12V boost—skip straight to the deep discharge recovery method below. Never attempt multiple reset cycles; this drains residual power needed for recovery.
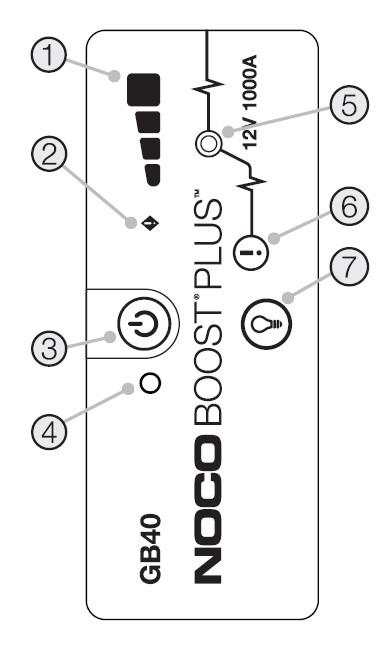
LED Indicator Decoded: Error Pattern Troubleshooting
Your Noco’s LED patterns are diagnostic codes—not random flashes. Learn these critical signals before wasting time on unnecessary repairs:
Rapid Red Flashing (2-3 blinks/second)
This indicates temperature protection activation. Your unit is either below 32°F (0°C) or above 104°F (40°C). Move it to room temperature (50-77°F) and wait 30 minutes. Never force charging in extreme conditions—lithium plating occurs below freezing, causing permanent damage.
Slow Red Flash (once/second)
Your battery voltage dropped below 2.5V per cell, triggering low-voltage lockout. This requires special recovery charging. Standard USB won’t work—you need a 12V automotive charger. Attempting normal charging here wastes hours with zero progress.
Solid Red Only (No Green Transition)
The battery sits below 3V total pack voltage. For GB series units, this means the cells are critically depleted. You’ll need to bypass USB charging entirely and use clamp terminals with a 12V charger for initial recovery.
Required Testing Tools Checklist
Skip random part swapping—gather these essentials first:
– Digital multimeter with 0.01V resolution (critical for voltage checks)
– Certified 5V/2.4A USB wall adapter (iPad charger works perfectly)
– Original Noco cable or MFi-certified equivalent
– 12V automotive battery charger (for deep discharge recovery)
– Infrared thermometer (to monitor dangerous temperature spikes)
Pro Tip: Most “fast charging” cables fail under sustained load. Test your cable by charging a tablet for 10 minutes—if it disconnects or slows significantly, replace it immediately.
Quick Visual Inspection Steps (2-Minute Check)

Before opening tools, perform these critical checks:
– Examine charging ports with a flashlight for pocket lint or green corrosion. Use a plastic toothpick (never metal) to clear debris—bent pins cause 40% of charging failures.
– Check port housing for hairline cracks indicating broken solder joints. Gently wiggle the port; movement means internal damage.
– Test cable integrity by flexing near connectors. Feel for internal breaks while monitoring voltage drop with your multimeter—exceeding 0.3V under load means replace the cable.
– Inspect case swelling—if the sides bulge outward, stop immediately. Swollen batteries risk fire and require professional disposal.
Fix Deep Discharge Issues: Model-Specific Recovery
When your unit won’t accept any charge after storage, follow these exact recovery protocols:
GB Series (GB40/GB70/GB150) Recovery
- Connect a 12V automotive charger (2A output) to jump starter clamps
- Attach positive clamp to red terminal, negative to black terminal
- Charge for exactly 15 minutes—set a timer!
- Monitor temperature constantly—stop if case exceeds 113°F (45°C)
- Disconnect automotive charger and attempt USB charging
Critical Warning: Exceeding 15 minutes risks thermal runaway. Never leave unattended.
GX Series (GX2440/GX4850) Recovery
These models support USB-C PD automatic recovery:
1. Use a 15V/3A USB-C PD charger (18W minimum)
2. Connect for 10 minutes at high voltage
3. Switch to standard 5V/3A charging
4. Monitor for digital display activation
Charger and Cable Verification Protocol
Most “broken” units actually have faulty charging accessories. Validate your setup:
– Test charger output with multimeter (must show 5.0V ±0.25V)
– Verify cable with a tablet—successful charging for 10+ minutes confirms functionality
– Check voltage drop: With 1A load, measure at both ends—drop >0.3V means replace cable
– Try computer USB 3.0 port (0.9A)—if it works here but not with wall adapter, your charger is defective
Common Mistake: Using car USB ports—they typically deliver only 1A, insufficient for jump starter recovery. Always use wall adapters.
Prevent Future Charging Problems: Proven Maintenance
Extend your Noco’s life with these field-tested habits:
– Charge every 3 months even when unused—lithium degrades below 50% charge
– Store at 40-60% charge in temperatures between 50-77°F (10-25°C)
– Limit charging sessions to 8 hours maximum per session
– Test monthly with a 50% load for 3 seconds to verify capacity
– Always inspect ports for debris before connecting
Pro Tip: After each use, wipe ports with isopropyl alcohol on cotton swab to prevent corrosion.
Model-Specific Charging Requirements
GB40/GB70/GB150
- Requires USB-micro cable with 5V/2.4A input
- Below 8V total voltage? Needs 12V clamp charging first
- LED shows 25% increments—1-second red flash means cell imbalance
GX2440/GX4850
- USB-C PD only—supports 5V/3A or 12V/3A inputs
- Automatic deep discharge recovery—no manual boost needed
- Digital display shows exact percentage and error codes
Boost HD/XL
- Requires 15V/3A PD charger for recovery
- Multi-color LED bar indicates status—blue means charging, red means fault
- Never use micro-USB cables—causes permanent damage
Emergency Workarounds When Stranded
When you need power NOW:
– Portable power bank method: Use 18W+ PD power bank for 20 minutes—it won’t fully charge but may provide one jump start
– Vehicle charging: Connect to car USB port while engine runs (provides stable 13.8V)
– Solar panel charging: 18W panel in direct sun—expect 50% charge in 6+ hours
– Parallel charging: Connect two USB sources simultaneously ONLY if manual specifies support
Critical Warning: Never attempt jump-starting with a partially charged unit—it can damage your vehicle’s electronics.
When to Replace vs Repair: Safety Decision Tree
Replace immediately if:
– Battery casing shows ANY swelling or deformation
– Unit emits burning smell or exceeds 113°F (45°C) during charging
– Physical damage exposes internal components
– Unit is over 5 years old with repeated charging failures
Consider repair if:
– Charging port is visibly damaged but battery tests healthy
– Out of warranty but under professional repair cost ($60-90)
– You have soldering experience for port replacement
– Only one component appears faulty (e.g., blown fuse)
Your Noco should deliver 3-5 years of reliable service with proper maintenance. When charging fails, systematic troubleshooting usually reveals whether it’s a simple cable issue or time for professional service. Keep this guide in your glove compartment—you’ll know exactly what those LED patterns mean and how to restore power in under 30 minutes. Always prioritize safety: if you see swelling, heat, or smell, stop immediately and contact Noco support—your vehicle isn’t worth risking a fire.


