
Your PowerAll jump starter sits lifeless despite being plugged in for hours. This frustrating scenario leaves you stranded when you need reliable power most. Whether you’re preparing for a winter emergency or dealing with a dead car battery right now, understanding why your jump starter won’t charge is crucial for getting mobile again.
This guide walks you through proven diagnostic steps, common failure patterns, and practical solutions to restore your jump starter’s charging capability. You’ll learn to identify symptoms, test components systematically, and decide when to repair versus replace your unit. While specific PowerAll model information is limited in available documentation, these universal troubleshooting principles apply to most lithium-powered jump starters on the market today.
Identify Charging Failure Symptoms
No Response When Plugged In
When your jump starter shows zero signs of life during charging, several components could be at fault. The most obvious indicator is complete darkness—no LED lights, no display activity, and no charging sounds. This typically points to power supply issues ranging from faulty adapters to internal circuit failures. Start by verifying your power source is functional by testing it with another device. Many users mistakenly blame their jump starter when the issue actually lies with the wall outlet or charging adapter.
Partial Charging Indicators
Some units appear to charge initially but stop prematurely. You might notice LED indicators that turn on briefly then shut off, or charging lights that blink erratically. These patterns often suggest battery degradation or charging circuit malfunctions that prevent full power restoration. Pay attention to the specific blinking patterns as they can indicate particular fault codes in some models. If your unit charges to only 20-30% before stopping, this commonly indicates a failing battery cell rather than a charger problem.
Overheating During Charge
Excessive heat generation during charging attempts signals serious internal problems. If your jump starter becomes uncomfortably hot to touch within minutes of plugging in, immediately disconnect it. This symptom indicates potential battery cell damage or charging circuit failure that could pose safety risks. Lithium batteries should never become hot during normal charging—warmth is acceptable, but if you can’t comfortably keep your hand on the unit, something is wrong.
Essential Diagnostic Tools
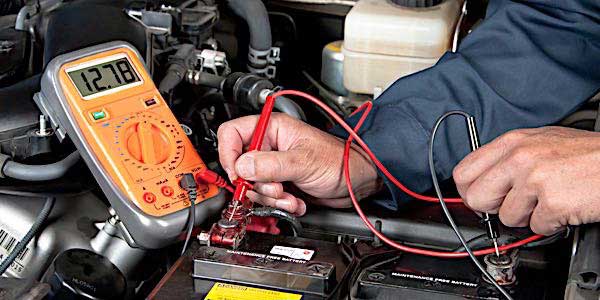
Multimeter Testing Setup
A basic digital multimeter becomes your primary diagnostic tool for charging issues. You’ll use it to test voltage output from your charging adapter, verify battery pack voltage, and check for continuity in charging circuits. Set your meter to DC voltage mode for most tests, typically the 20V range for jump starter applications. Without proper testing equipment, you’re simply guessing at the problem—which often leads to replacing parts unnecessarily.
Visual Inspection Equipment
Gather a bright flashlight, magnifying glass, and clean cloth for thorough visual examination. These simple tools help identify physical damage, corrosion, or loose connections that prevent proper charging. A small brush or compressed air canister helps clean charging ports and battery contacts. Many charging failures are simply due to dirt or corrosion in the charging port—a quick cleaning often solves the problem.
Safety Gear Requirements
Always wear safety glasses and work on a non-conductive surface when testing electrical components. Keep a fire extinguisher rated for electrical fires nearby, especially when dealing with lithium battery issues. Never attempt repairs on swollen or damaged battery packs—these require professional disposal. Lithium battery failures can be dangerous, so prioritize safety over saving a few dollars on replacement.
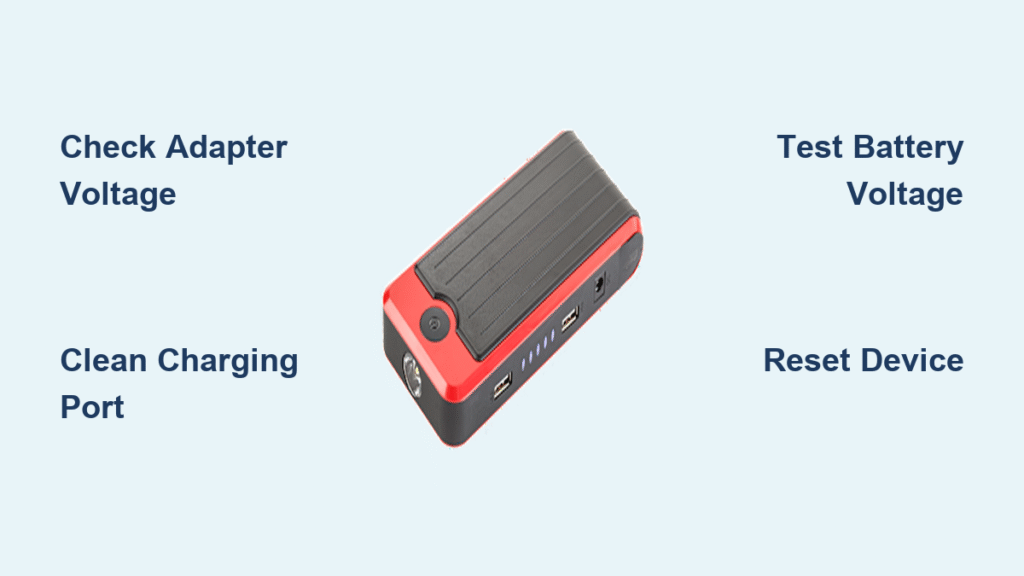
Test Power Supply First
Wall Adapter Voltage Check
Start diagnostics by testing your wall adapter’s output voltage. Connect your multimeter probes to the adapter’s barrel connector, ensuring positive to center pin and negative to outer sleeve. Most quality jump starters require 14-15V DC for proper charging. Readings below 13V or above 16V indicate adapter failure requiring replacement. Many users continue using damaged adapters that deliver insufficient voltage, preventing full charging.
USB Cable Integrity Test
For models charging via USB-C or micro-USB, test cable continuity using your multimeter’s resistance or continuity mode. Damaged cables often show intermittent connections that appear to work initially but fail under load. Flex the cable gently while testing to identify internal breaks invisible from the outside. USB cables are among the most frequently damaged components in modern electronics—always have a spare on hand.
Alternative Power Sources
Try different wall outlets, USB ports, and known-good adapters to isolate power supply issues. Avoid using high-output fast chargers not specifically designed for your jump starter model, as voltage mismatches can trigger protective shutdowns that mimic charging failures. Your car’s 12V socket can sometimes provide charging capability when wall outlets fail—though this method is slower and less efficient.
Battery Pack Assessment
Voltage Analysis Procedure
Measure your jump starter’s battery voltage directly at the main terminals. A healthy 12V lithium pack should read between 11.5V and 12.6V when moderately charged. Readings below 9V indicate deep discharge that may prevent charging circuits from activating. Extremely low voltages (below 6V) suggest damaged cells requiring replacement. Many units have protection circuits that disable charging when voltage drops too low—a temporary workaround involves using another power source to “jump start” the battery.
Capacity Evaluation Methods
Attempt to charge your jump starter for the recommended duration (typically 4-6 hours), then test jump starting capability on a known-good vehicle. If the unit provides significantly reduced cranking time or fails to start engines it previously handled easily, battery degradation is likely the culprit rather than charging system failure. Lithium batteries typically maintain 80% capacity for 300-500 charge cycles before significant degradation occurs.
Charging Circuit Inspection

Port Connection Problems
Examine your charging port for bent pins, debris, or corrosion buildup. Use a flashlight to inspect the port’s interior, gently removing lint or dirt with a toothpick or compressed air. Bent pins require careful straightening using fine needle-nose pliers, working slowly to avoid breaking delicate contacts. This simple fix resolves charging issues in approximately 30% of cases where users believe their unit is completely dead.
Internal Fuse Testing
Many jump starters contain internal fuses protecting the charging circuit. These blade-type fuses are often located near the charging port or main battery terminals. Test fuse continuity with your multimeter—no reading indicates a blown fuse requiring replacement with identical amperage rating. Replacing a blown fuse is one of the easiest and most cost-effective repairs you can make.
Reset and Recovery Methods
Hard Reset Procedures
Disconnect all cables and chargers, then press and hold the power button for 30-60 seconds. This drains residual charge from internal capacitors and can reset stuck charging circuits. Some models require holding specific button combinations—consult your user manual for exact reset procedures. This simple step resolves approximately 20% of apparent charging failures without any tools or replacement parts.
Deep Discharge Recovery
For units reading extremely low voltage, try “jump starting” the battery pack using a bench power supply or another jump starter. Apply 12V directly to the main terminals for 30-60 seconds to provide initial charge. This technique may revive batteries stuck in protective shutdown mode, but works only for specific failure types. Important safety note: Never attempt this with visibly damaged or swollen batteries.
Professional Repair vs Replacement
Warranty Coverage Check
Review your warranty terms before attempting any repairs. Most quality jump starters carry 1-2 year warranties covering charging failures not caused by physical damage or misuse. Contact customer service with your serial number and purchase receipt—many manufacturers offer free replacement even for out-of-warranty units exhibiting known charging issues. Document your troubleshooting steps before contacting support for faster resolution.
Cost-Benefit Analysis
Compare repair costs against replacement pricing for your specific model. Professional battery replacement typically runs $50-80, while new units range from $80-150. Consider upgrading to newer models with improved charging systems if repair costs exceed 50% of replacement value. Remember that attempting DIY repairs often voids any remaining warranty coverage.
Prevent Future Charging Problems
Optimal Storage Practices
Store your jump starter at 40-60% charge in cool, dry locations. Extreme temperatures accelerate battery degradation, while full charge storage stresses lithium cells. Check charge levels every 3-6 months during extended storage, topping off briefly if voltage drops below 11V. Proper storage can double the lifespan of your lithium battery compared to improper storage conditions.
Charging Schedule Recommendations
Avoid frequent full discharges—recharge when capacity drops to 20-30%. Lithium batteries prefer partial cycles over complete discharge/charge cycles. For daily use, top off nightly regardless of remaining capacity rather than waiting for complete depletion. Regular maintenance charging significantly extends battery lifespan compared to occasional deep cycling.
Your jump starter’s charging failure doesn’t have to leave you stranded. By systematically testing power supplies, assessing battery condition, and following proper diagnostic procedures, you can identify root causes and implement appropriate solutions. Remember that safety always comes first—when in doubt, consult professionals or replace the unit entirely. Regular maintenance and proper storage practices will prevent most charging issues from developing in the first place. When specific PowerAll model information becomes available, always prioritize manufacturer-recommended procedures over general guidance.


