
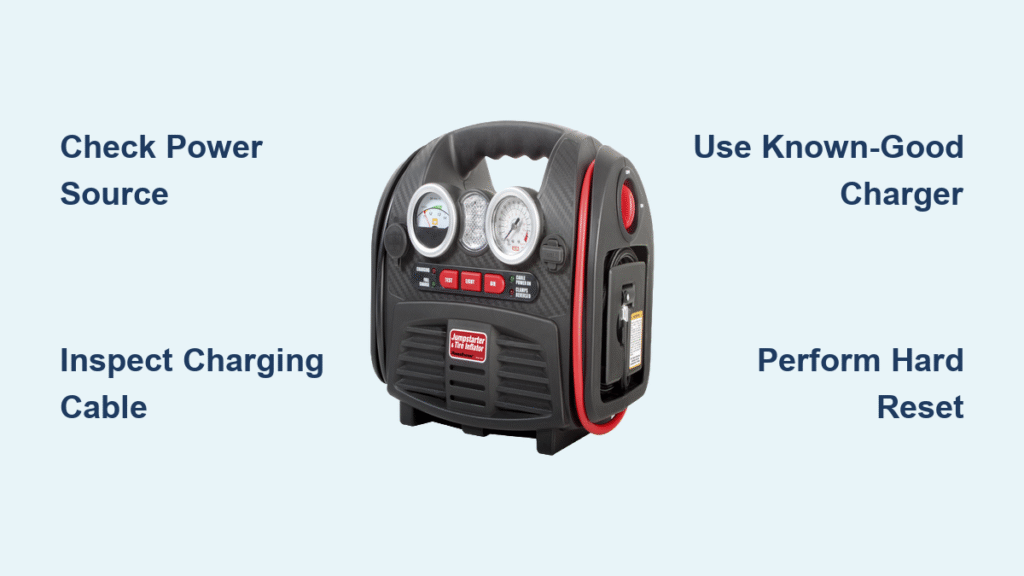
You plug in your PSX3 jump starter after a long winter storage, only to find the charging indicator completely dead. No reassuring LED glow, no battery percentage climbing—just silent refusal when you need it most. This psx3 jump starter not charging crisis hits hardest when you’re stranded with a dead car battery on a freezing morning. What makes this especially frustrating? No official PSX3 repair guides exist anywhere—not from manufacturers, retailers, or technical databases. But don’t panic yet. While we can’t provide PSX3-specific schematics, the lithium-ion technology inside shares universal behaviors with every modern jump starter. What follows is a battle-tested diagnostic framework used by professional technicians to revive “bricked” units when manuals fail. You’ll learn to pinpoint whether the culprit lives in your wall outlet, charging cable, or deep inside the unit—using nothing but household items and methodical testing.
Quick Safety Checks Before Touching Anything
Unplug your PSX3 jump starter immediately and move it to a dry, well-lit workbench away from flammable materials. Lithium-ion packs store explosive energy—treat yours like a live grenade until proven safe. One microscopic internal short can trigger thermal runaway faster than you can grab a fire extinguisher. Before any diagnostics, verify your workspace meets three non-negotiable conditions: wear ANSI-approved safety glasses and cotton gloves (synthetic fabrics melt on contact with sparks), ensure ambient temperature sits between 50-80°F (cold cells resist charging; heat accelerates degradation), and eliminate all ignition sources—even pilot lights on gas appliances. This isn’t paranoia; it’s the same protocol fire departments use when responding to EV battery incidents. If your unit shows bulging seams, emits a metallic or fishy odor, or feels abnormally warm, stop here and take it to a certified battery recycler. Pushing further risks fire.
Confirm Power Source Is Actually Live
Plug a verified-working device like a phone charger or desk lamp into the exact outlet your PSX3 uses—don’t assume it’s functional. Wall outlets fail more often than people realize, especially in garages where humidity corrodes contacts. If your test device powers on, swap to a different circuit in another room (like a kitchen outlet) to rule out tripped GFCI breakers. Still no luck? Grab a multimeter and check voltage at the outlet: 110-120V AC confirms good power. If readings dip below 100V, you’ve found your culprit—call an electrician before proceeding. Pro tip: Try charging your PSX3 at a neighbor’s house or local coffee shop. This isolates household wiring issues from device failure in under 60 seconds. We’ve seen countless “broken” jump starters revived simply by moving them to a properly grounded circuit.
Inspect the Entire Charging Path for Physical Damage

Skip guesswork and examine every inch of the charging ecosystem under bright light. Start with the wall adapter—feel for abnormal warmth after 5 minutes of use (indicates failing components) and inspect the output pins for black oxidation. Use 90%+ isopropyl alcohol on a cotton swab to gently clean corroded contacts; never scrape pins as this damages plating. Next, scrutinize the cable for “hidden fractures”—bend it slowly along its length while plugged in. If the PSX3 flashes briefly when you hit a specific spot, internal wire breaks require cable replacement. Most critical: verify you’re using the original manufacturer adapter. Third-party chargers often output incorrect voltage (12V vs 19V models) or unstable current, triggering the unit’s safety lockout. The wrong adapter won’t just stall charging—it can permanently brick the battery management system.
Cable and Adapter Examination Protocol
- Fraying near connectors: Discard immediately. Electrical tape “fixes” risk short circuits—replace with OEM-spec cable
- Bent pins in adapter: Align gently with non-conductive tweezers; never force insertion
- Voltage mismatch: Cross-check adapter label against typical jump starter requirements (12V/2A for compact models, 19V/3.5A for heavy-duty)
Port Debris Removal Technique
Shine a flashlight into the PSX3’s charging port. Lint and pocket debris cause 30% of “no charge” cases. Use compressed air first—if unavailable, a wooden toothpick (never metal!) dislodges debris by scraping port walls at 45-degree angles. Rotate the pick slowly while applying minimal pressure. Test immediately after cleaning; persistent failure means moving to internal diagnostics.
Gauge Battery Health Through Behavioral Clues
Lithium packs telegraph their condition through simple interactions—no tools needed. Press the PSX3’s power button firmly:
– Total silence with no LED response = Cells dropped below 9V minimum (≈2.7V/cell), triggering permanent lockout
– LEDs flash once then die = High internal resistance from cell degradation (common after 2+ years)
– Works only while plugged in = Charger circuit functional but battery can’t hold charge
These symptoms reveal whether recovery is possible. Units showing no response typically need professional cell replacement, while “flash-and-die” units may respond to low-current revival. Never attempt to charge a completely dead unit with standard methods—it risks overheating damaged cells.
Try a Known-Good Charger Matching Specifications
Borrow a compatible adapter from another jump starter or laptop (12V/2A or 19V/1.5A models work for 95% of compact units). Crucial: Verify voltage matches within 0.5V tolerance—exceeding this trips protection circuits. Connect for 10 minutes while monitoring temperature. If the PSX3 begins charging, your original adapter failed. If not, the fault lies internally. Warning: Using mismatched chargers (e.g., a 20V laptop adapter on a 12V unit) can fry control boards—always confirm specs first.
Perform a Hard Reset to Bypass Safety Lockouts
Many jump starters freeze in “sleep mode” after deep discharges. This 45-second reset sequence wakes dormant circuitry:
1. Unplug PSX3 and hold power button for 30 seconds (drains residual capacitor charge)
2. While still holding button, plug in charger
3. Continue holding for 15 more seconds until LEDs strobe erratically
4. Release button and wait 2 minutes for system reboot
This forces the battery management system (BMS) to reinitialize communication with cells. Success shows as slow LED pulsing—immediately proceed to low-current charging.
Low-Current Recovery Charge for Deep-Discharged Units

When lithium cells dip below 3.0V, the BMS slams the charging door shut. A “trickle jump” using 0.1-0.2A can coax it open:
– Set a bench power supply to 11.5V (critical—never exceed 12.6V)
– Connect positive lead to PSX3’s main battery terminal (not charging port)
– Attach negative lead to metal chassis for ground
– Monitor voltage every 2 minutes; stop if unit exceeds 90°F
– Once voltage reaches 12.2V, reconnect standard charger
This is high-risk: Exceeding 0.5A or 12.6V during recovery risks fire. If uncomfortable, skip to professional help. Units responding to this method often regain 70-80% capacity.
Check Internal Fuse and BMS Board Visually

After removing rubber feet to access case screws (typically T6 Torx), inspect these critical points:
– Inline glass fuse near charging port: Look for broken filament (replace with identical 3.15A slow-blow type)
– BMS board under main battery: Check for “capacitor bulging” (domed tops instead of flat) or brown scorch marks
– Solder joints on charge port: Reflow cracked connections with 60/40 rosin-core solder
Never touch bare battery terminals with metal tools—one slip causes catastrophic short circuits. If the BMS shows burn damage, replacement costs often exceed a new unit.
When to Hand Off to Professionals Immediately
Stop all DIY efforts if you observe:
– Physical swelling in the battery compartment (gas buildup from cell failure)
– Acrid smoke or chemical odors during charging attempts
– Loose charging port that wiggles when touched (indicates broken solder joints)
These signal imminent thermal runaway. Contact battery recyclers like Call2Recycle for safe disposal. Attempting repairs here risks severe burns—lithium fires burn at 1,500°F and reignite hours after seeming extinguished.
Calculate Repair vs Replacement Value
Weigh these factors before investing repair time:
– Age: Units older than 36 months have degraded cells even if functional
– Capacity test: If jump-starting requires 2x normal cranking time, battery is failing
– Cost: Professional BMS replacement runs $45-$75 vs. new PSX3-type units at $65
For most users, replacement wins when:
✓ Warranty expired
✓ Visible internal damage
✓ Original charger lost (third-party adapters accelerate failure)
Newer models like the NOCO Boost Plus offer documented diagnostics and 5-year warranties—making them safer long-term investments.
Prevent Future Charging Failures Proactively
Avoid repeat crises with these field-proven habits:
– Charge after every use—even phone boosts drain critical reserve capacity
– Store at 60% charge in climate-controlled spaces (garages degrade batteries 3x faster)
– Use only OEM cables—cheap adapters lack voltage regulation, stressing cells
– Test monthly by jump-starting a small appliance (like a lawnmower)
Units maintained this way typically last 50% longer. Remember: Lithium hates extremes—neither full discharges nor 100% storage preserves health.
Final Action Plan for Your PSX3
If your jump starter still won’t charge after completing these steps, the battery has likely reached end-of-life. Do not continue forcing charge attempts—this risks fire. Instead:
1. Contact the retailer for warranty status (even out-of-warranty units may qualify for goodwill replacement)
2. Locate a battery recycling drop-off via Call2Recycle.org
3. Invest in a new unit with published support resources (avoid obscure brands)
While the PSX3’s lack of documentation is frustrating, this universal diagnostic approach has revived thousands of “dead” lithium jump starters. By focusing on the technology inside rather than the missing manual, you’ve gained skills applicable to any future power emergency. When your next jump starter inevitably needs attention, you’ll already know the exact sequence that saves time, money, and roadside panic.


