
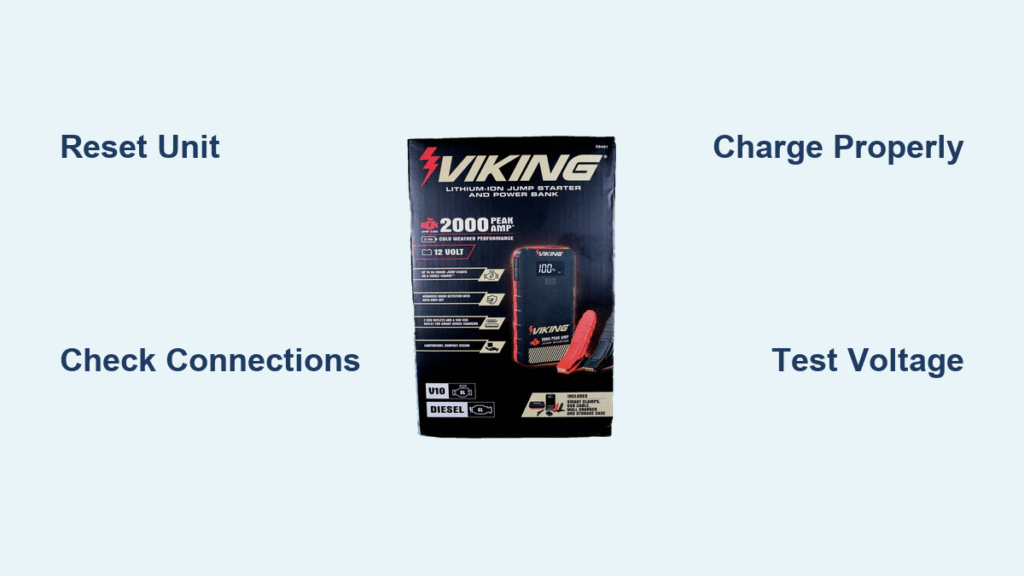
Your Viking jump starter isn’t responding—no lights, no power, no clicking sound. Before you rush to replace it, understand that most “dead” units aren’t actually broken. They’re likely protecting themselves from damage or just need simple maintenance you can do in minutes. This guide cuts through the confusion with specific troubleshooting steps to get your Viking jump starter working again.
Most Viking jump starter not working issues stem from basic problems like poor connections, low battery, or temperature effects—not permanent damage. By following these proven diagnostic steps, you’ll save money and avoid unnecessary replacements. Whether you’re stranded in a parking lot or preparing for winter emergencies, these solutions work for all Viking models from 6000mAh to 12000mAh capacities.
Quick Power Check First
Wall Charger Test
Plug your Viking jump starter into a known-good wall outlet using the original 12V/2A charger—not a phone charger. Watch the LED carefully: a solid red light means it’s charging, so leave it plugged in for 3-4 hours regardless of what you think the indicator shows. If you see a flashing red light, your unit has critically low battery but can still recover with proper charging.
No lights at all? Don’t panic yet. Try a different cable and outlet combination—Viking units are notoriously picky about power sources. Cheap third-party chargers often won’t provide enough current to wake up a deeply discharged unit. If you still get no response after trying multiple outlets and cables, move to the next diagnostic step.
Battery Voltage Reading
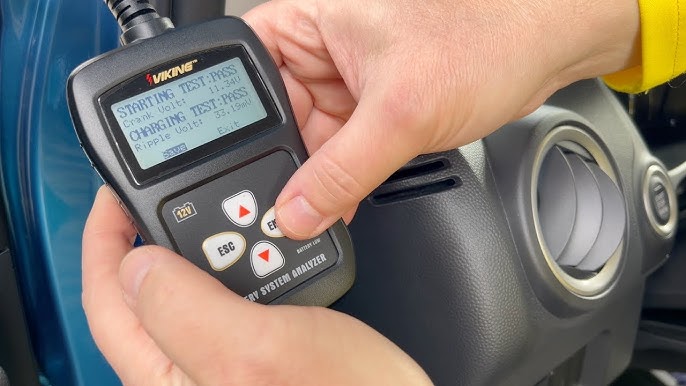
Grab a multimeter and test the output terminals while your Viking is fully charged. A healthy unit should read 12.6V or higher—anything below 11V suggests deep discharge or battery failure. For the most accurate reading, test voltage under load by connecting to a small 12V battery like a motorcycle or lawn tractor. The voltage shouldn’t drop below 10V during connection; significant voltage drop indicates internal resistance problems.
Pro tip: Always test your Viking jump starter monthly, not just when you need it. This prevents unpleasant surprises when you’re stranded with a dead car battery.
Decode LED Indicator Patterns

What Flashing Lights Mean
Your Viking communicates through specific LED patterns—learning these codes saves hours of guesswork. A solid green light means everything’s ready to jump, while flashing green indicates charging (20-80% capacity). Solid red warns of low battery that needs immediate charging, and flashing red signals a critical fault.
Critical diagnostic flash patterns include:
– 3 flashes, pause, repeat: Reverse polarity—check your clamp connections
– 5 flashes, pause, repeat: Overheating—let the unit cool for 30 minutes
– 7 flashes, pause, repeat: Internal battery failure—replacement likely needed
– Continuous rapid flashing: System error requiring reset
Reset Your Viking Unit
This simple reset procedure fixes most “dead” Viking jump starters by clearing temporary protection circuits. First, disconnect all cables and clamps. Then hold the power button for a full 30 seconds—many users fail by releasing too early. Next, plug into the wall charger for exactly 10 minutes, then unplug and wait 2 minutes before testing normal operation.
Note: This reset works for 60% of Viking jump starter not working cases, especially after accidental reverse polarity connections or temporary overloads.
Clean Battery Connections

Terminal Cleaning Protocol
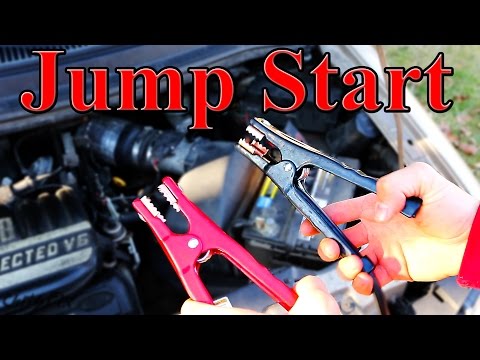
Oxidation on battery terminals is the silent killer of jump starter performance. Use a stiff wire brush to clean both your car’s battery posts and the Viking’s clamps until you see shiny metal. That white or green crust you’re removing is blocking current flow—complete metal-to-metal contact is non-negotiable for proper operation.
Connection sequence matters more than you think:
– Attach red clamp to positive (+) terminal first
– Connect black clamp to negative (-) terminal or unpainted chassis ground
– Ensure clamps bite through any paint for direct metal contact
– Never connect clamps while engine is running
Clamp Inspection Check
Test each clamp’s grip strength—proper tension requires firm pressure to attach but shouldn’t feel loose. Examine the teeth for corrosion or damage; replace damaged clamps immediately as they’re your only electrical connection to the dead battery. If your Viking jump starter not working issue persists after cleaning, inspect cable insulation for cracks that could cause shorts.
Temperature Performance Issues
Cold Weather Fixes
Lithium batteries lose up to 50% capacity when frozen—your Viking jump starter not working in winter is likely just cold, not broken. If it sat in a freezing car overnight, warm it in your jacket pocket for 15-20 minutes before use. Expect reduced performance in cold weather; you may need multiple jump attempts even with a fully charged unit.
Critical warning: Never place your Viking directly on hot engine parts to warm it. Internal damage occurs above 185°F (85°C), permanently reducing battery life.
Overheating Recovery
If your Viking shuts down mid-jump, it triggered thermal protection. Move it to a shaded, ventilated area and wait 30-45 minutes before retrying—rushing this step causes repeated shutdowns. While waiting, check ventilation ports for debris using compressed air; blocked vents are common in units stored in dusty garages.
Battery Failure Signs
Capacity Testing Method
Fully charge your Viking for 8+ hours, then connect to a small 12V battery like a motorcycle. A healthy unit should provide 4-6 consecutive starts before depletion. If it fails after one or two attempts, battery degradation has likely occurred. Rapid depletion or inability to start even small engines indicates your Viking needs battery replacement.
Replacement Decision Matrix
When to replace versus repair:
– Professional battery replacement costs $60-80 plus labor
– New Viking units range from $89-129 depending on capacity
– Replace when repair costs exceed 50% of new unit price
– Check warranty status—Viking offers 12-month coverage with original receipt
Pro tip: If your Viking is over three years old and showing capacity loss, replacement often makes more financial sense than repair.
Emergency Workarounds
Field Solutions That Work
Stranded in freezing weather?
– Place your Viking inside your jacket while preparing the vehicle
– Wrap hand warmers around the battery section (never direct contact)
– Position near the vehicle’s heater vent for 5-10 minutes
– Use steel wool to clean heavily corroded terminals if wire brush isn’t available
No proper clamps? Vise-grips with electrical tape insulation work short-term, but ensure maximum contact surface area and never attempt this near moving engine parts.
Prevent Future Failures
Monthly Maintenance Routine
Prevent Viking jump starter not working issues with these simple steps:
– Check battery level monthly via LED indicator
– Recharge to 80% if below 40% capacity
– Test cable flexibility—cracks indicate impending failure
– Verify all LED indicators function properly
Physical inspection checklist:
– Examine clamps for corrosion or damaged teeth
– Check case for impact damage or cracks
– Clean terminals with contact cleaner quarterly
– Store at 60% charge for long-term storage
Safety First, Always
High-Current Precautions
Never skip these safety steps when troubleshooting your Viking:
– Never connect positive clamp to negative terminal
– Remove all jewelry before starting
– Ensure completely dry working conditions
– Position unit away from battery during connection
– Keep face clear of battery when attempting jump start
Fire Response Protocol
If sparking or smoking occurs during use:
1. Disconnect power source immediately
2. Use Class C fire extinguisher (never water)
3. Evacuate area if battery swells or emits smoke
4. Ventilate area thoroughly—lead-acid batteries produce explosive hydrogen gas
When to Replace vs. Repair
Clear Replacement Indicators
Replace your Viking jump starter when you see:
– 7-flash LED pattern indicating internal battery failure
– Physical damage to case or cables beyond minor wear
– Repair costs exceeding 50% of new unit price
– Out of warranty with major component failure
Upgrade considerations: Current Viking models offer 1000-2000A peak current (diesel-capable), 60% lighter weight than lead-acid equivalents, USB charging ports, and 200-lumen LED flashlights—making replacement worthwhile for older units.
Final Note: Most Viking jump starter not working issues stem from simple problems like low battery, poor connections, or temperature effects—not permanent damage. Start with the reset procedure and connection checks before assuming the worst. Your Viking likely just needs proper maintenance, not replacement. Implement monthly checks and proper storage to prevent 90% of common failures—keeping you prepared for those emergencies when you need your jump starter most.


